Complete the steps outlined below to configure DTI Tax Monitoring in Idealpos.
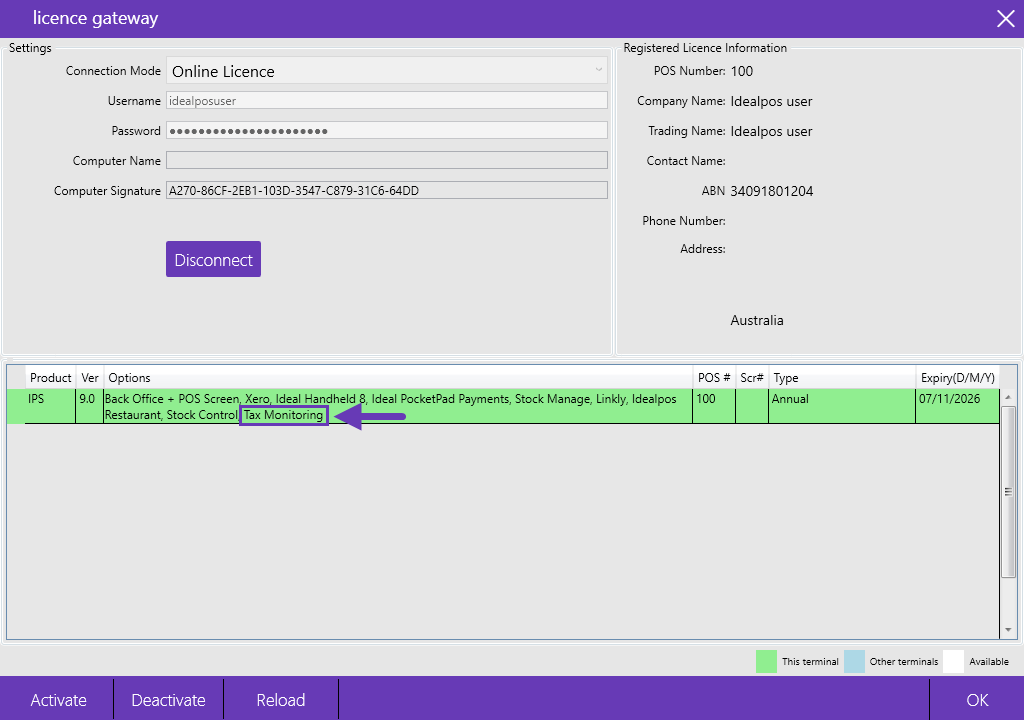
The "Tax Monitoring" module will need to be enabled in the Licence Gateway for each POS Terminal.
Speak to Idealpos or your Reseller to purchase/enable this module.
After the module has been enabled, go to: Back Office > Setup > Licence Gateway.
Ensure that "Tax Monitoring" is displayed in the Options column for each POS Terminal.
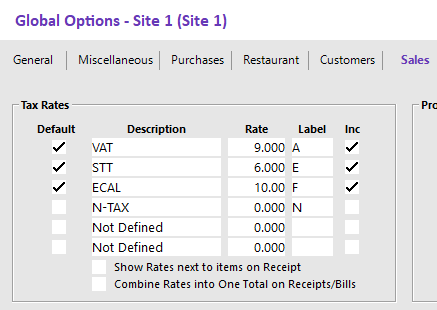
Go to: Back Office > Setup > Global Options > Sales > Tax Rates.
Configure the Tax Descriptions, Tax Rates, Labels and Inc Options.
The Tax Descriptions/Labels must be explicit and can be obtained from the governing body in your country or region that handles Tax Monitoring.
VMS (Fiji)
The below Tax Descriptions and Rates are examples for VMS (Fiji Region), however, we strongly recommend that you consult with the local governing body in your region for the latest up-to-date Tax Descriptions and Rates to ensure that you meet the requirements for compliance in your region.
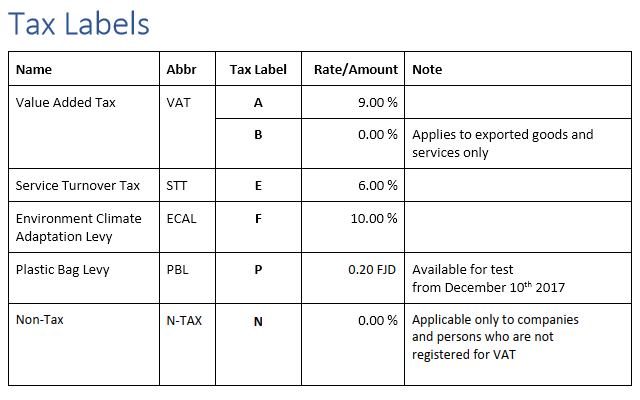
The Tax Labels supplied below for use with VMS (Fiji) are listed below for reference.
We strongly recommend that you refer to your local governing body who is responsible for managing Tax Monitoring for the latest Tax Rates and Tax Labels to ensure that you are tax compliant in your region.
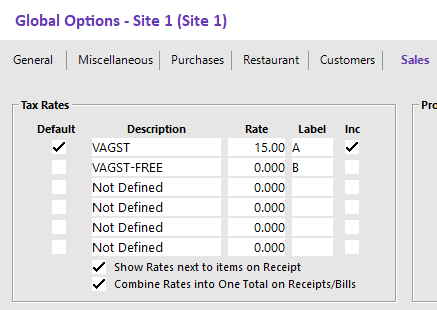
Samoa
The below rates are examples for the Samoa region, however, we strongly recommend that you consult with the local governing body in your region for the latest up-to-date Tax Descriptions and Rates to ensure that you meet the requirements for compliance in your region.
After the Tax Labels/Rates have been configured, close the Global Options window.
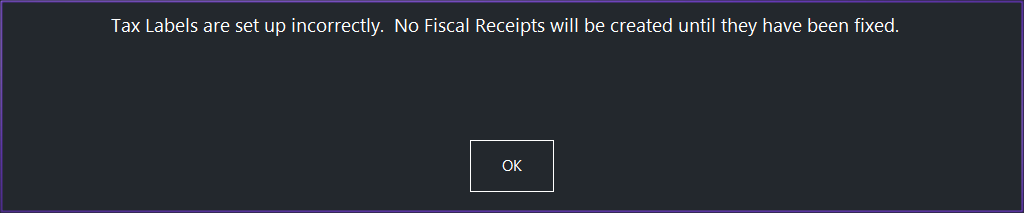
If any prompts are displayed regarding Tax Labels being set up incorrectly or prompts regarding Fiji Vat Monitor ERROR, press OK to close the prompts; they can be ignored for now.
We recommend that you restart Idealpos for these changes to take effect.
Go to: Start menu > Idealpos > IPSUtils > Enable the "Close IPS Utility" checkbox > Press the "Close" button.
Start Idealpos by double-clicking the Idealpos desktop shortcut or go to: Start menu > Idealpos > Idealpos.
When starting Idealpos, prompts regarding Fiji Vat Monitor ERROR can be ignored for now.
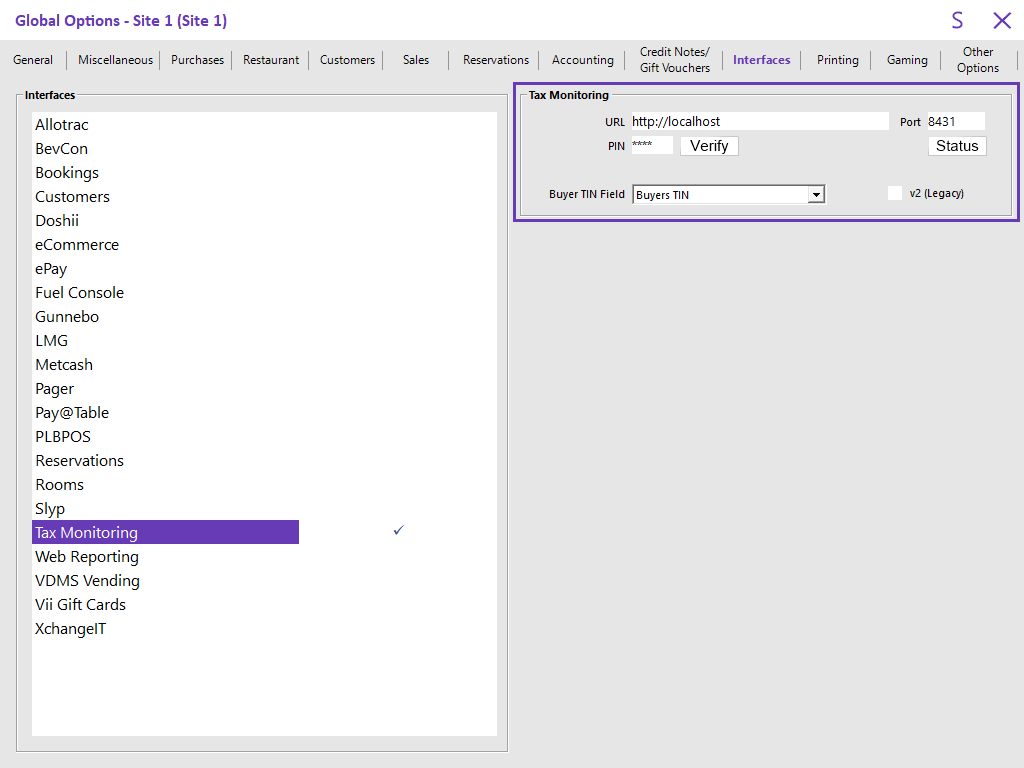
Go to: Back Office > Setup > Global Options > Interfaces > Tax Monitoring.
PIN Warning!
When configuring the PIN Code in Global Options, all POS Terminals will need to have a Smart Card with the same PIN Number.
If the Smart Card PIN differs at each POS Terminal and the PIN is configured in Global Options, this will result in failed PIN attempts.
The Smart Card will be LOCKED after a specific number of failed PIN number attempts.
A unique Tax Monitoring PIN number can be configured for each POS Terminal.
For more information, see below Configure PIN at POS Terminal level.
Note!
After configuring the above fields, pressing the Verify or Status buttons will result in a prompt ERROR: Unable to connect to the remote server.
A Close Suite/Open Suite will be required to get a successful response after pressing the Verify or Status buttons!
Go to: Start menu > Idealpos > IPSUtils > Enable the "Close IPS Utility" checkbox > Press the "Close" button.
Start Idealpos by double-clicking the Idealpos desktop shortcut or go to: Start menu > Idealpos > Idealpos.
Go to: Back Office > Setup > Global Options > Interfaces > Tax Monitoring > Press Verify or Status.
A successful response should be returned after the Close/Open Suite.
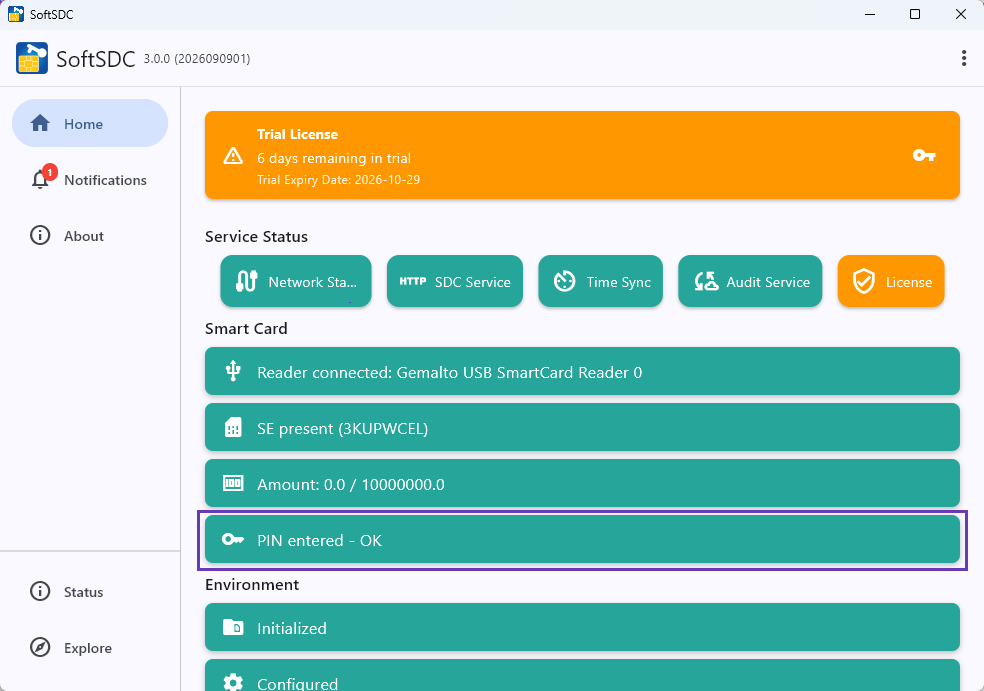
Pin OK
SoftSDC - Last Invoice: ###
When opening the SoftSDC application, the PIN section will now show "PIN entered - OK".
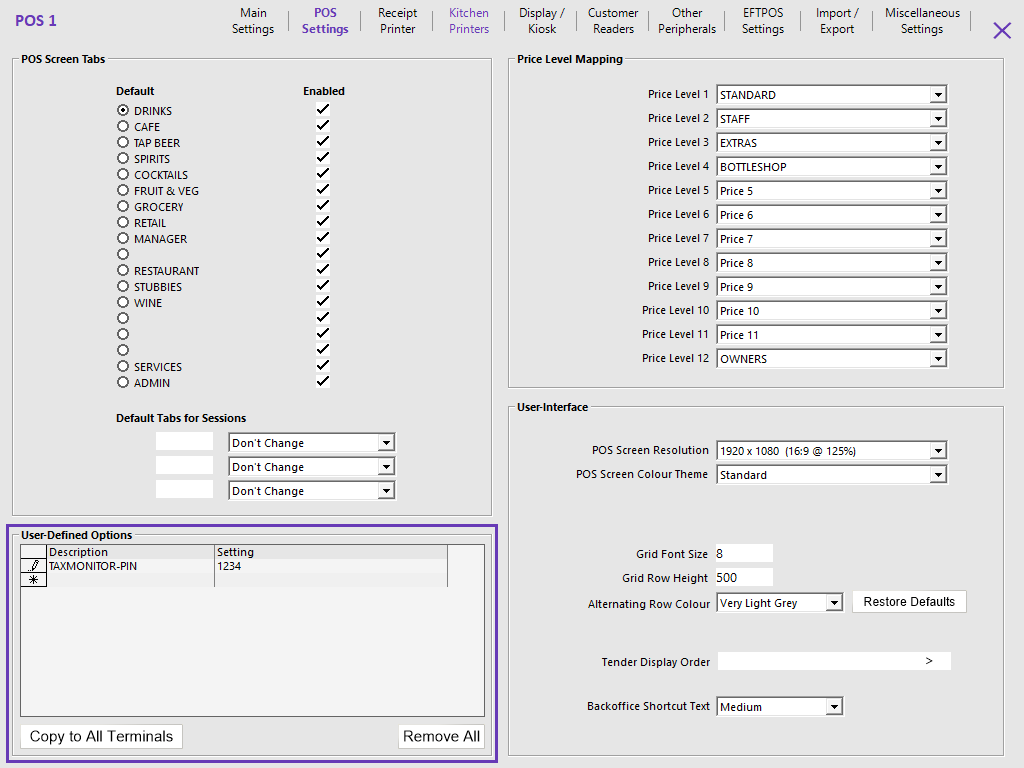
If the PIN Number needs to be configured at the POS Terminal level, a User-Defined Option can be created at each POS Terminal.
Go to: Back Office > Setup > POS Terminals > Select a POS Terminal > Modify > POS Settings tab > User-Defined Options.
Create the following User-Defined Option, ensuring that the PIN number is entered as the Setting.
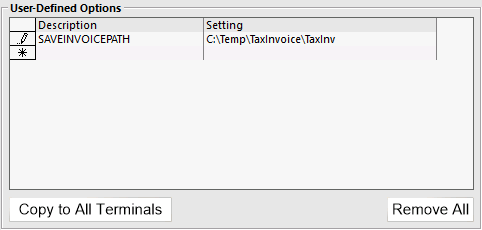
If a PDF File of each sale needs to be saved automatically to a folder location on the terminal, a User-Defined Option can be created.
Go to: Back Office > Setup > POS Terminals > Select a POS Terminal > Modify > POS Settings tab.
In the User-Defined Options section on the bottom-left corner, create the following User-Defined Option.
Note that the Setting path should include the required filename at the end of the path.
E.g. C:\Temp\TaxInvoice\TaxInv
In the above example, Tax Invoices will be saved with a filename of "TaxInv[AuditNo-POSNo].pdf" in the path "C:\Temp\TaxInvoice\".
If the Audit Number of a sale is 123 on POS 1, the resulting filename will be "TaxInv123-1.pdf".
Ensure that the required path is created prior to configuring this User-Defined Option.
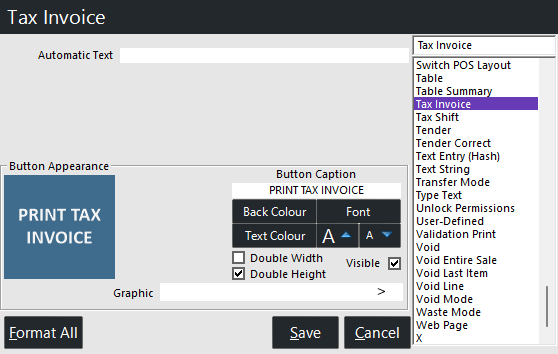
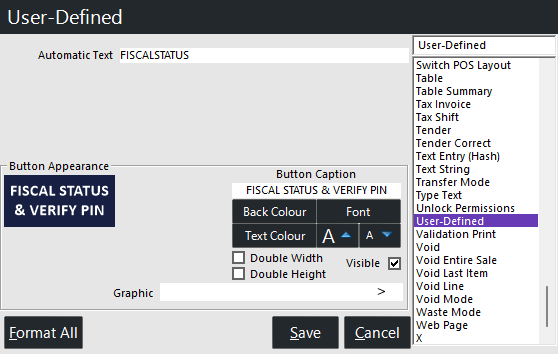
To display the Fiscal Status and Verify PIN, a POS Screen button can be created to trigger this functionality.
When the button is pressed, Idealpos will attempt to connect to the SDC to get the status and verify the PIN number.
Go to: Back Office > Setup > POS Screen > POS Screen Setup > Select a POS Screen Layout > Buttons > Select a POS Screen Tab > Select an unused/blank button and configure as follows:
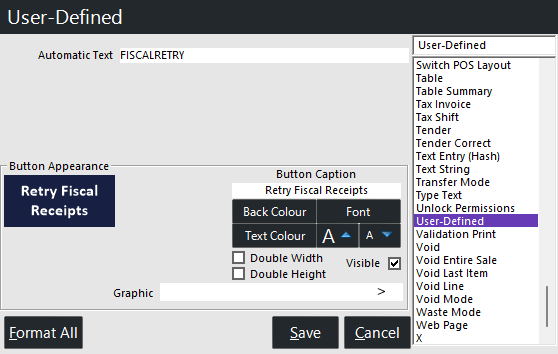
To retry sending Fiscal Receipts on-demand, a button can be created.
Go to: Back Office > Setup > POS Screen > POS Screen Setup > Select a POS Screen Layout > Buttons > Select a POS Screen Tab > Select an unused/blank button and configure as follows:
Go to: Start menu > Idealpos > IPSUtils > Enable "Close IPS Utility" checkbox > Press "Close" > Confirm the prompt to close suite.
Start Idealpos via the Idealpos desktop shortcut or via Start menu > Idealpos > Idealpos.
Idealpos should start without any prompts or error messages.
If there are any issues connecting to the ESDC or if any problems with the Tax Labels/Rates, an error message will be displayed when starting Idealpos.
If there are any problems with the Tax Rates/Descriptions, review the steps above to ensure that the Tax Rates/Descriptions have been configured correctly.