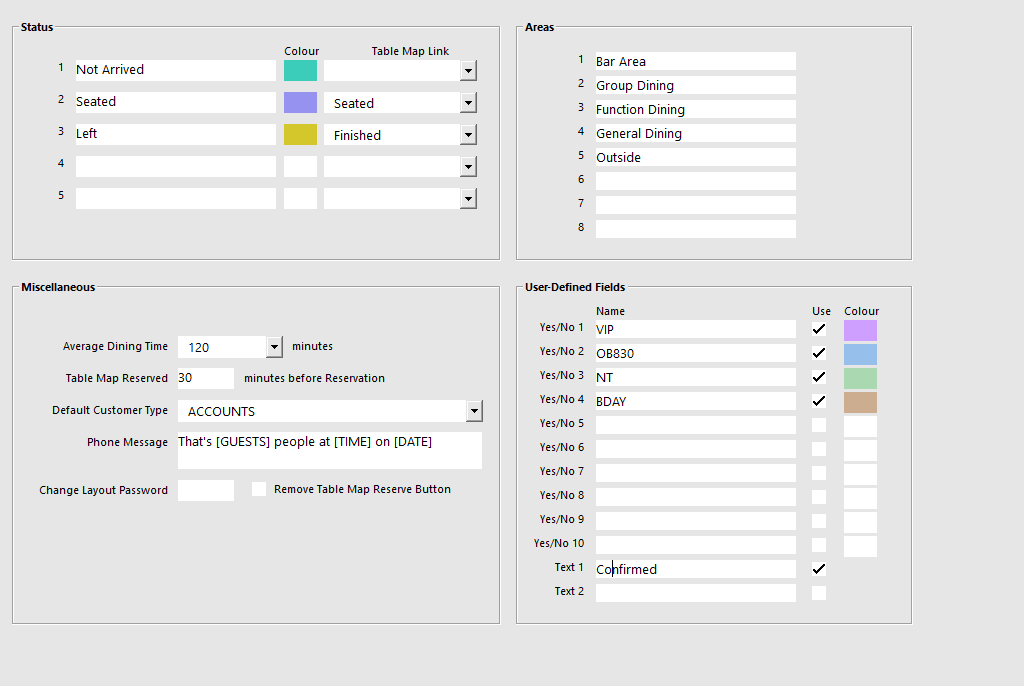
The Reservations Tab is broken up into four different sections which are:
This section allows you to create custom colours for the Table Map to display when the selected table has achieved the current status.
These statuses will display in the Reservation screen only.

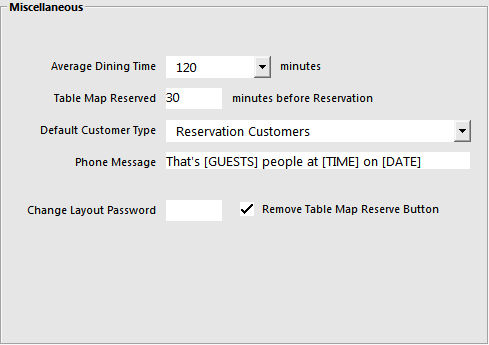
This section will allow you to set numerous default options that will be applied to all Reservations.
These values can be changed when booking a reservation.
Average Dining Time
Allows a set period of time for the reservation to take place, and plan for turnover of tables.
This value will automatically be entered on all new Reservations.
Table Map Reserved
This allows a table to be reserved for a period before the guest is arriving.
Default Customer Type
Will be the Customer Type new guests will be linked to from their first reservation if they are not currently in your database.
Phone Message
A message that can help the staff repeat the reservation they have just taken back to the guest to confirm the details.
Change Layout Password
To limit which staff can make changes to the Reservations table layout.
Remove Table Map Reserved Button
If using the Reservations module, this check box will hide the small “Reserve” button from the Table Map screen when selecting a Table.
This section allows you to create up to 8 different areas or sections within your seating plan.
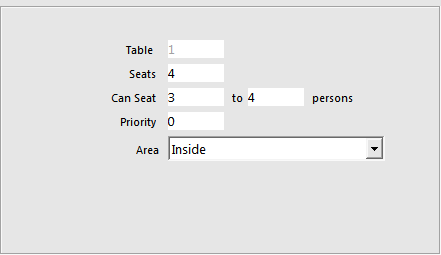
Each table must be allocated to a specific area.
Note that when the Reservations button is pressed from the Table Map screen, the Reservations screen that appears will be locked to the Area Code that matches the Table Map Code.
If the Table Map Code does not match an Area Code between 1 to 8 as shown below, then ALL Areas will be displayed and it will be possible to toggle between the different Areas. This is only the case when Reservations are accessed from the POS Screen.
When accessing Reservations from the Back Office (via the menu Reservations > Reservations), the Reservations screen will not be locked to any particular area and will by default show all areas. The area can be toggled by pressing the "Area" button at the top-right corner of the screen.
Therefore, when configuring Areas, it would be of benefit to ensure that the Table Map Codes match the Area Codes below and that the tables located in those areas also correspond to the Tables on the Table Map.

A Table in the Reservations Layout can be modified by going to:
Back Office Dashboard > Reservations > Default Setup > Select Default Layout > Tables > Select an existing Table from the list > Modify.
A Table can also be added to the Reservation Default Table Setup by pressing the "Add" button instead.
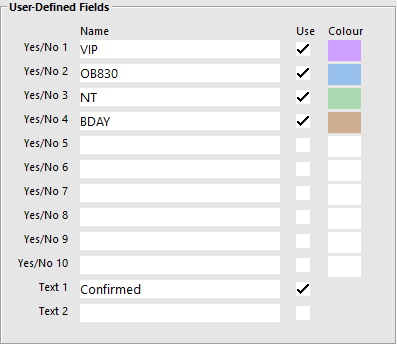
This section gives you the ability to control ten Yes/No fields and two Text fields, which will appear on the Run Sheet.