Open topic with navigation
Stocktake in Idealpos
Idealpos provides an easy to use step by step process for performing a stocktake.
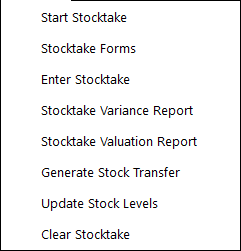
The basic process is to start at the top of the list and work your way down until you have either updated the stock levels or cleared the stocktake.
You will find the list under the Stocktake heading from the back office.

Important Details
The stocktake procedure is one that can cause major changes to your database and reporting.
It is important to ensure that all details are correct throughout the entire process.
- Do not sell any items of stock between starting the stocktake and when you actually count the stock.
- Once an item has been counted and recorded, that item is able to be sold through the terminal.
- Any stock purchases, returns, transfers or write-offs that are entered after the stocktake has been started will affect the Stocktake; you will have the choice to apply these changes to the current stock levels.
Stocktake Procedure
The basic stocktake procedure is as follows:
- Choose the Location/s you wish to stocktake.
- Click ‘Start Stocktake’.
- Print out the Stocktake Forms for the selected locations.
- Physically count each item in the selected locations and record the quantities on the stocktake forms.
- Enter the Stocktake into Idealpos.
- View or print the Stocktake Variance Report.
- View or print the Stocktake Valuation Report.
- Update the stock levels for the locations selected.
Related Information available here.
Open topic with navigation

