To configure POS Screen Grids, go to: Back Office > Setup > POS Screen > Grids.
Grids can be used to expand the amount of items available on the POS Screen.
They can be used to step users through a menu selection to ensure that each detail is recorded before proceeding.
Grids can be configured with a minimum and maximum number of items that must be selected before you can proceed.
Grids need to be created before they can be linked to a button on the POS Screen.
Once a grid has been created the buttons within it are able to be modified through the POS Screen or the Grid list.
A grid is also able to be locked to a Price Level.
To skip to a particular section in this topic, click on one of the following links:
There are 2 types of grids available:
This is the default setting for all newly created grids.
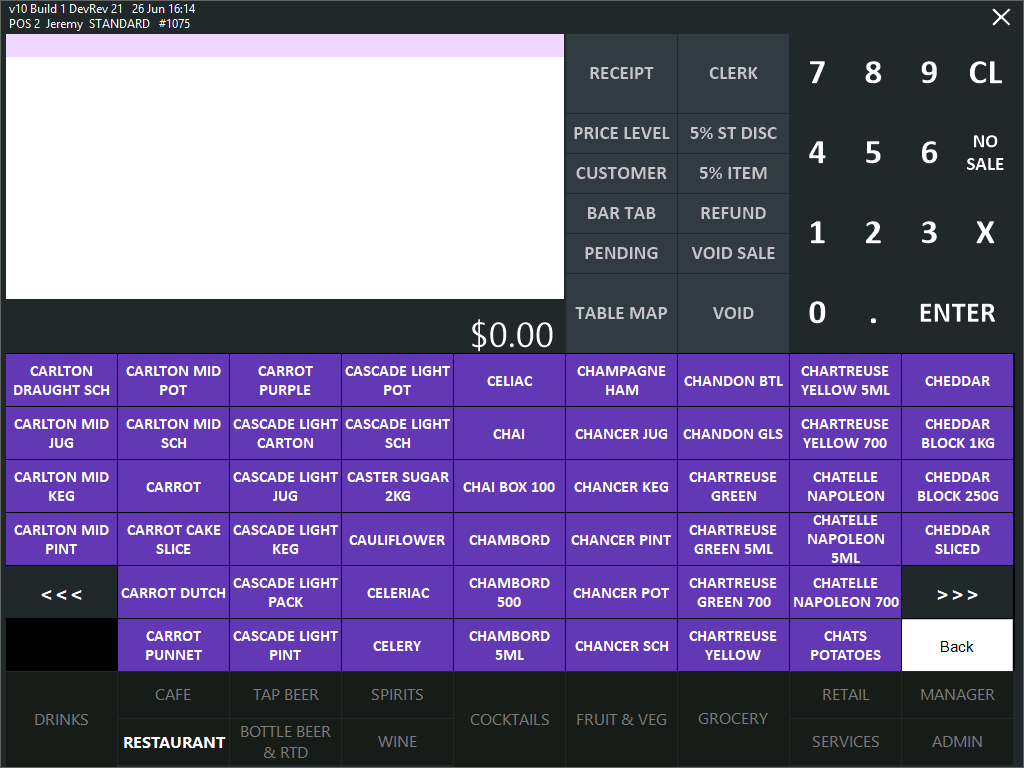
Fit Grid to POS screen means that it will open in the bottom half of the POS Screen display, over the top of the currently selected tab.
It is nine buttons wide and six buttons high, the same as the POS Screen Tab.
This is by far the most used and easily programmed grid type, along with being able to be used with drag and drop items.
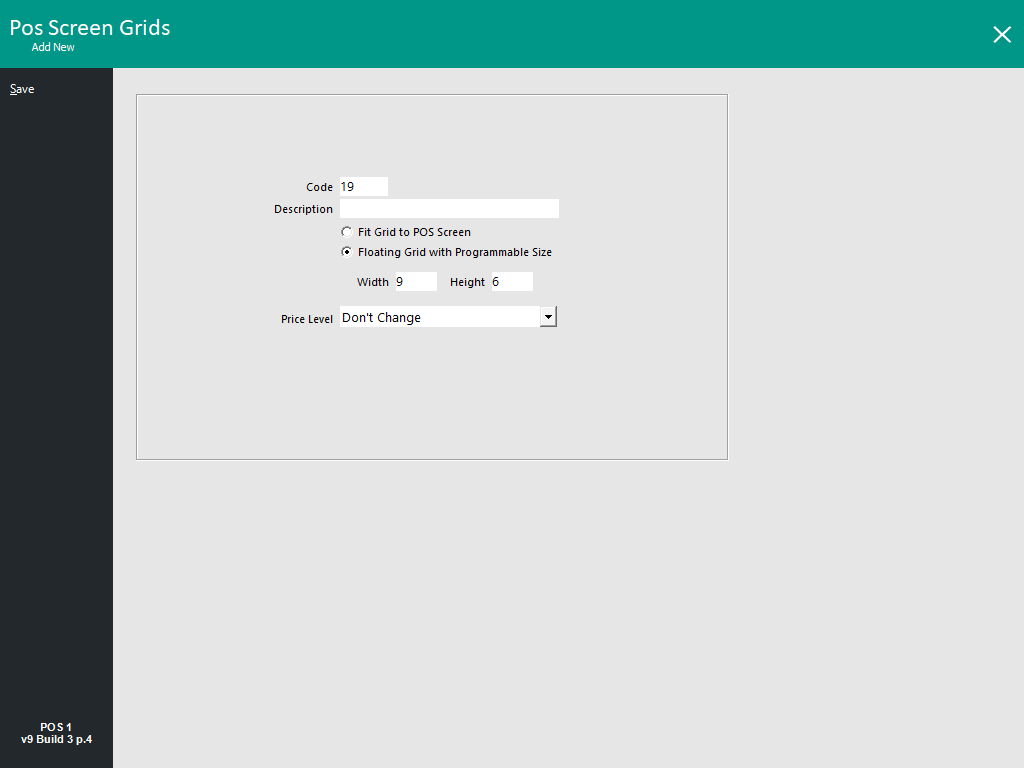
This type of grid allows the operator to see as many items as they wish.
The grid will not be set anywhere on the screen, but will appear in the last location that it was used.
It is possible to have a grid that is two buttons wide and twelve buttons high, or vice versa.
While this might seem entertaining or useful, it can be an issue.
When the grid is open, if it is too big, it will display over the top of the POS Screen area.
Using this type of grid can also make performance of the terminal itself slower.
Note - The Force Selection minimum/maximum fields are not available when using Floating Grid with Programmable Size.
Note!
When Floating Grids are displayed on Kiosk screens, they will appear on the centre of the Kiosk screen and will not contain a title-bar.
This is by design and is to prevent consumers from re-positioning Floating Grid windows on the Kiosk screen (title-bars on most dialogue boxes and windows can be clicked and dragged to move them to a different position on the screen).

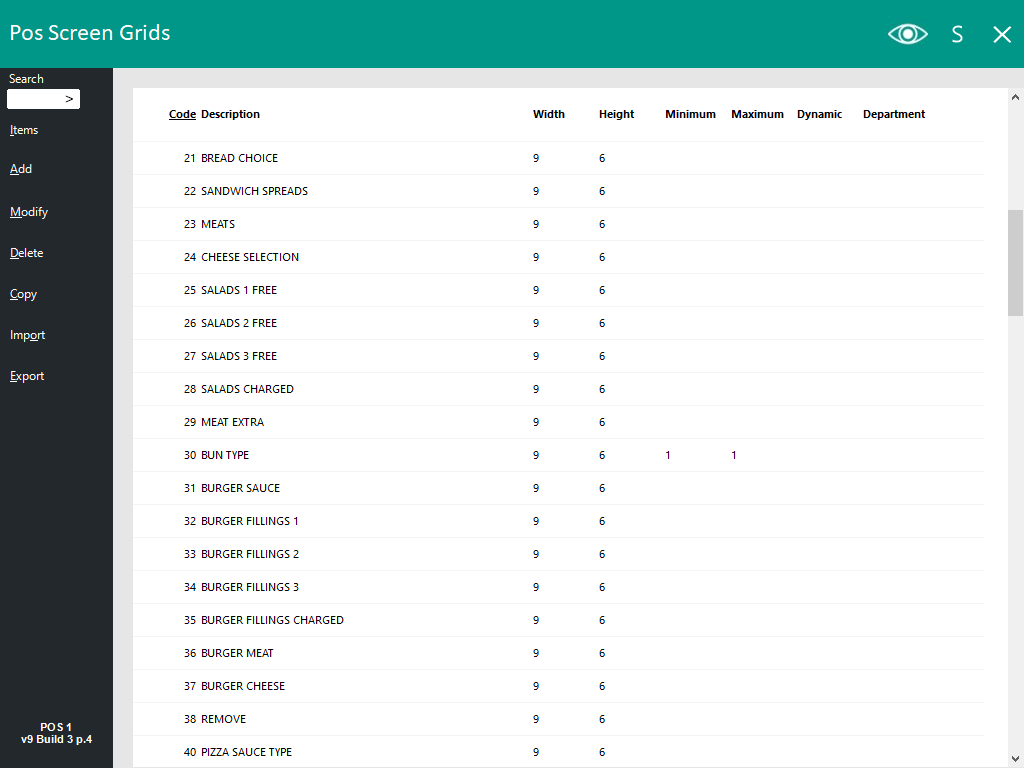
This is simply the list of all created grids in the database.
The list is displayed after accessing the POS Screen Grids function via Back Office > Setup > POS Screen > Grids.
There are selections of seven different buttons (located on the top-left corner of the Grids list) that can be used in this area.
This button allows you to configure the buttons that will be contained within the selected grid.
Buttons that are created within a grid have a special ability in that they are able to link to another grid once the button has been selected.
This button will allow you to add a new grid to the database.
The Code field will automatically assign the next available code.
The Code has no specific function in relation to how the grids will work on the POS Screen, but they can be used to group various grids together.
The maximum Code that can be entered is 9999.
This button allows you to modify the Description, Grid Type and Price Level of the selected grid.
This button will delete the current grid from the database.
All buttons in the grid will be deleted and any links to the grid will also be deleted.
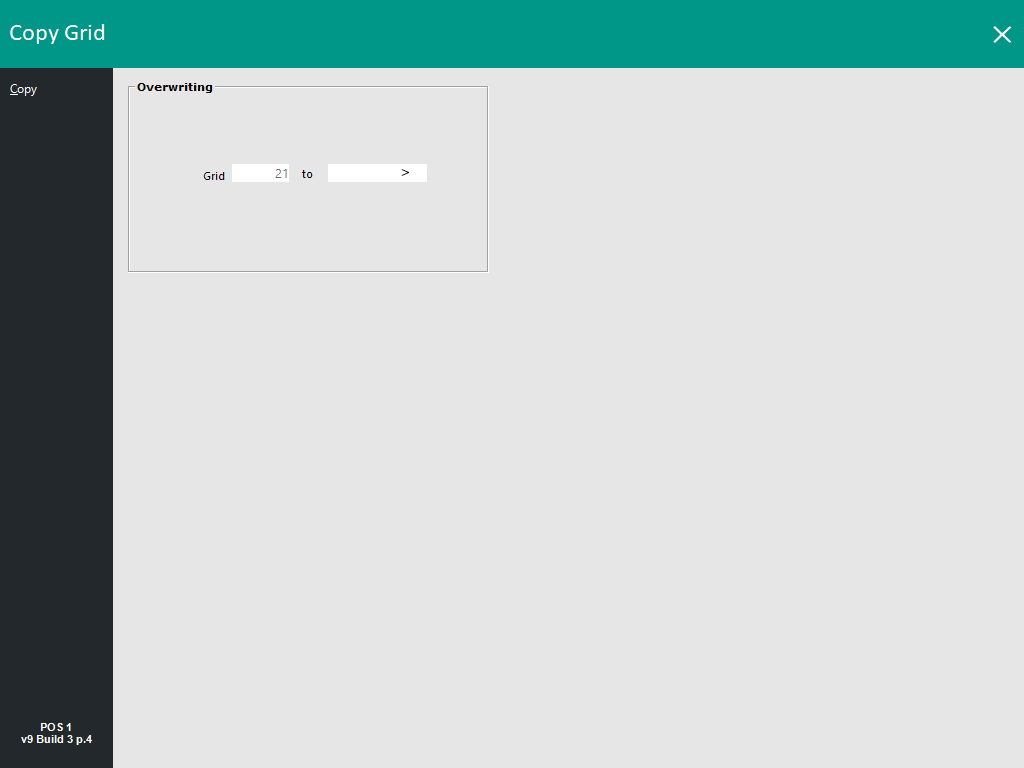
This button will copy a grids buttons to another.
The destination grid must be created before a grid can be copied to it.
All existing buttons on the grid to be copied over will be deleted.
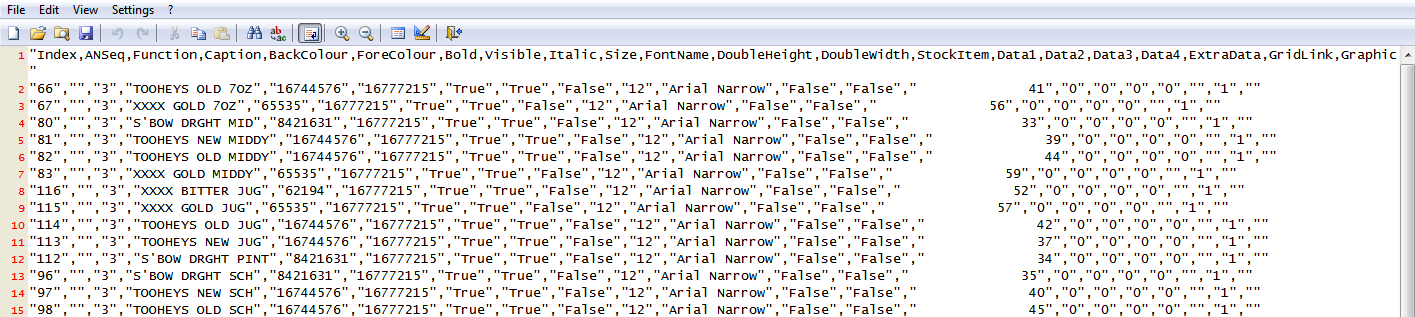
This button allows you to import a .txt file containing all of a grids detail into the grid list.
Generally this file is one that has been created on another terminal that is not on the same network as the terminal that is importing the grid.
It is not intended as a file that you would create from scratch when programming a database.
This button allows you to export a highlighted grid and all details to a .txt file, for importing on another terminal.
This is generally used when the same business is selling the same items in different locations, but the terminals are not on the same network.
It is not intended as a file that you would edit.
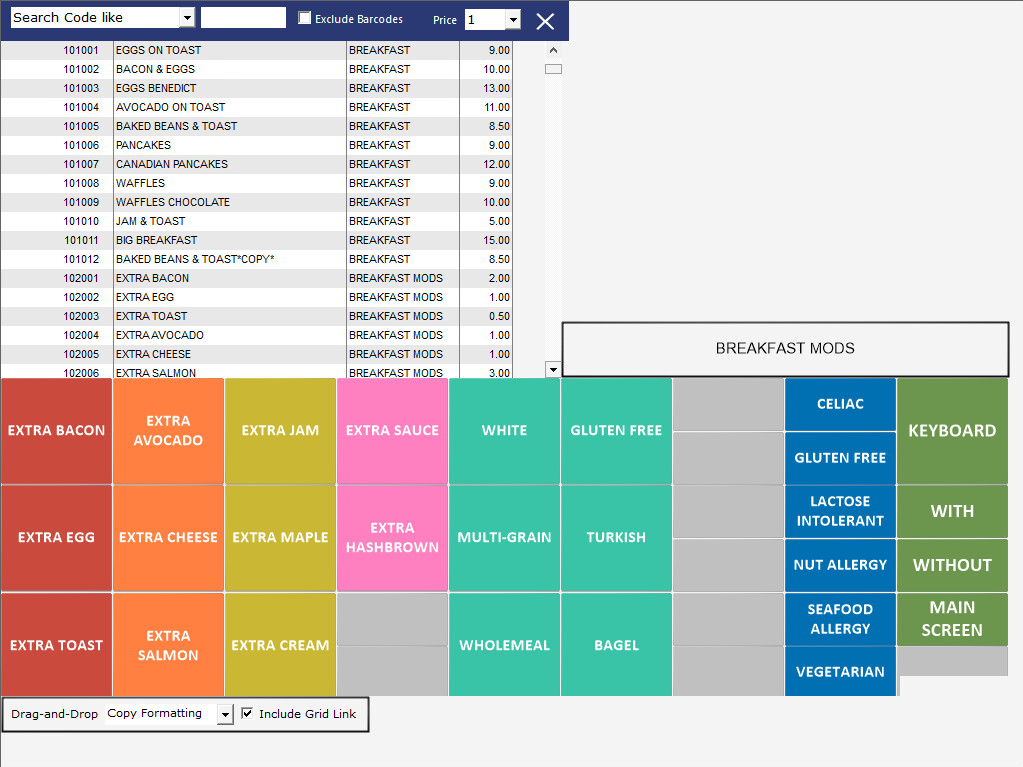
Adding Items to a Grid is a matter of selecting the Grid from the Grids List screen, then pressing the 'Items' button on the top-left corner.
This will open the Grid for modification where Stock Item buttons can be added.
When adding items to a grid, it is essentially the same as adding new buttons to a POS Screen.
The main thing to notice is that there are not as many functions available to use within a grid.
This type of grid will allow you to ‘Drag and Drop’ stock items from the list to the button themselves.
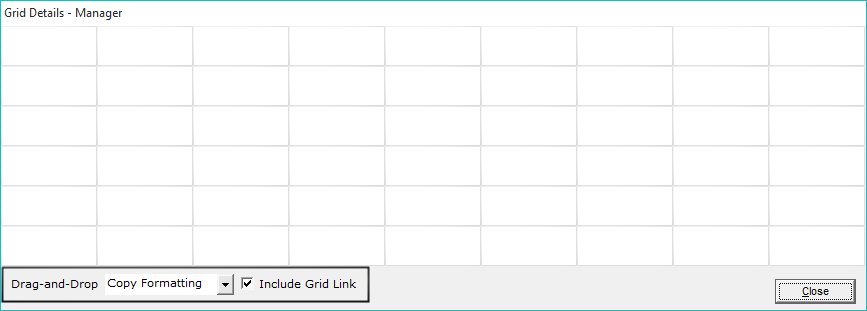
This type of grid requires you to select the grids one by one and program each one using the stock item search button or auto-create grid method.
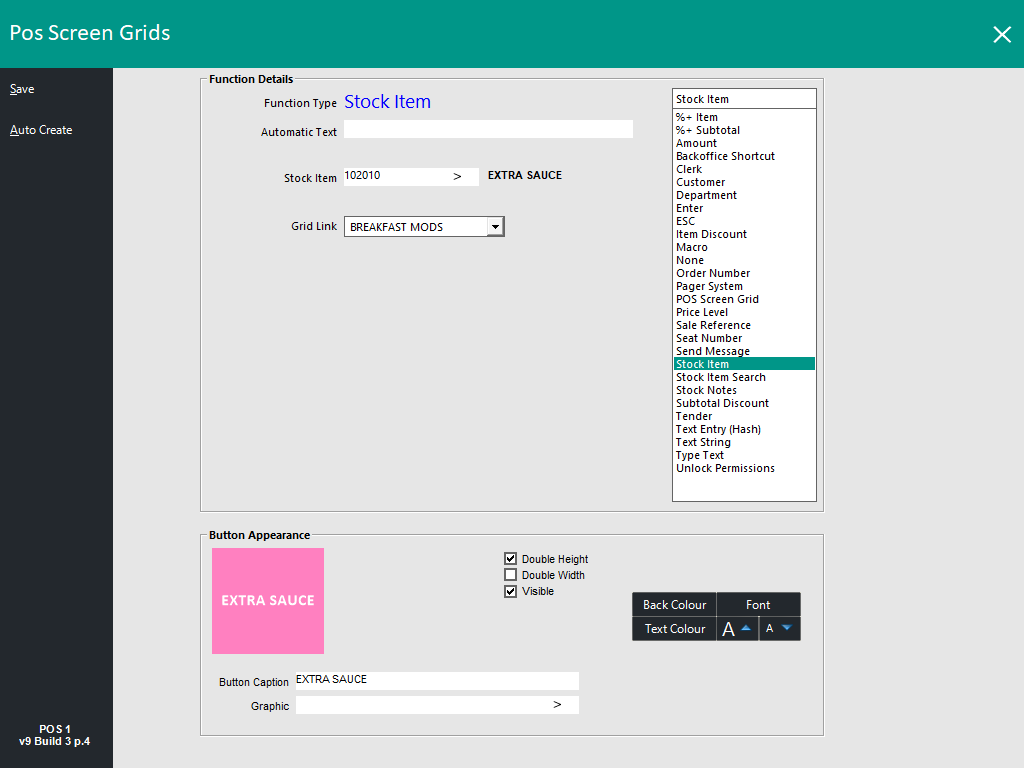
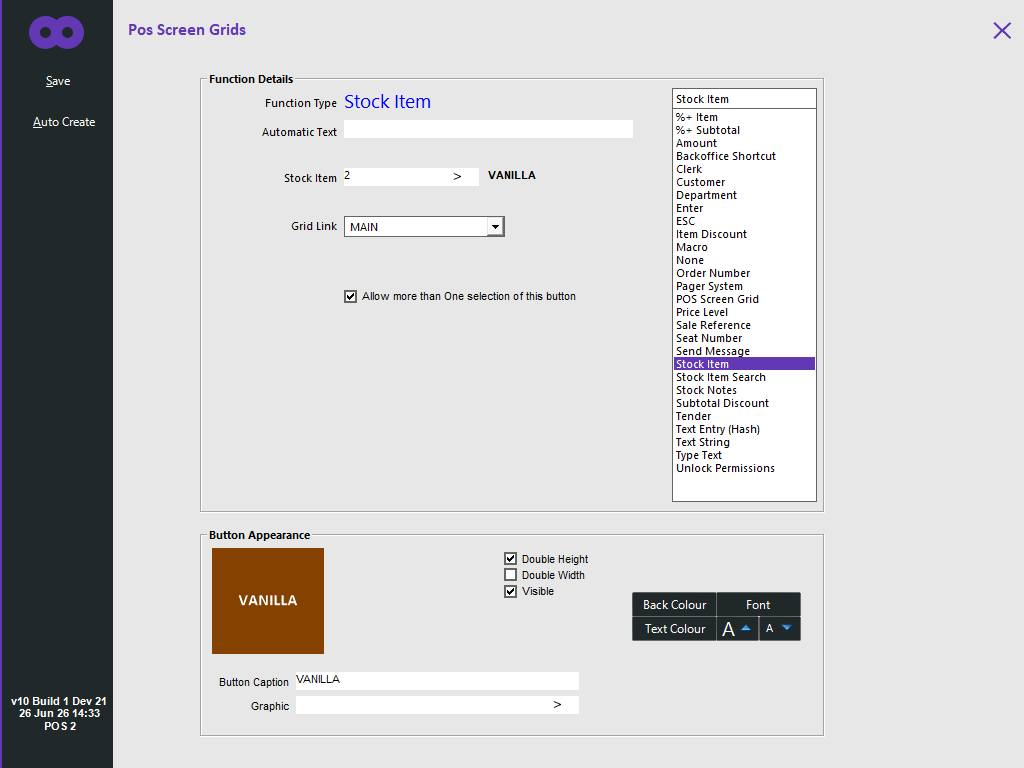
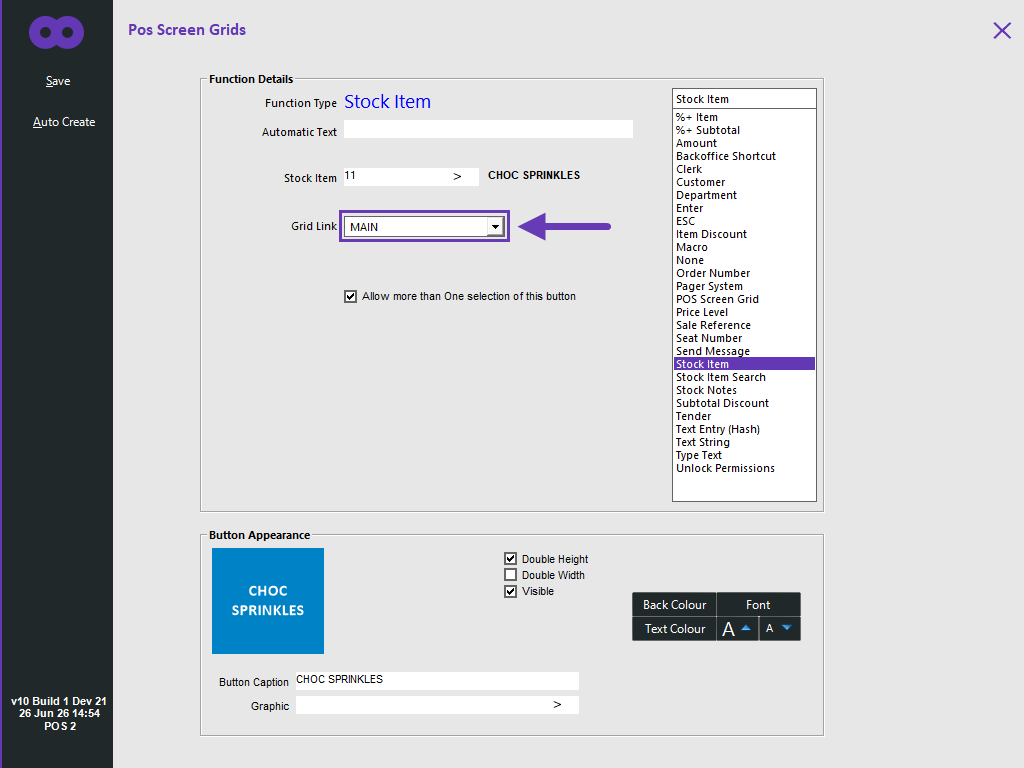
This field is a drop down box and will determine what is supposed to happen after the button has been pressed.
[BACK] - This will link the button to the previous POS Screen Grid. When pressed, the Stock Item will be added to the sale, then the previous POS Screen Grid will be displayed (i.e. the previous POS Screen Grid that was shown prior to the current POS Screen Grid).
MAIN – This will link the button to the “Main” POS Screen. Essentially it will exit you from the grid and take you back to the default POS Screen.
GRID DESCRIPTION – This will enable you to select from all the other created grids. If you want to keep the operator in the grid they are currently working on, ensure that the grid link selected is the grid they are using.
Function Type: None – When selecting this option you will not be able to select a Grid Link. This will allow you to use place-holder buttons not linked to a grid, so you can copy grids without needing to change the linking on each copied grid. Linking to another grid can be done using the POS Screen Grid function.
Note!
If you have a grid that contains all the stock items linking back to that grid, you may also want to create a single button that links to another Grid or the Main screen to allow the operator a way to “exit” the grid.

As is the case with the POS Screen, you have the options to “Copy Formatting”, “Move Button”, “Copy Font Only” and “Copy Button”.
There is one more option within grid programming called “Include Grid Link”.
This function will include any Grid Links that are associated with the buttons you are copying.

This feature allows you to configure the exact number of items the operator is expected to press before being allowed to move on.
An example of this is Ice Cream Flavours and Ice Cream Toppings.
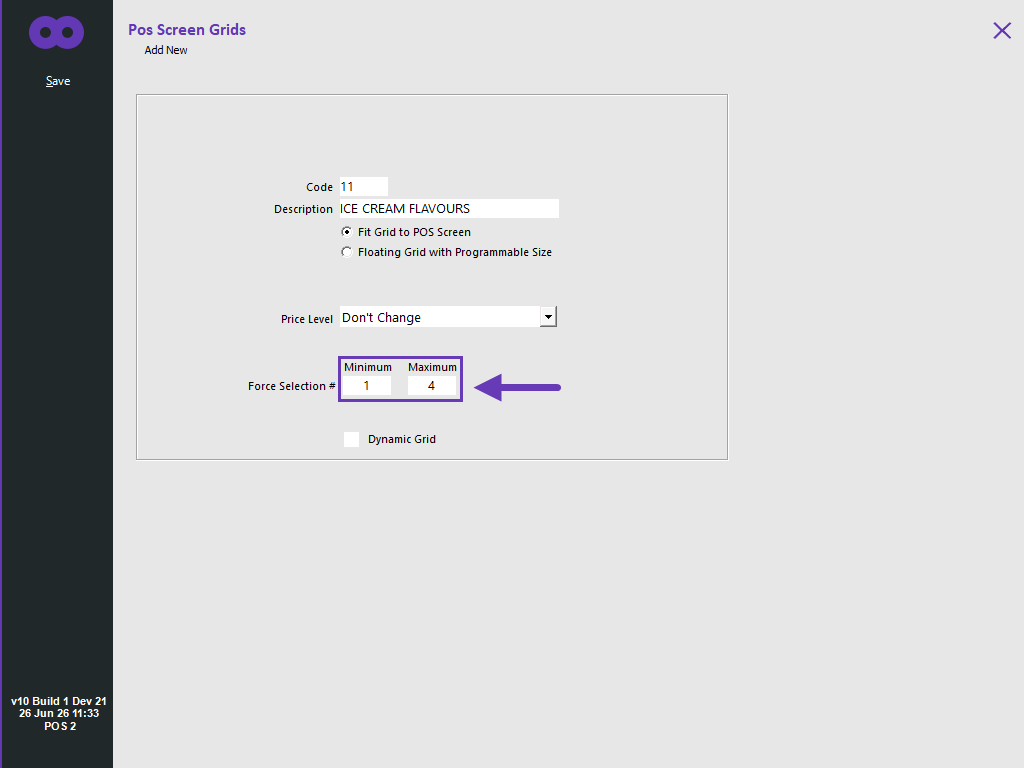
Go to Setup > POS Screen > Grids > Add.
Enter a Description for your POS Screen Grid (e.g. Ice Cream Flavours).
Ensure that "Fit Grid to POS Screen" is enabled.
Next to Force Selection, enter the Minimum and Maximum number of items you want the operator to be allowed to select from this Grid.
After entering the required options, press the "Save" button to save your changes.
Close the POS Screen Grid window, then from the Grid list, select your newly created Grid.
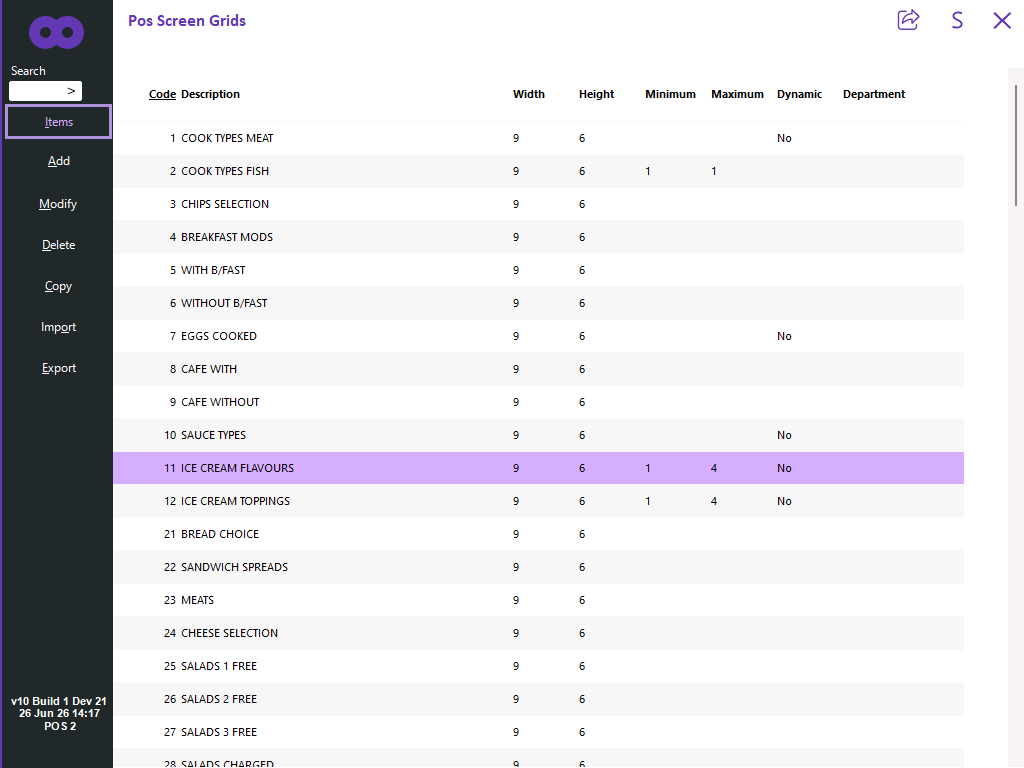
Press Items > Add all the required stock items in this grid, in this example, Ice Cream Flavours.
It can also be used for Pizzas and Sandwiches where a maximum number of items are added for free.
Items included in the grid can have a price allocated to them as per usual.
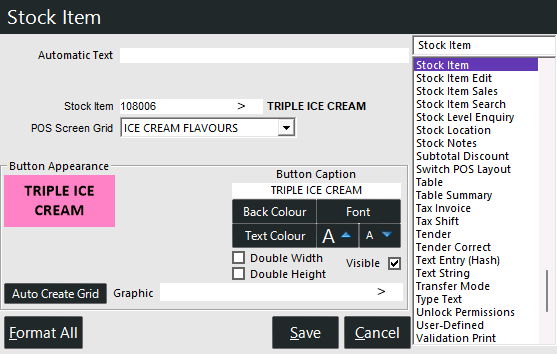
Link your Triple Ice Cream button to the Ice Cream Flavours Grid.
Optional steps below to create multiple Force Selection Grids
If multiple Force Selection Grids are not required, skip to Using Force Selection Grids on the POS Screen below.
If required, multiple Force Selection POS Screen Grids can be created so that once the minimum/maximum items from one POS Screen Grid are selected, another minimum/maximum POS Screen Grid will be shown.
E.g. Select the main Ice Cream Item > select the minimum/maximum Ice Cream Flavours (Vanilla, Chocolate, etc.) > select minimum/maximum Ice Cream Toppings (e.g. Choc Sprinkles, 100s and 1000s, Choc Sauce, Vanilla Sauce) > return to main POS Screen.
Create another POS Screen Grid (e.g. Ice Cream Toppings) and set the Force Selection Minimum/Maximum fields.
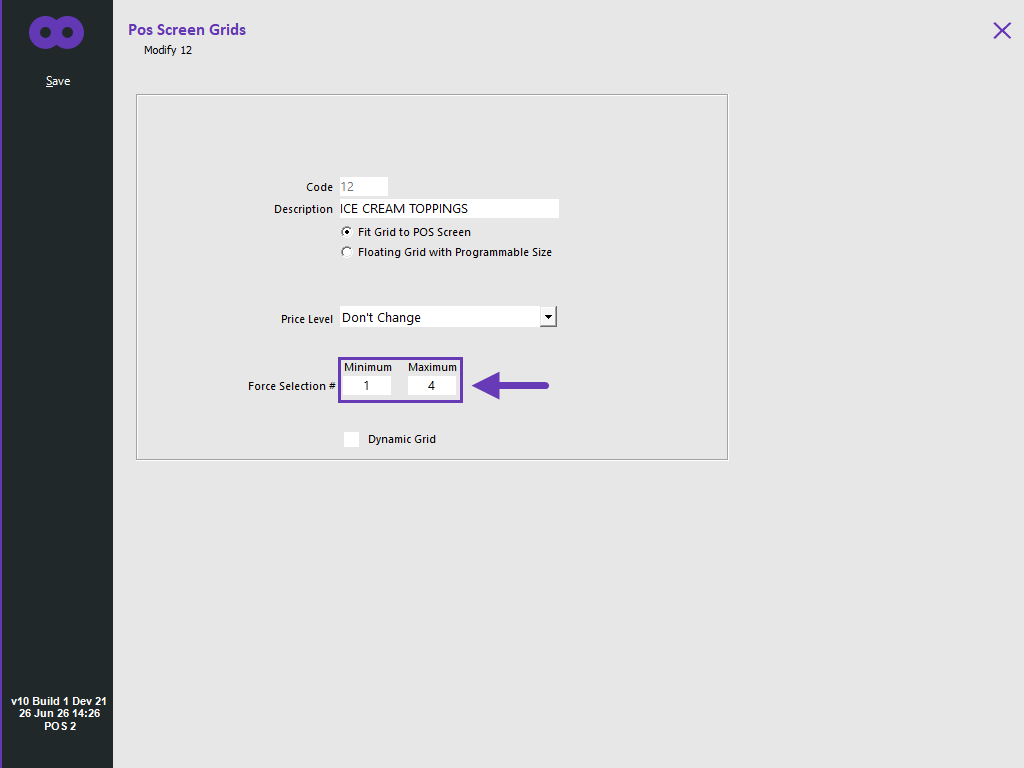
The items within the first POS Screen Grid (e.g. Ice Cream Flavours) need to be linked to the second POS Screen Grid (e.g. Ice Cream Toppings).
Select the Ice Cream Flavours POS Screen Grid > Items
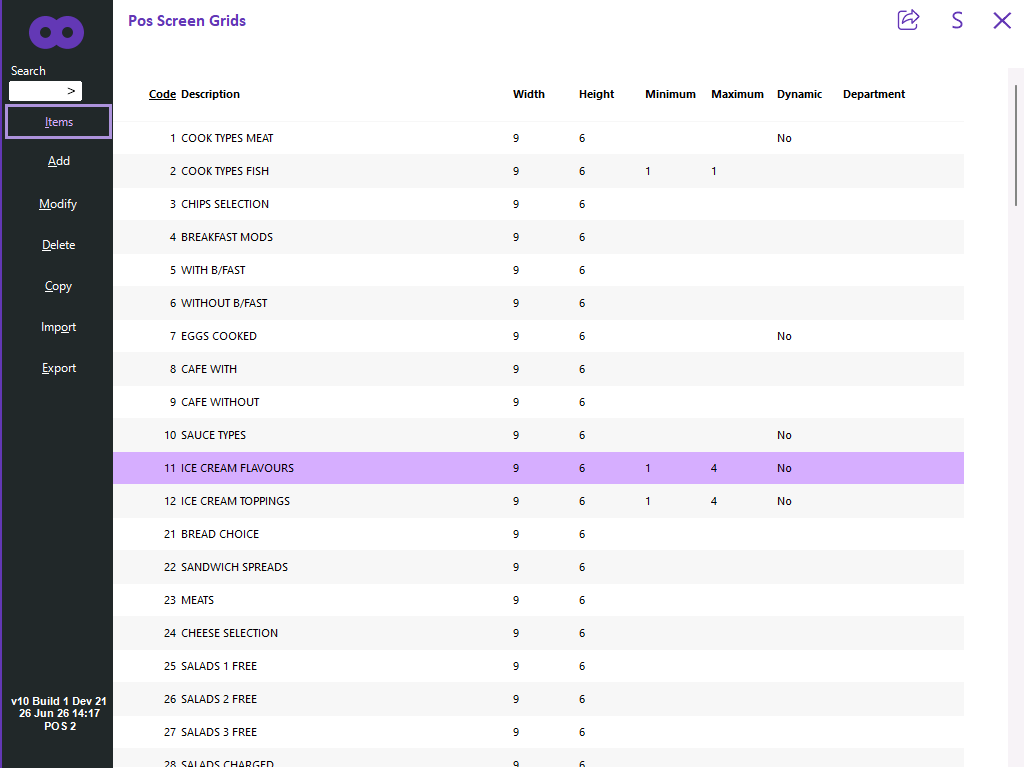
Ensure that all the Stock Item buttons within the Ice Cream Flavours POS Screen Grid have their Grid Link dropdown box set to "Ice Cream Toppings".
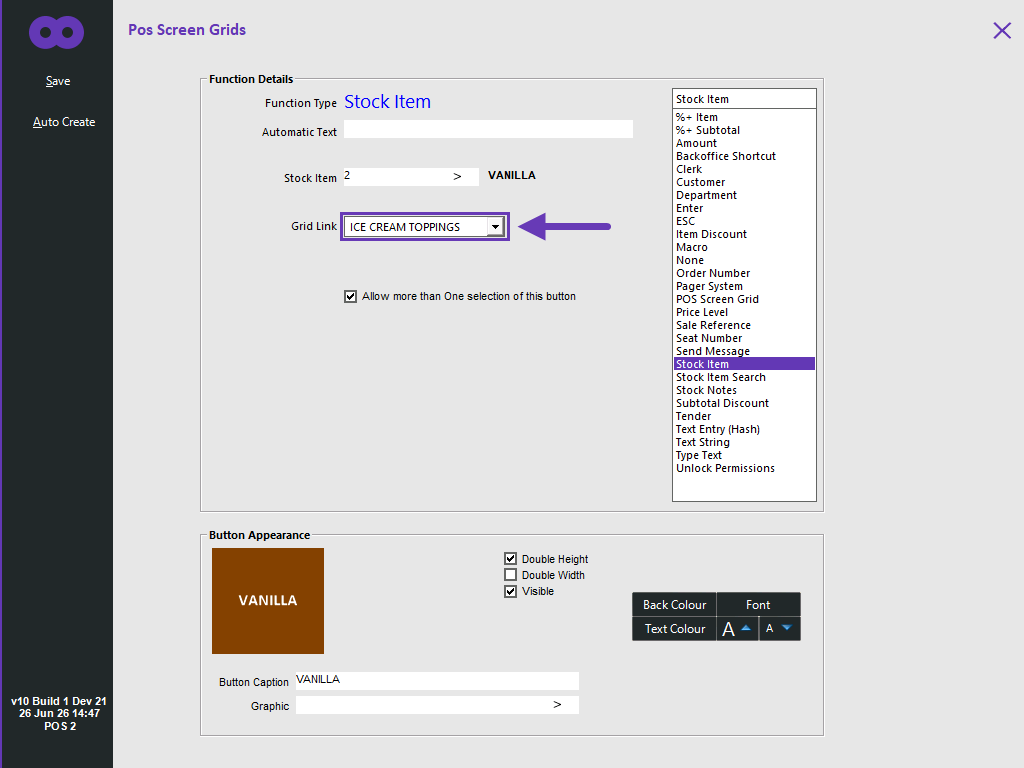
Once all the Ice Cream Flavour Stock Item buttons on the Ice Cream Flavour POS Screen Grid have had their POS Screen Grid dropdown options configured, close the POS Screen Grid.
Select the Ice Cream Toppings POS Screen Grid > Items.
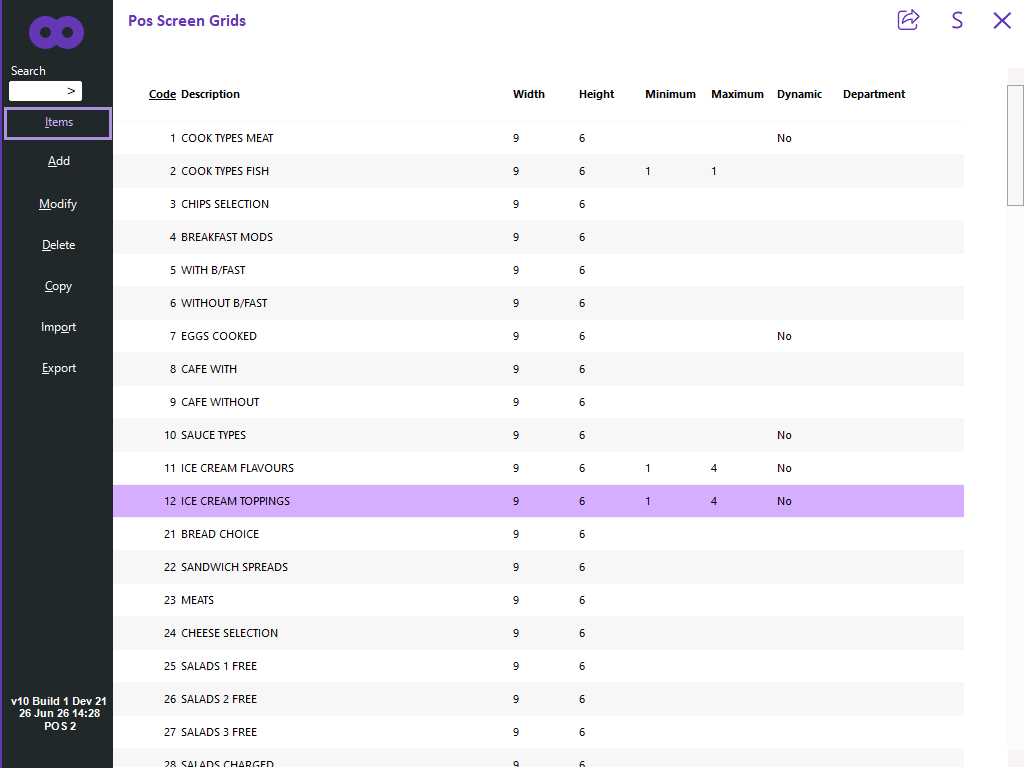
Add the required Ice Cream Topping Stock Items to the grid.
The Ice Cream Topping Stock Items should have their POS Screen Grid option set to MAIN so that the main POS Screen Grid is displayed after the items are added.
If other POS Screen Grids need to be shown after the Ice Cream Toppings Grid, create additional POS Screen Grids as outlined above
Ensure that the Stock Items within the POS Screen Grids have their POS Screen Grid Link options set to the next POS Screen Grid in the sequence.
Ensure that the Stock Items on the last POS Screen Grid in the sequence have their Grid Link dropdown box set to MAIN.
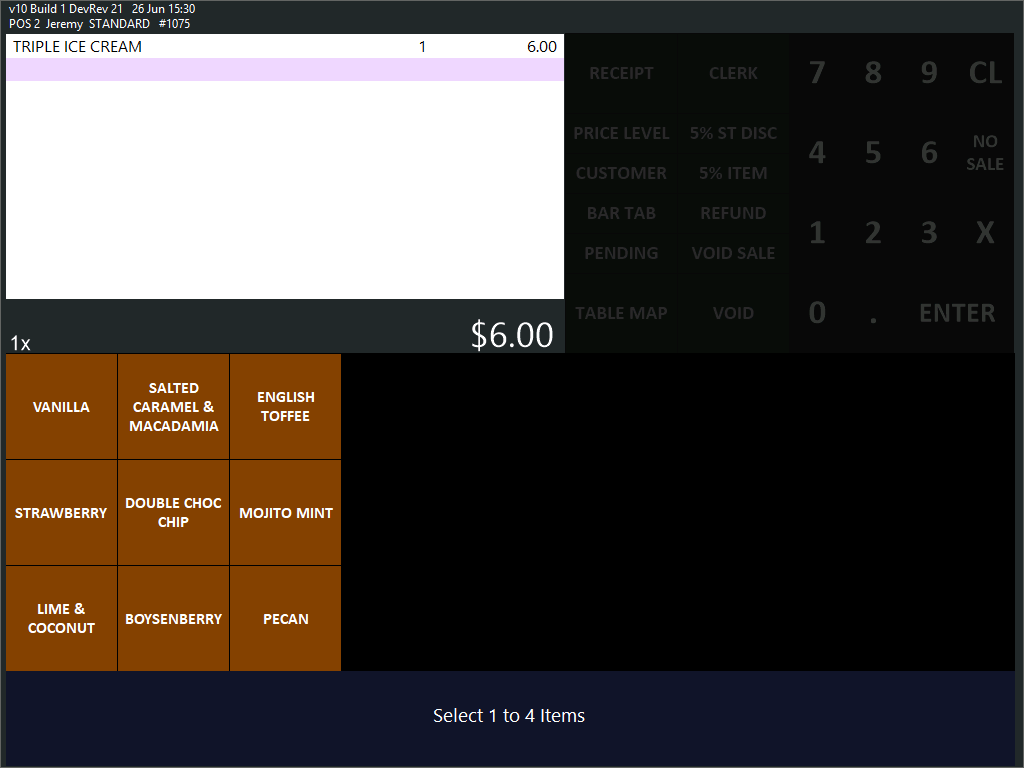
On the POS Screen, press the Triple Ice Cream button.
The item will be added to the sale and the Ice Cream Flavours grid will open.
The bottom of the grid will tell you how many items you need to select.
In the below example, a range of 1 to 4 items need to be selected.
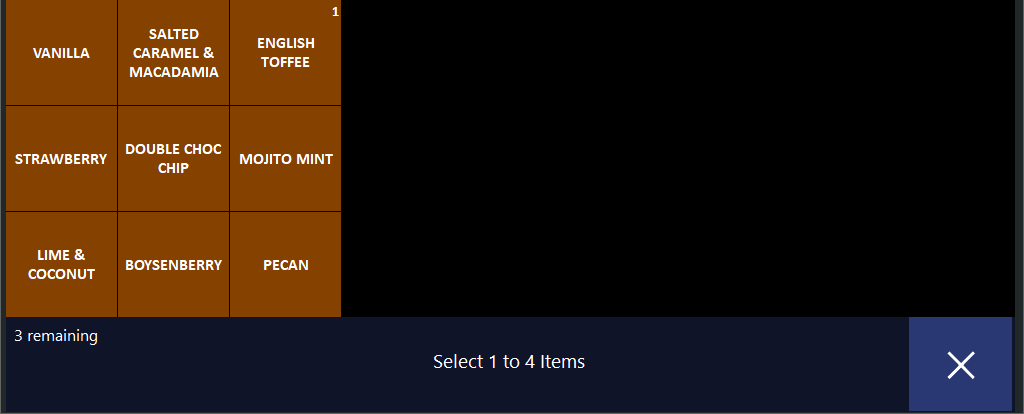
Once an item is selected (English Toffee), a count will display on the button as to how many of that flavour has been selected.
The bottom of the grid will show how many items are yet to be selected.
Once the minimum number of items have been added, an "X" button will appear on the bottom-right corner of the grid.
Note!
The behaviour of this function will vary depending on the state of the checkbox Allow more than One selection of this button.
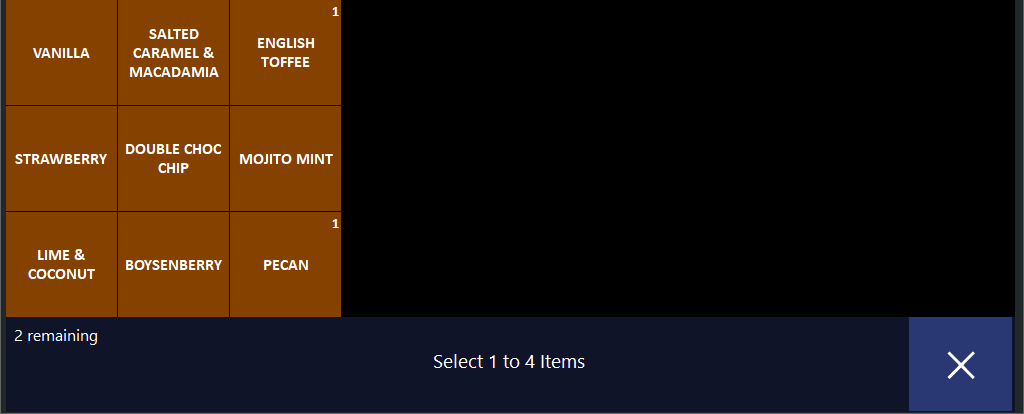
Additional items can be added to the sale.
After adding another item, the count will decrease.
The POS Screen will behave as follows when adding the minimum or maximum number of items from a Force Selection Grid.
Option A - Add the minimum number of items or add less than the maximum number of items
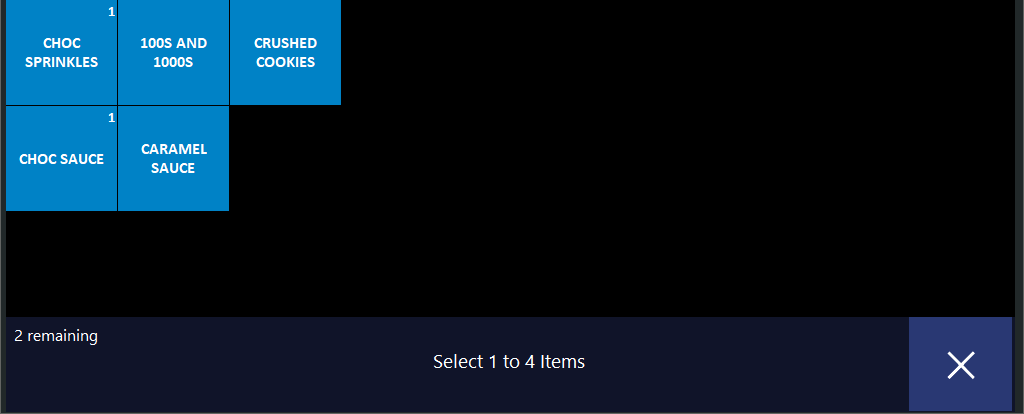
Once the minimum number of items have been added to the sale from the grid, an "X" button will appear on the bottom-right corner of the grid.
The "X" can be pressed to close the grid; if the last Stock Item that was added to the sale from the grid links to another POS Screen Grid, the next grid will be displayed.
If the last Stock Item that was added to the sale links to MAIN, the main POS Screen Grid will be displayed.
Option B - Add the maximum number of items
Once the maximum number of items have been added to the sale from the grid, the grid will close automatically.
If the last Stock Item that was added to the sale from the grid links to another POS Screen Grid, the next grid will be displayed.
If the last Stock Item that was added to the sale links to MAIN, the main POS Screen Grid will be displayed.
Notes!
After the main item (e.g. Triple Ice Cream) and the instruction items (e.g. Ice Cream Flavours, Ice Cream Toppings) have been added to the sale, you cannot return to the Force Selection Grids unless you:
If required, the main Stock Item (Triple Ice Cream) can be voided and the options re-selected from the Force Selection Grids.
You cannot add multiple quantities of the main item as it will not select the same quantities of the choices available.
If multiples of the same item are required, each instance of the main item must be added one at a time, ensuring that the instructions or options for that item are selected as required.
If multiple Force Selection Grids were configured, the next Force Selection Grid in the sequence will be displayed and minimum/maximum Force Selection will also be enforced.
E.g. After selecting an Ice Cream Flavour as shown above, the Ice Cream Toppings grid will be displayed.
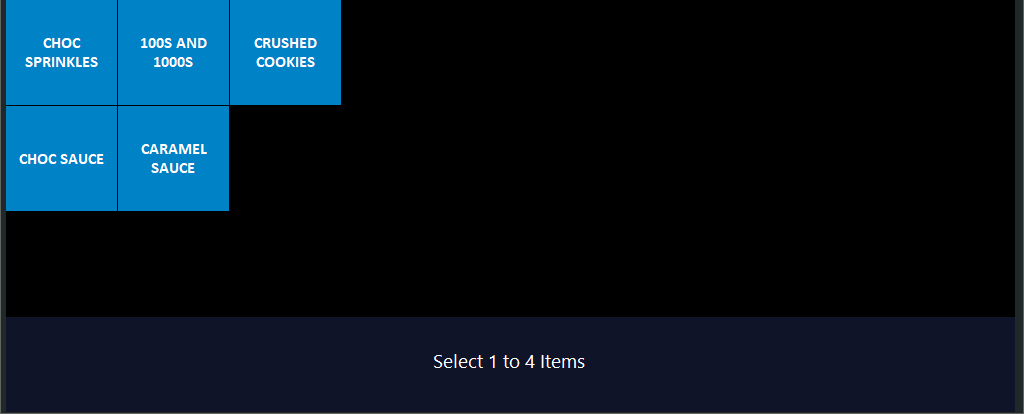
Select the minimum number of Ice Cream Toppings (or select less than the maximum), then press "X" to close the POS Screen Grid.
Or select the maximum number of Ice Cream Toppings which will trigger the POS Screen Grid to close automatically.
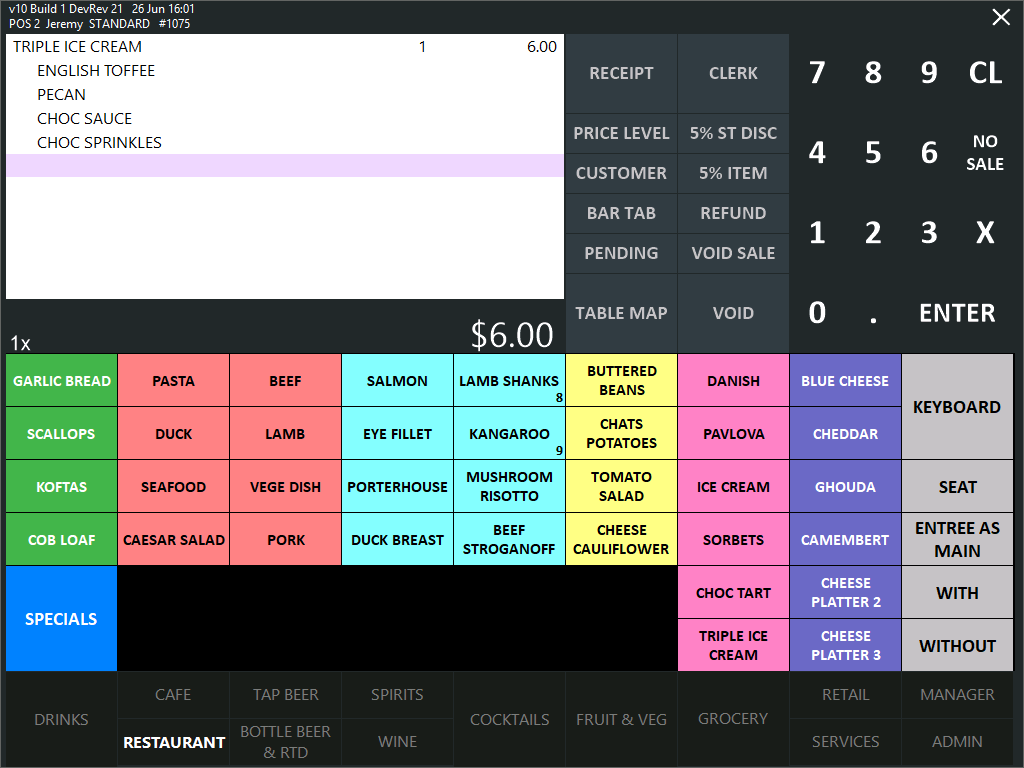
After selections have been made on all the Force Selection Grids, the main POS Screen Grid will be displayed and the items will appear in the sale window.
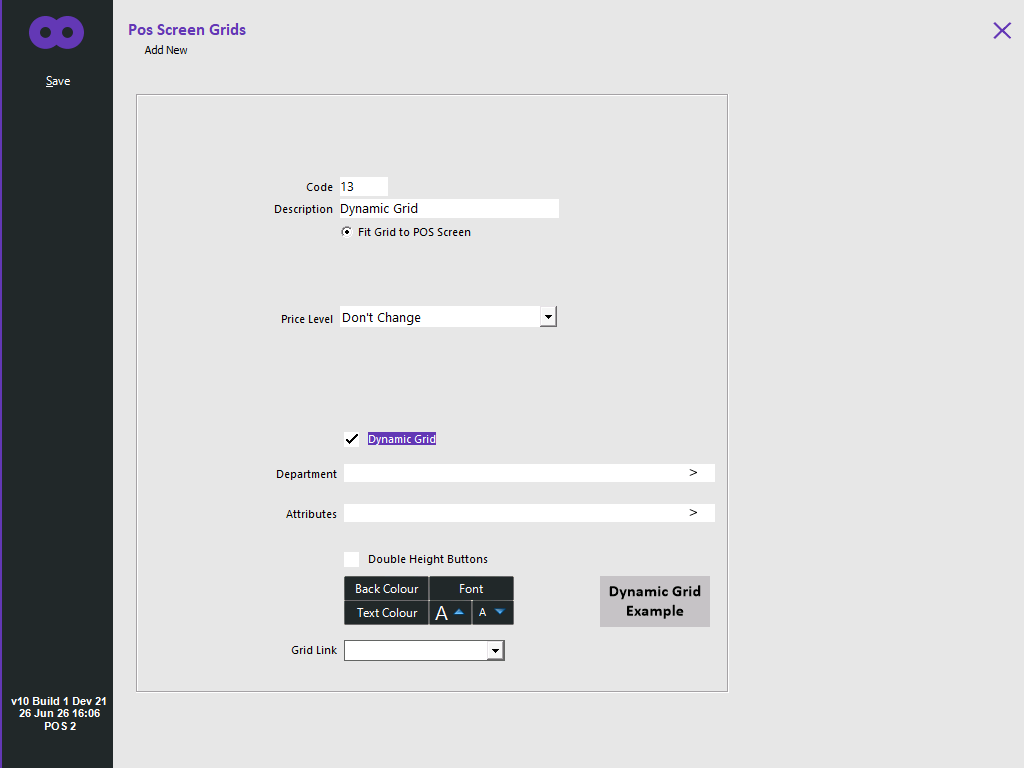
The Dynamic Grid option can be used to create a POS Screen Grid that is dynamically populated with Stock Item buttons using the Departments and Stock Item Attributes that have been configured.
When there are too many Stock Item buttons to fit on one screen, the Dynamic Grid will simply display previous (<<<) and next (>>>) buttons to cycle through multiple pages.
To use the Dynamic Grid option, enable the Dynamic Grid checkbox.
Note that the Dynamic Grid checkbox will only appear when the "Fit Grid to POS Screen" option is selected.
Note!
Dynamic Grids are not currently supported on Pocket Pad/Ideal Handheld.
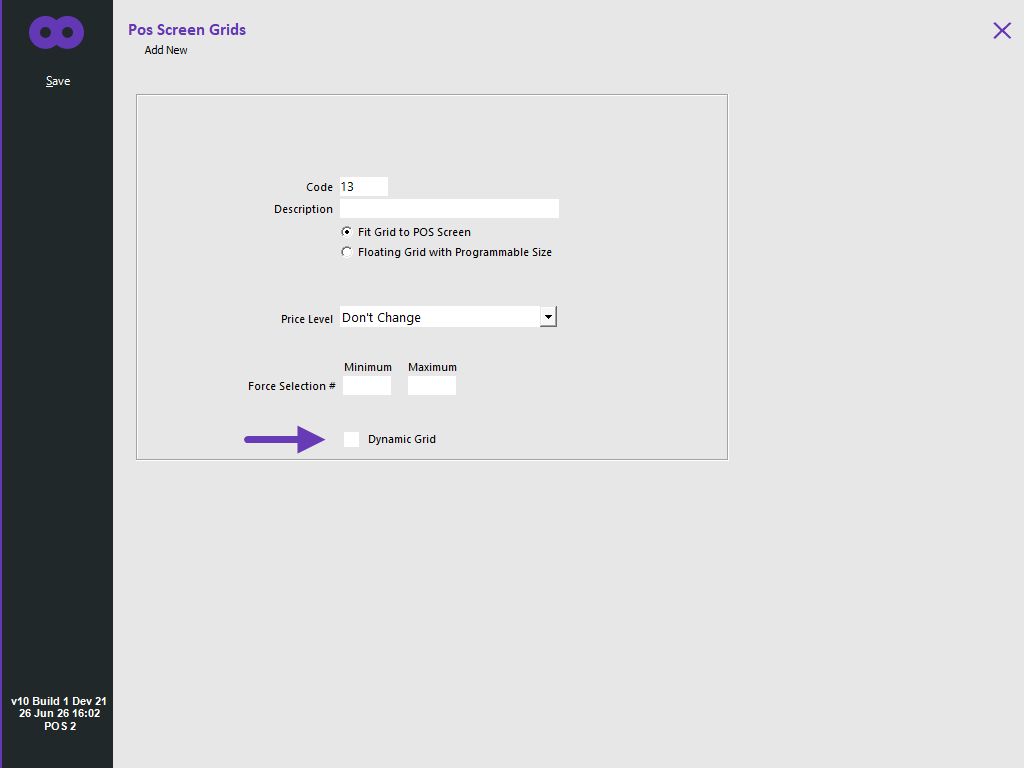
After the Dynamic Grid checkbox has been enabled, additional options will be displayed which can be used to configure the Stock Items that will be included in the Dynamic Grid.
The options specific to Dynamic Grid are as follows:
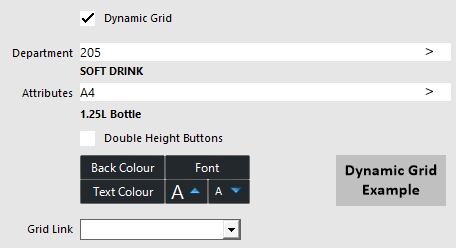
Department: Enter or select the Department Code(s) in this field. The Department Codes can be entered as a comma separated list (e.g. 1,2,3) or as a range (e.g. 1-3), or a combination of both (e.g. 1,2,3,5-10).
Attributes: Enter or select the Attributes in this field.
Note!
Leaving the Department and Attributes fields as blank will result in all Stock Items appearing in the Dynamic Grid ("<<<" and ">>>" buttons will appear on the sides of the Dynamic Grid to navigate between pages).
Double Height Buttons: Toggle this checkbox for each Stock Item button in the Dynamic Grid to be a double height button.
Button Appearance: All Stock Item buttons within the Dynamic Grid will be displayed using the configured appearance.
Grid Link: This option will control which POS Screen Grid is displayed after a Stock Item is added to the sale from the Dynamic Grid.
E.g. If this option is left as blank, the default value will be set to the current Dynamic POS Screen grid, which means that after an item is added to the sale from the Dynamic Grid, the Dynamic Grid will remain on-screen.
If this option is set to MAIN, the MAIN POS Screen Grid will be displayed after adding an item to the sale from the Dynamic Grid.
The below example shows a Dynamic Grid setup for the Department "Soft Drink" and Attributes "1.25L Bottle".
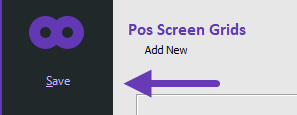
Once the required Dynamic Grid options have been selected, press the "Save" button on the top-left corner to save the Dynamic Grid, then close the POS Screen Grids window.
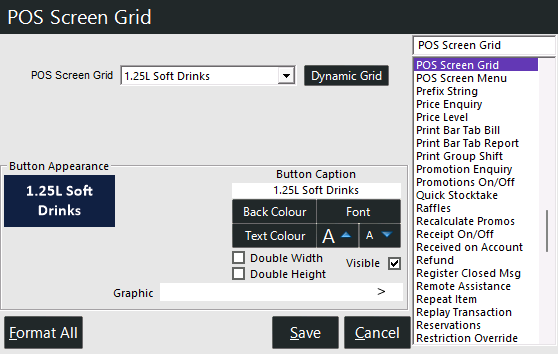
Create a button on the POS Screen to link to the Dynamic Grid by going to:
Back Office > Setup > POS Screen > POS Screen Setup > Select POS Screen Layout > Buttons > Select a POS Screen Tab > Select a blank POS Screen button > Select "POS Screen Grid" and link to the newly created Dynamic POS Screen Grid.
Customise the button appearance/button caption as required > Save button > close POS Screen Layout:
When a button on the POS Screen that is linked to the Dynamic POS Screen Grid is pressed, the Dynamic POS Screen Grid will be displayed and will be populated automatically with Stock Items (based on the Department and Attribute Filters that were configured for the Dynamic Grid).
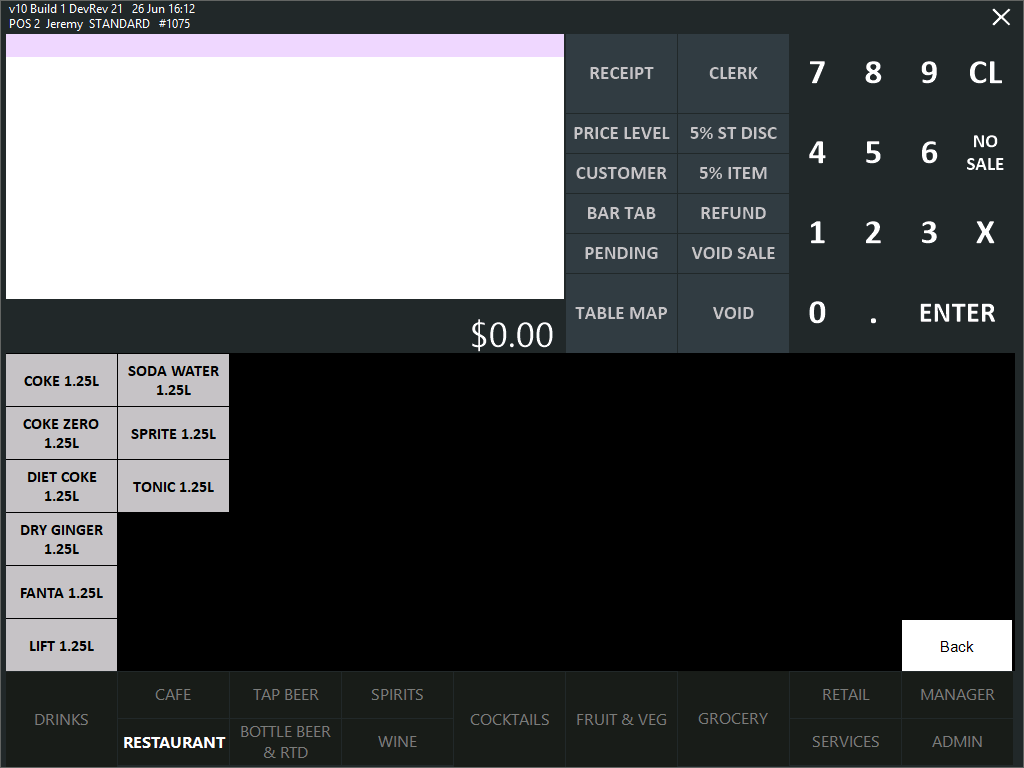
If no Department or Attribute filters are set, then all Stock Items will be displayed in the Dynamic Grid (with the "<<<" and ">>>" buttons to navigate between the multiple pages of Stock Items).