The programming screen is broken up into four different sections.
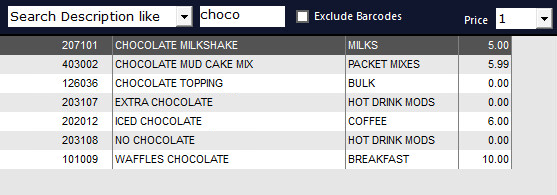
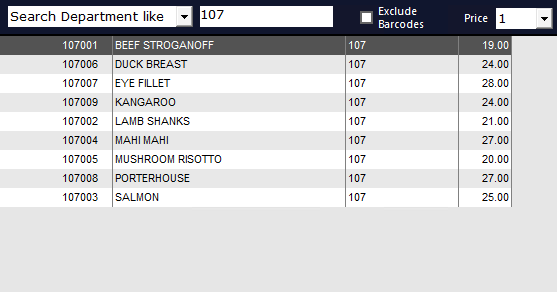
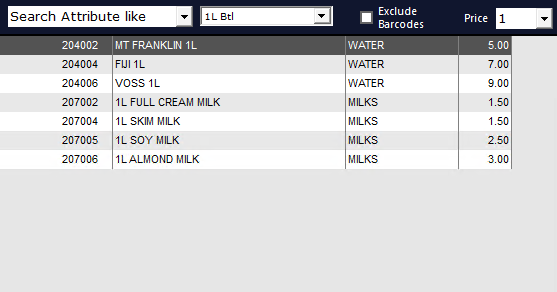
At the top of Section 1 there is a “Search” field. You can use the drop-down menu to select from the following options:
Exclude Barcodes checkbox - When this checkbox is enabled, any Stock Items that have a Scan Code/Barcode will be excluded from being displayed in the list.
Enter the details you want to use for searching which will change the stock items that are displayed.

Searching by Department using the Department Description will be used when the Yes/No Option "Stock Grid Department Search by Department Code" is disabled.
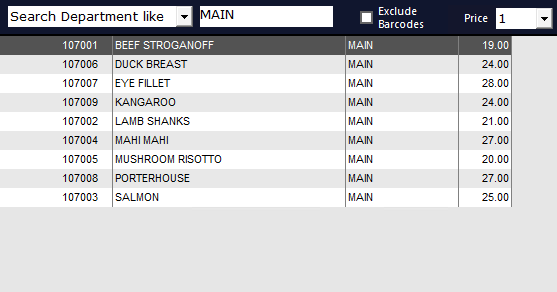
Searching by Department using the Department Description will be used when the Yes/No Option "Stock Grid Department Search by Department Code" is enabled.
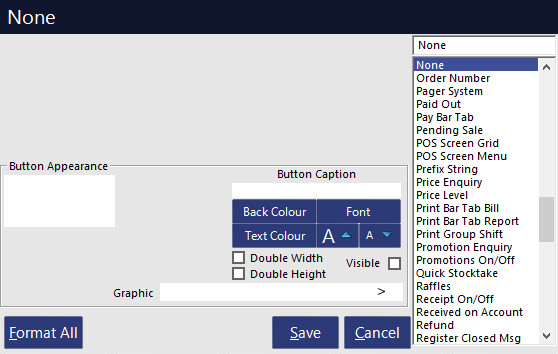
When a button is selected there are three additional options that are able to be used which are Format All, Save and Cancel. Selecting any of these buttons will Format All, Save or Cancel the current selected Button Appearance.
Format All – Selecting this will format ALL BUTTONS on the Tab regardless of if they have a stock item programmed or not. It will not change the visibility setting of the buttons, but it will change the Size, Colour and Font.
Save – Will save the changes made to THIS currently selected button only.
Cancel – Will cancel any changes made to THIS currently selected button only.
It is important to note that there is no “Undo” or “Back” once you have entered this screen.
The “X” button is a Save & Exit function and will save anything that has been done, regardless.
If you make a mistake, you will need to manually fix it before exiting.
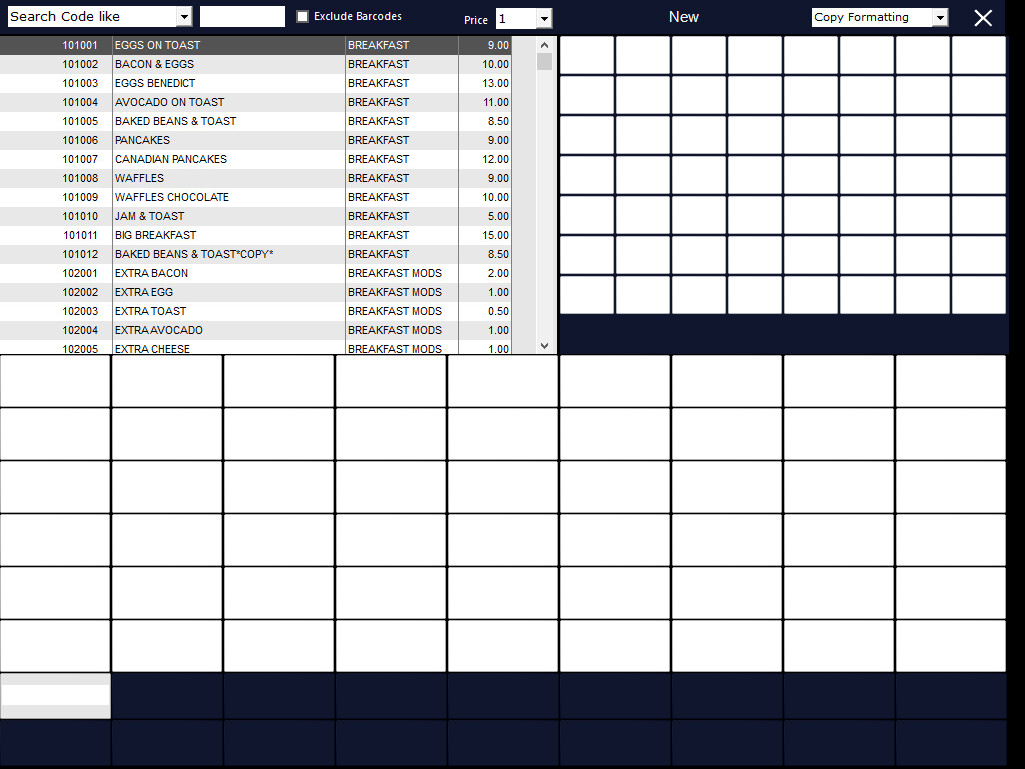
This is the numerical and multiple use section.
Generally the Numerical Pad will be displayed here, along with specialised functions that are used for a lot of sales.
Programming of these buttons will change as the needs of your layout become more apparent with the types of functions you require quick access to.
The Drag-and-Drop functions will work in this area.
By default, Idealpos will automatically have programmed the Numerical keypad and Admin Tab.
These can be changed and modified to your requirements.
This area will display fields that contain information about the Layout being edited and how it can be edited.
Layout Name – This is merely the name of the layout and possesses no functionality.
Drag-and-Drop – This drop-down menu allows you to select from four different choices:
Copy Formatting – Will copy the Colour, Font and Size of the button only.
Copy Button – Will copy the button and make another one.
Move Button – Will move the button from one location to another.
Copy Font Only – Will copy only the font settings of the button.

As soon as a button has been created, edited or deleted, the changes will appear instantly on the layouts of the POS Terminals that are using that particular Layout.
It is for this reason that you should do all button programming out of business trading hours to minimise any issues this can create.
Any buttons that have not been programmed will be flat white and not represent a button at all.
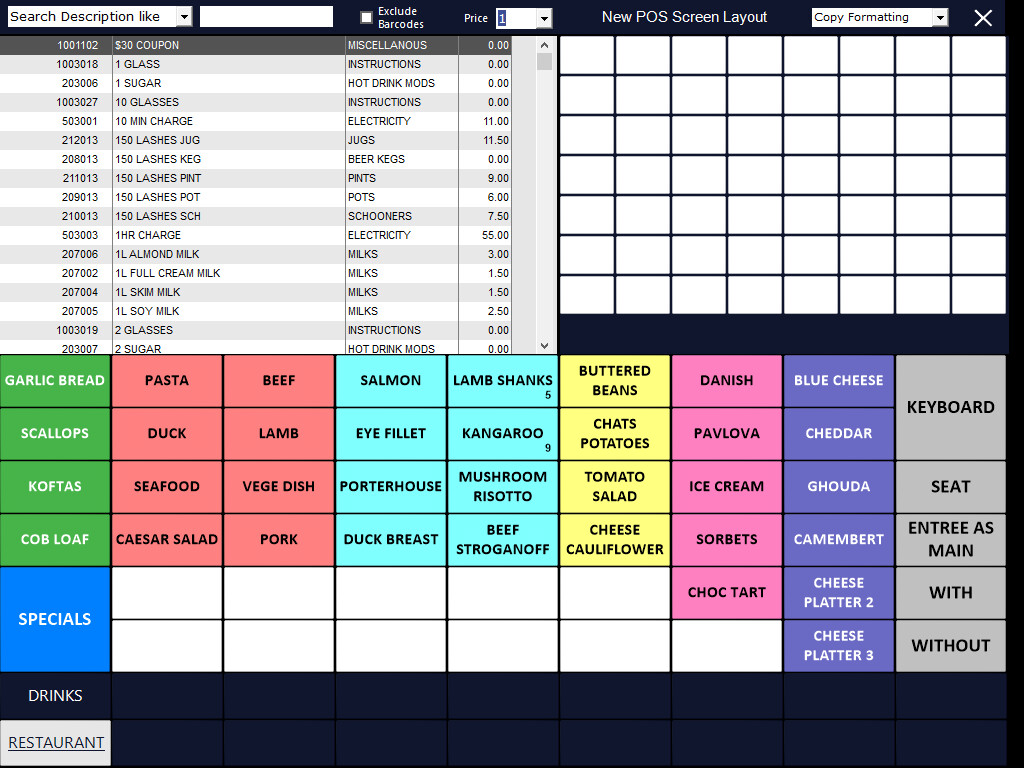
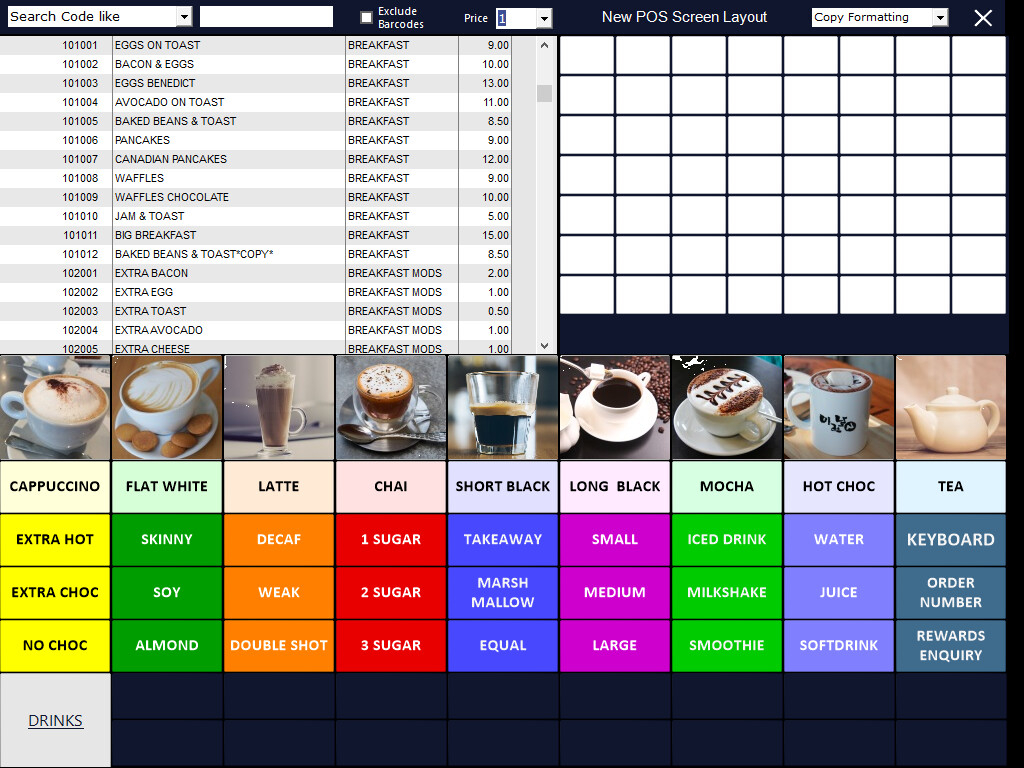
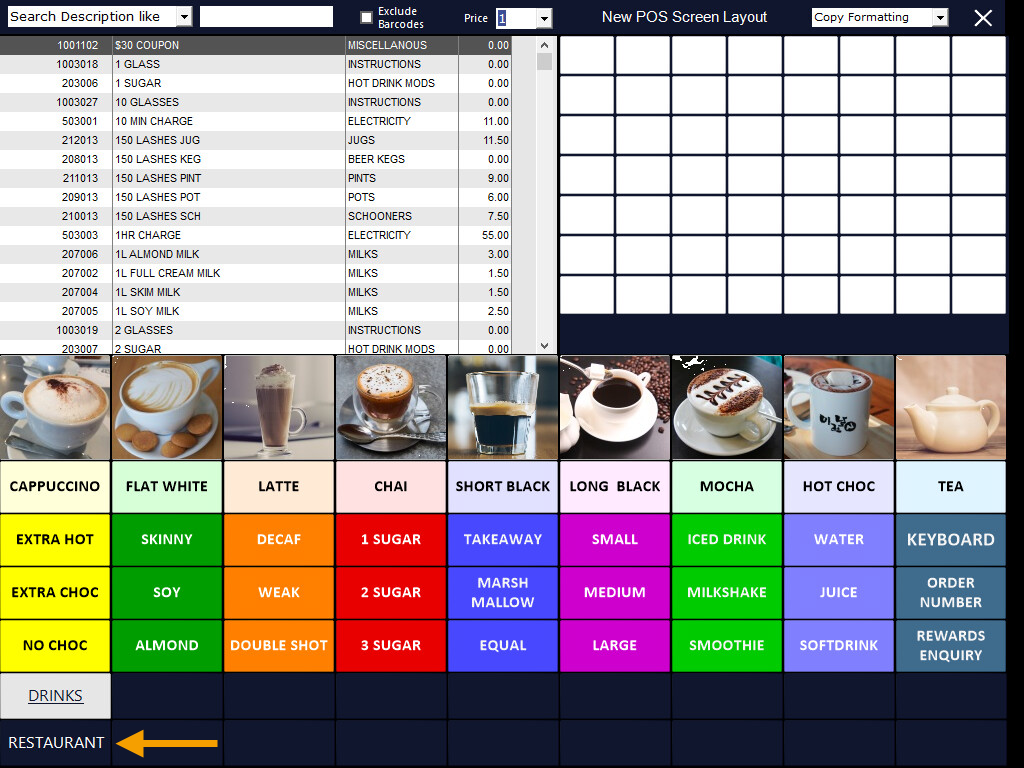
This section contains all the tabs and buttons that will be used on the POS Screen.
This area contains 18 different Tabs or Pages, and allows you to expand the button functionality into different product segments you want to use.
Each tab contains a maximum of 54 buttons in a 9 x 6 button grid.
Within this grid you can use any combination of Double-Width, Double-Height, and Double Width & Height buttons.
Each POS Screen Tab Button shown at the bottom of the POS Screen can have a Graphic assigned to it.
Click on the POS Screen Tab Button to modify it.
The available options are:
Button Caption - Enter the button Caption
Double Height - This option is only available for POS Screen Tab Buttons that are located on the top row. Enabling this option will result in the button on the top row covering the button located below it on the bottom row.
Graphic - To display a Graphic on the POS Screen Tab Button, select the image here. The graphic should be located in the Idealpos Pictures folder.
The Pictures folder is typically available in the following location, but this may vary based on the Operating System:
C:\ProgramData\Idealpos Solutions\Idealpos\Pictures\
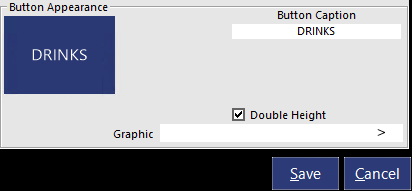
An example of a POS Screen Tab Button with a Graphic is shown below:

The option to Copy a Single Tab is available.
This function can be used to copy a Single POS Screen Tab and all the buttons within the tab from another POS Screen Layout to the currently selected POS Screen Tab.
From the POS Screen Layout window, click on a POS Screen tab at the bottom of the window.

Click on the 'Copy Single Tab' button.
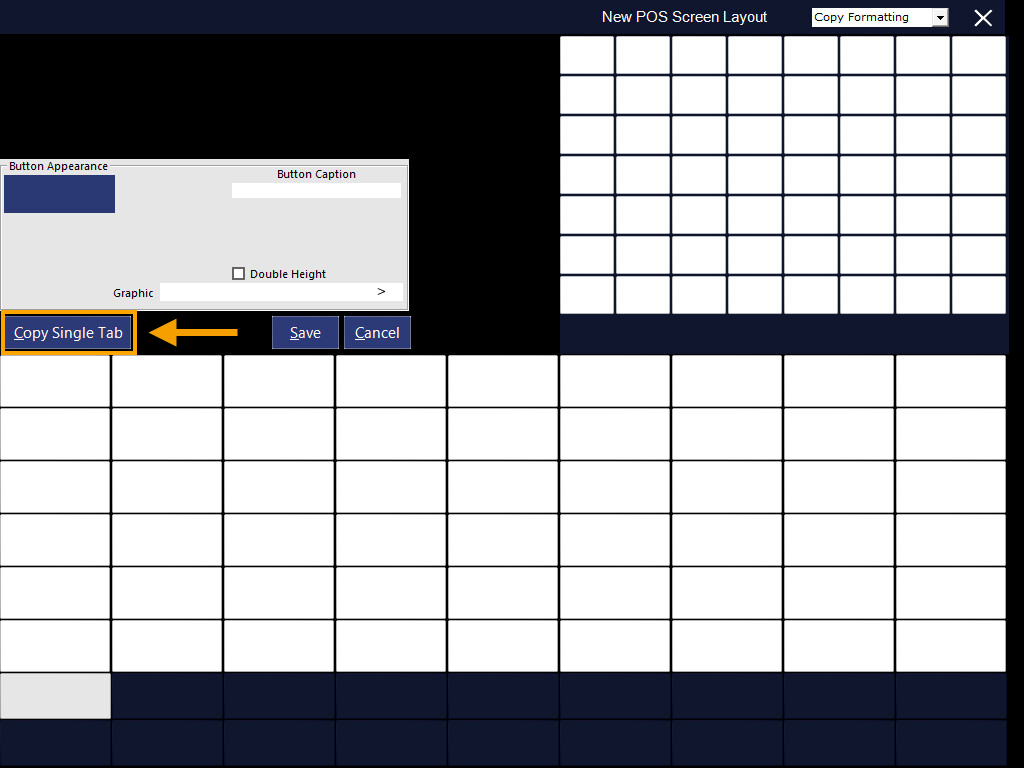
The 'Copy Single Tab From' window will be displayed:

Select the POS Layout to copy from, select the Tab to copy, then press the 'Copy' button.

A confirmation prompt will be displayed.
When the 'Yes' button is pressed, the selected POS Screen Tab and all buttons within the tab will be replaced with the POS Screen Tab from the POS Screen Layout.
As per the warning shown on the prompt, this operation cannot be undone.

After pressing 'Yes', the copied POS Screen Tab will be displayed.
Note!
When a Double Height POS Screen tab is copied to a POS Screen Tab on the top row, it will be copied as Double Height and will cover the POS Screen tab button on the bottom row.
If the POS Screen tab button on the bottom row has already been configured and contains buttons within the tab, that Tab Button will still exist, as will all the POS Screen buttons configured within that tab.
To regain access to the POS Screen Tab button on the bottom row, simply click on the Double Height POS Screen tab button and untick the 'Double Height' checkbox.
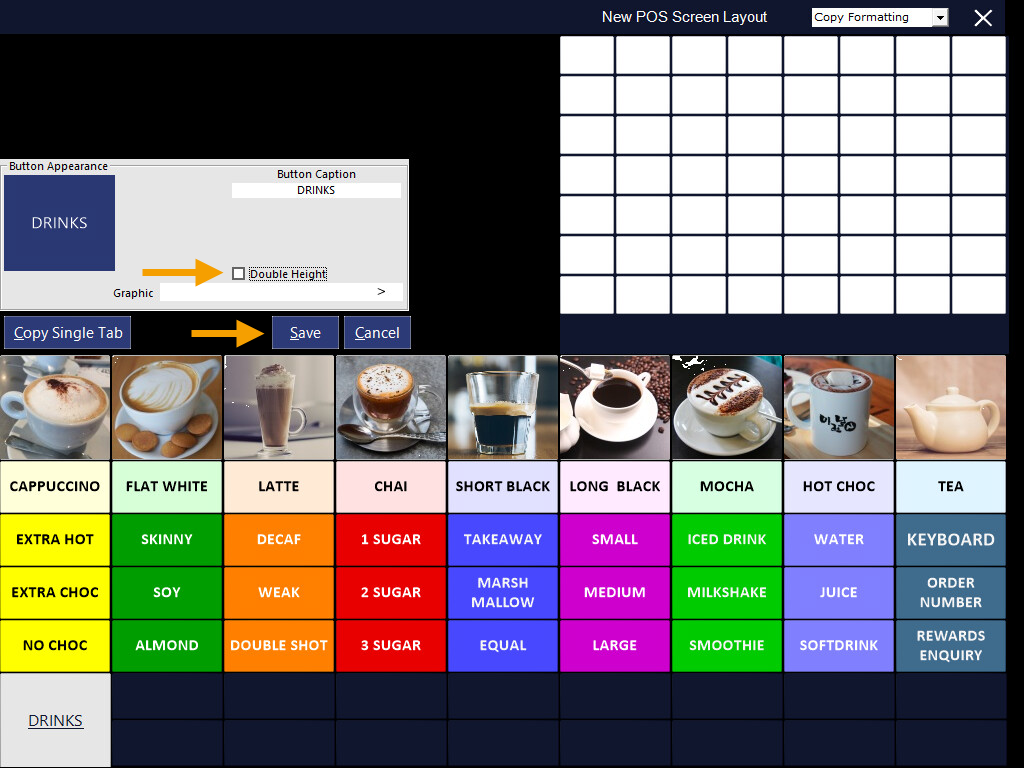
After unticking 'Double Height' and saving the change, the button below will reappear.
Clicking on the POS Screen tab button will reveal all the POS Screen buttons still exist within that tab.