The process for using Now Book It with Idealpos is outlined as follows.
Click on any of the following links to skip to the required section:
Reservations can be placed in Now Book It using the following methods:
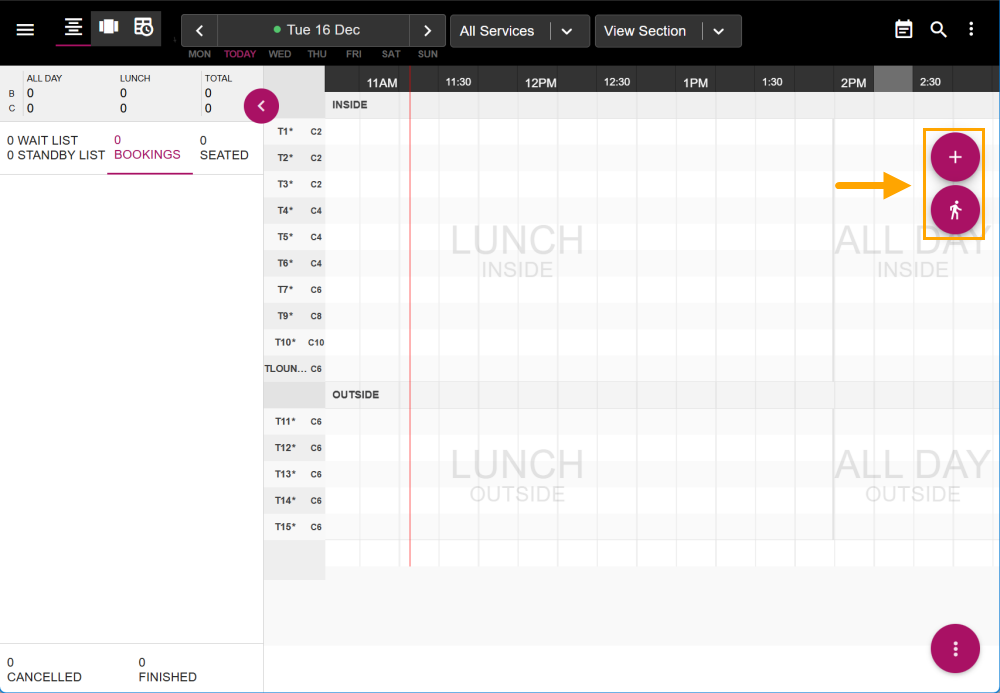
Login to the Now Book It website (https://restaurant.nowbookit.com), then on the top-right corner of the default Bookings page, press the "+" button (to create a Reservation against a Customer name) or press the person symbol (to create a Walk-In Reservation).
Press the "+" button on the top-right corner.

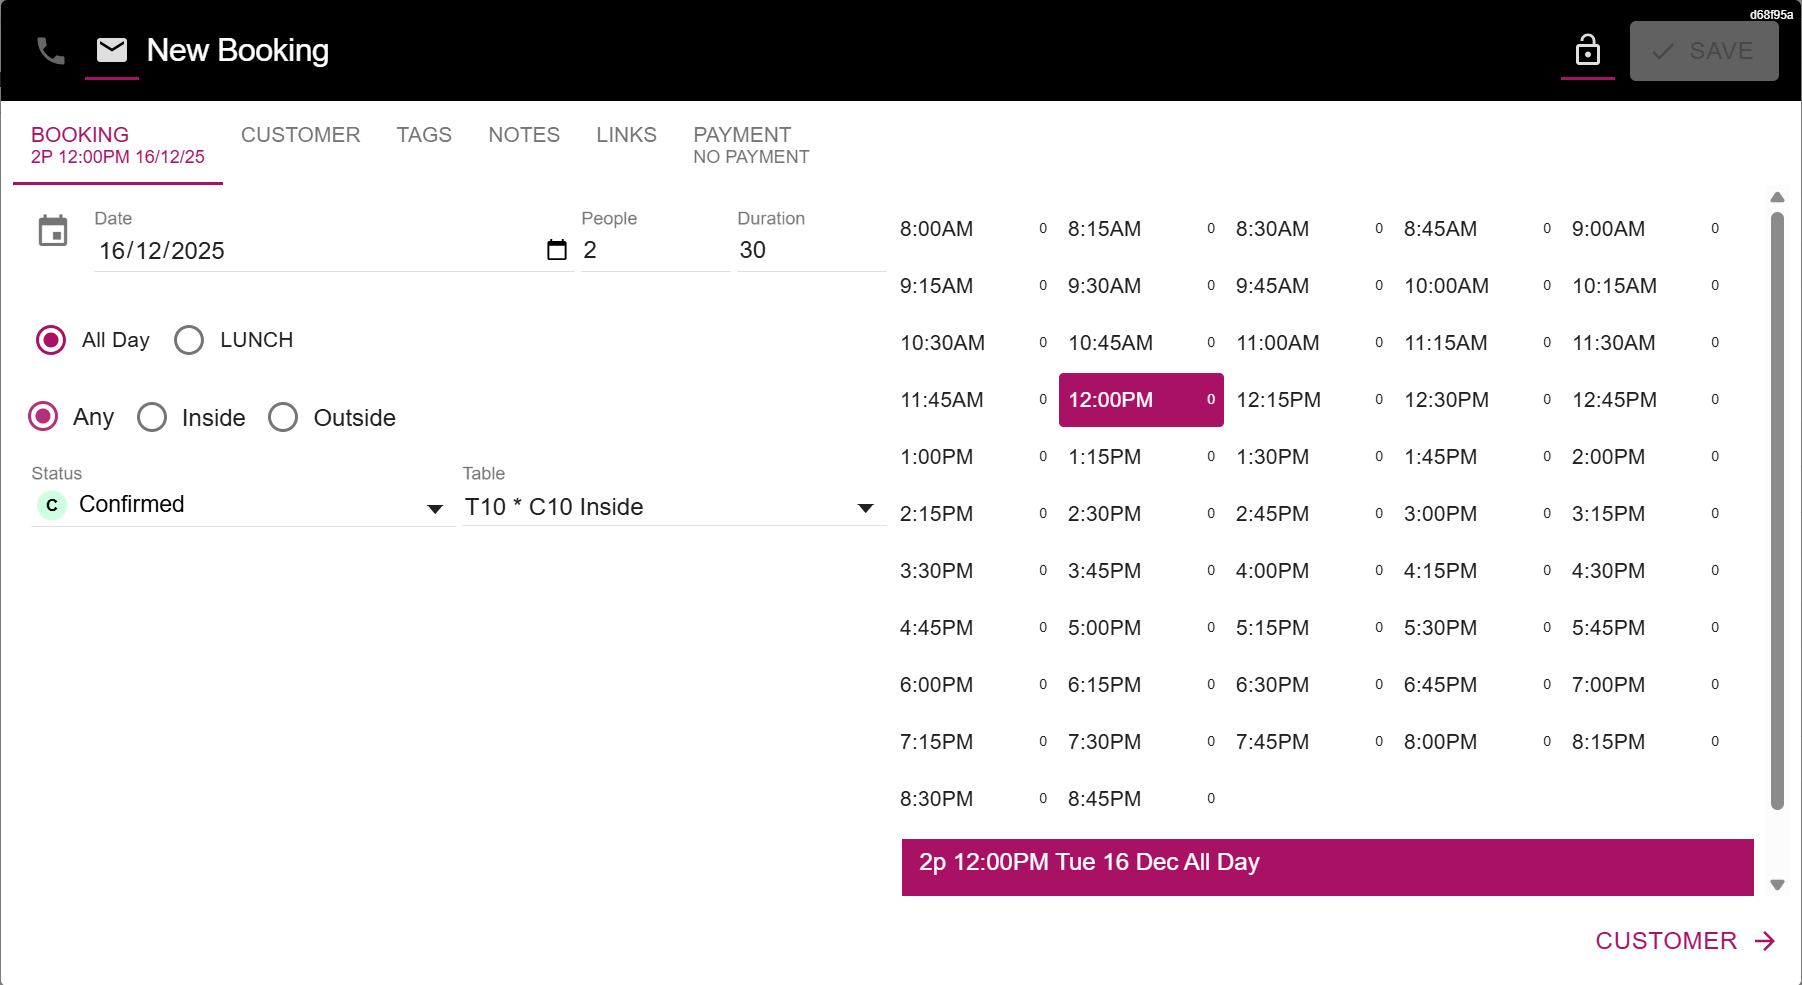
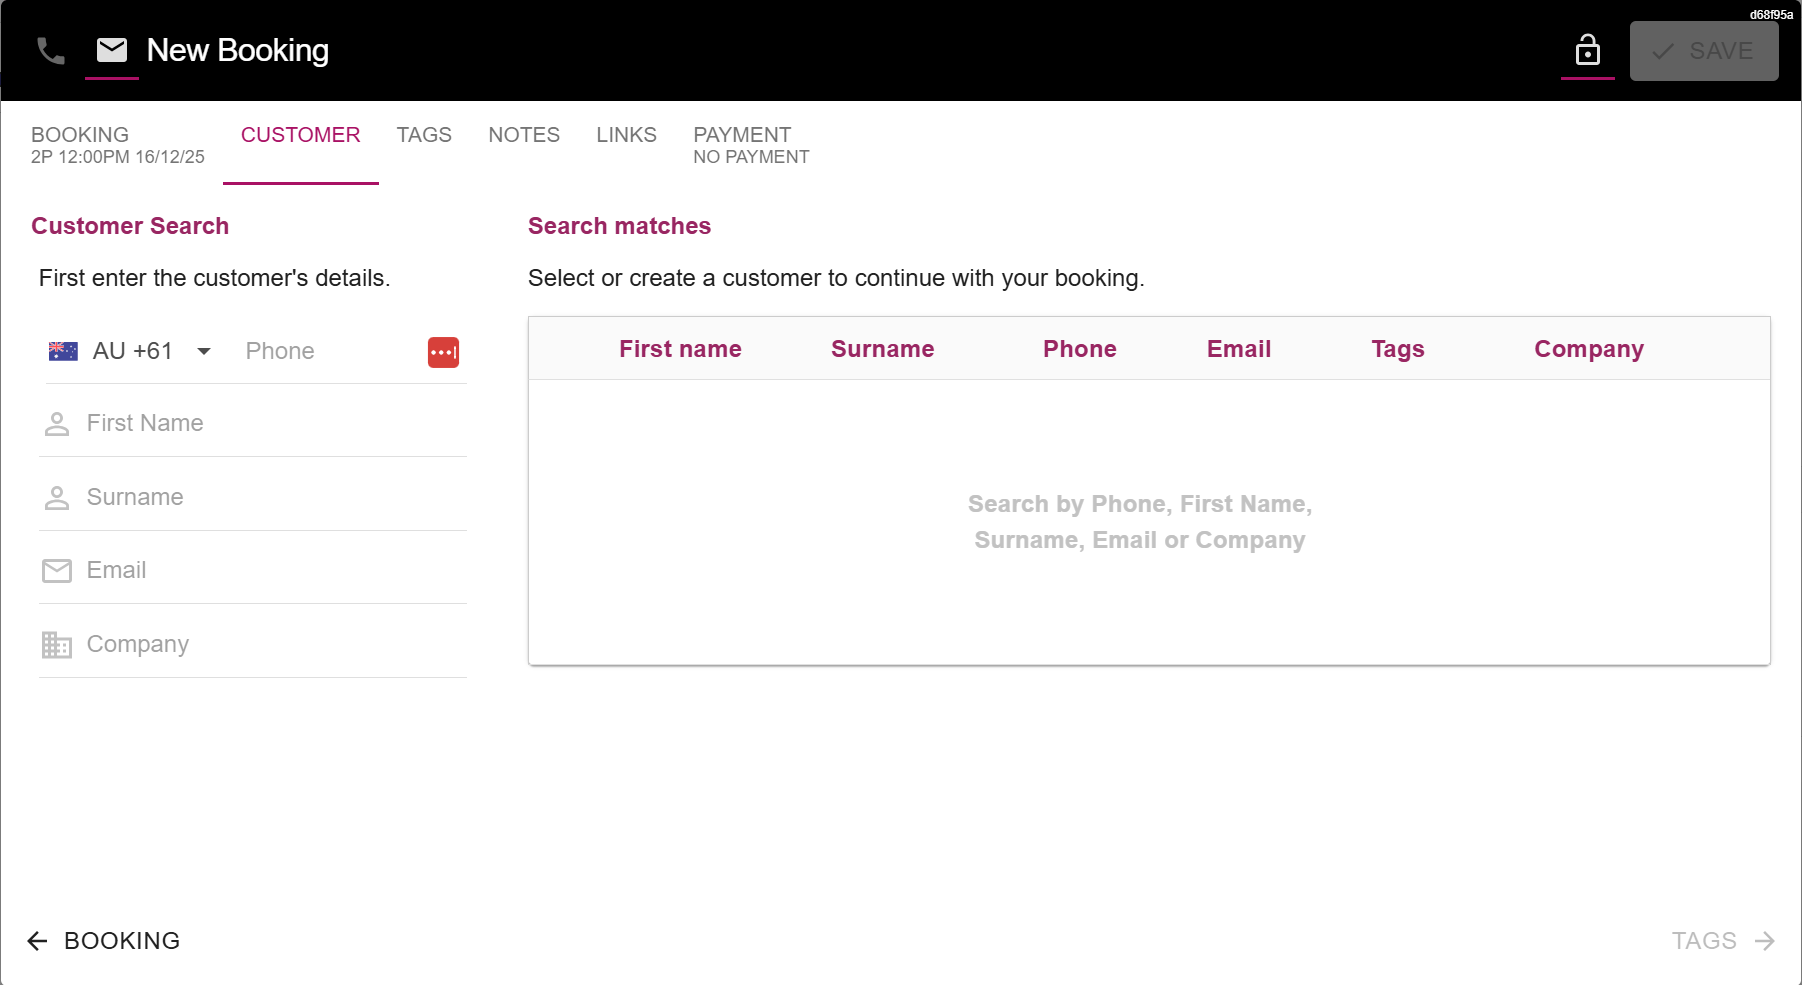
A "New Booking" window will appear.
Select the Date, Number of people, Duration, Session, Area, Status, Table, Time and enter any other required details, then press the "Customer" button on the bottom-right corner.
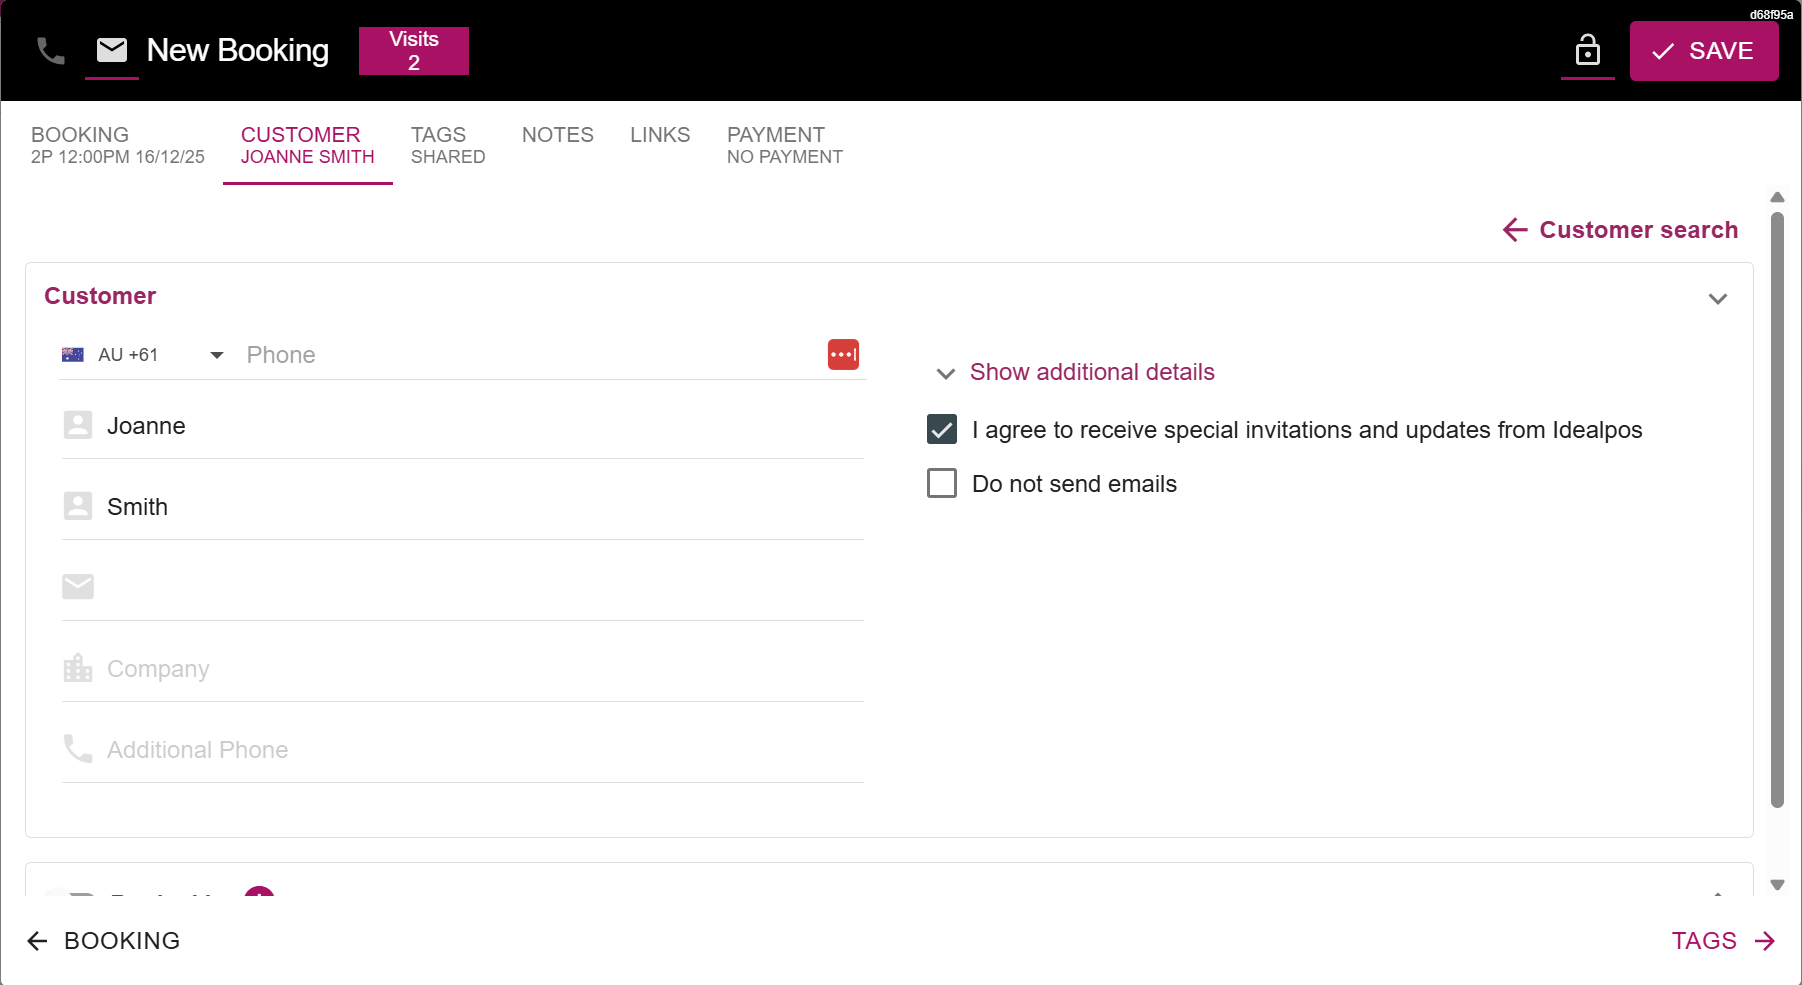
Enter the customer's name into the fields on the left-hand side.
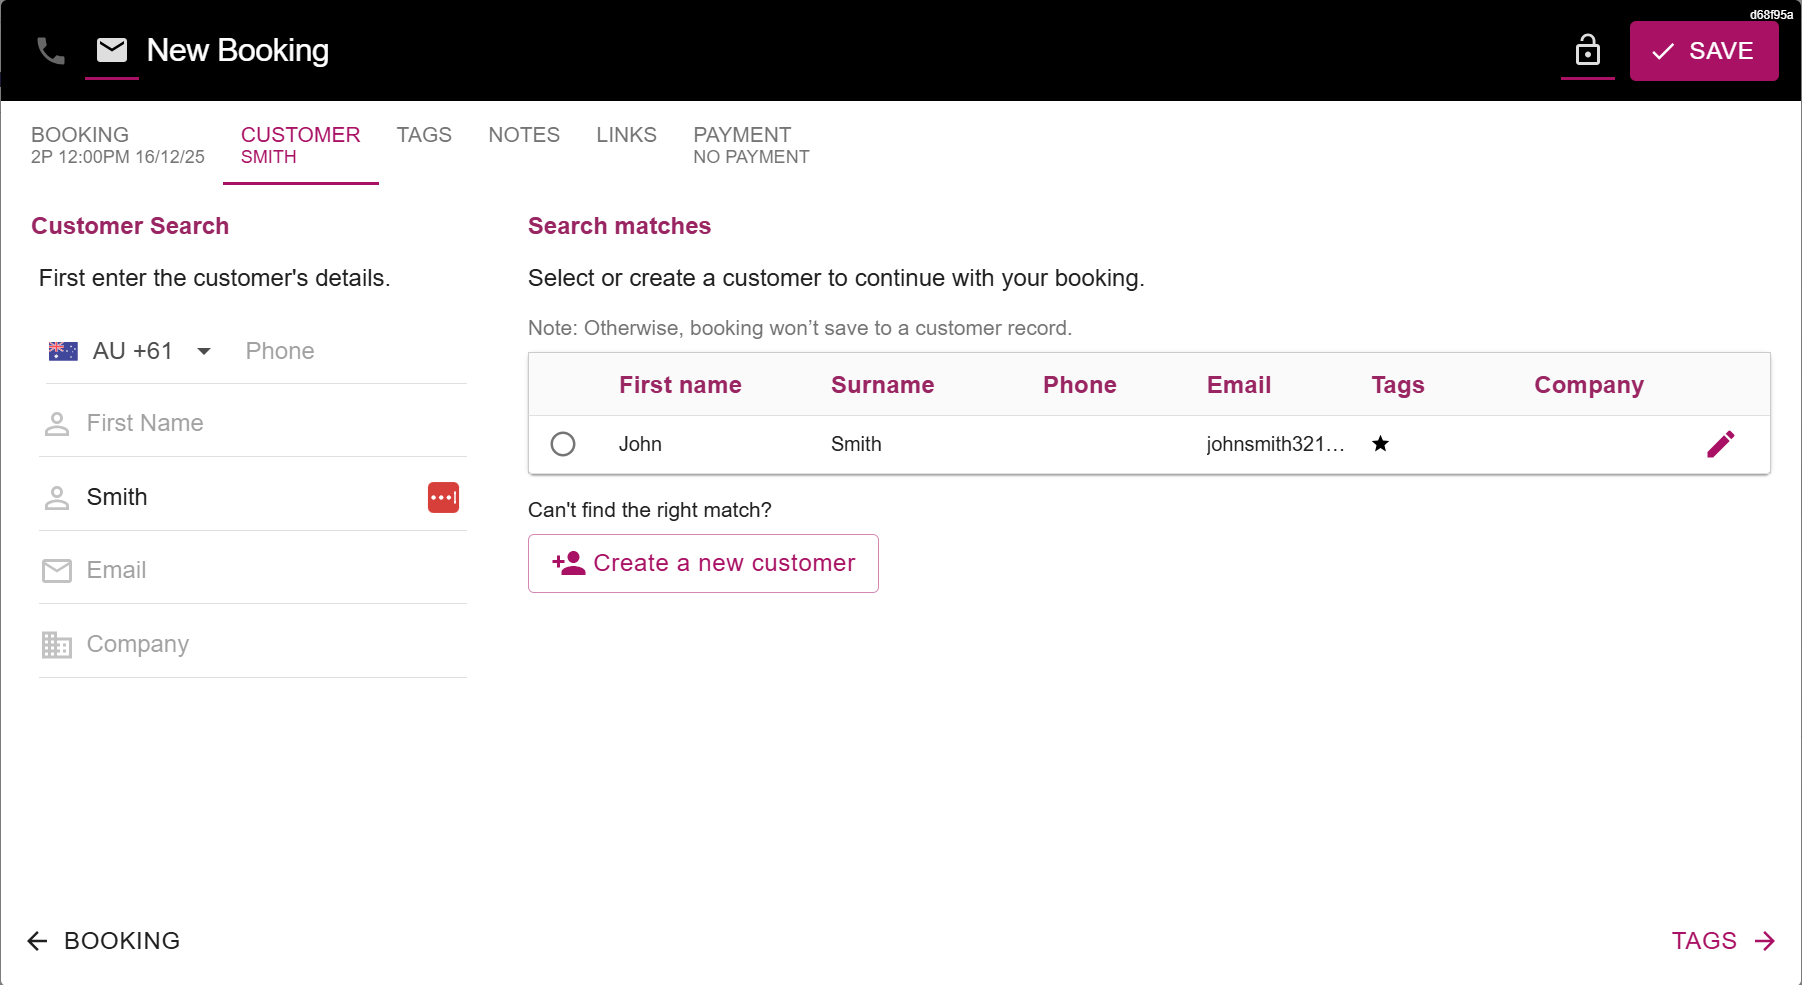
If a customer matching the entered details is found, select the customer.
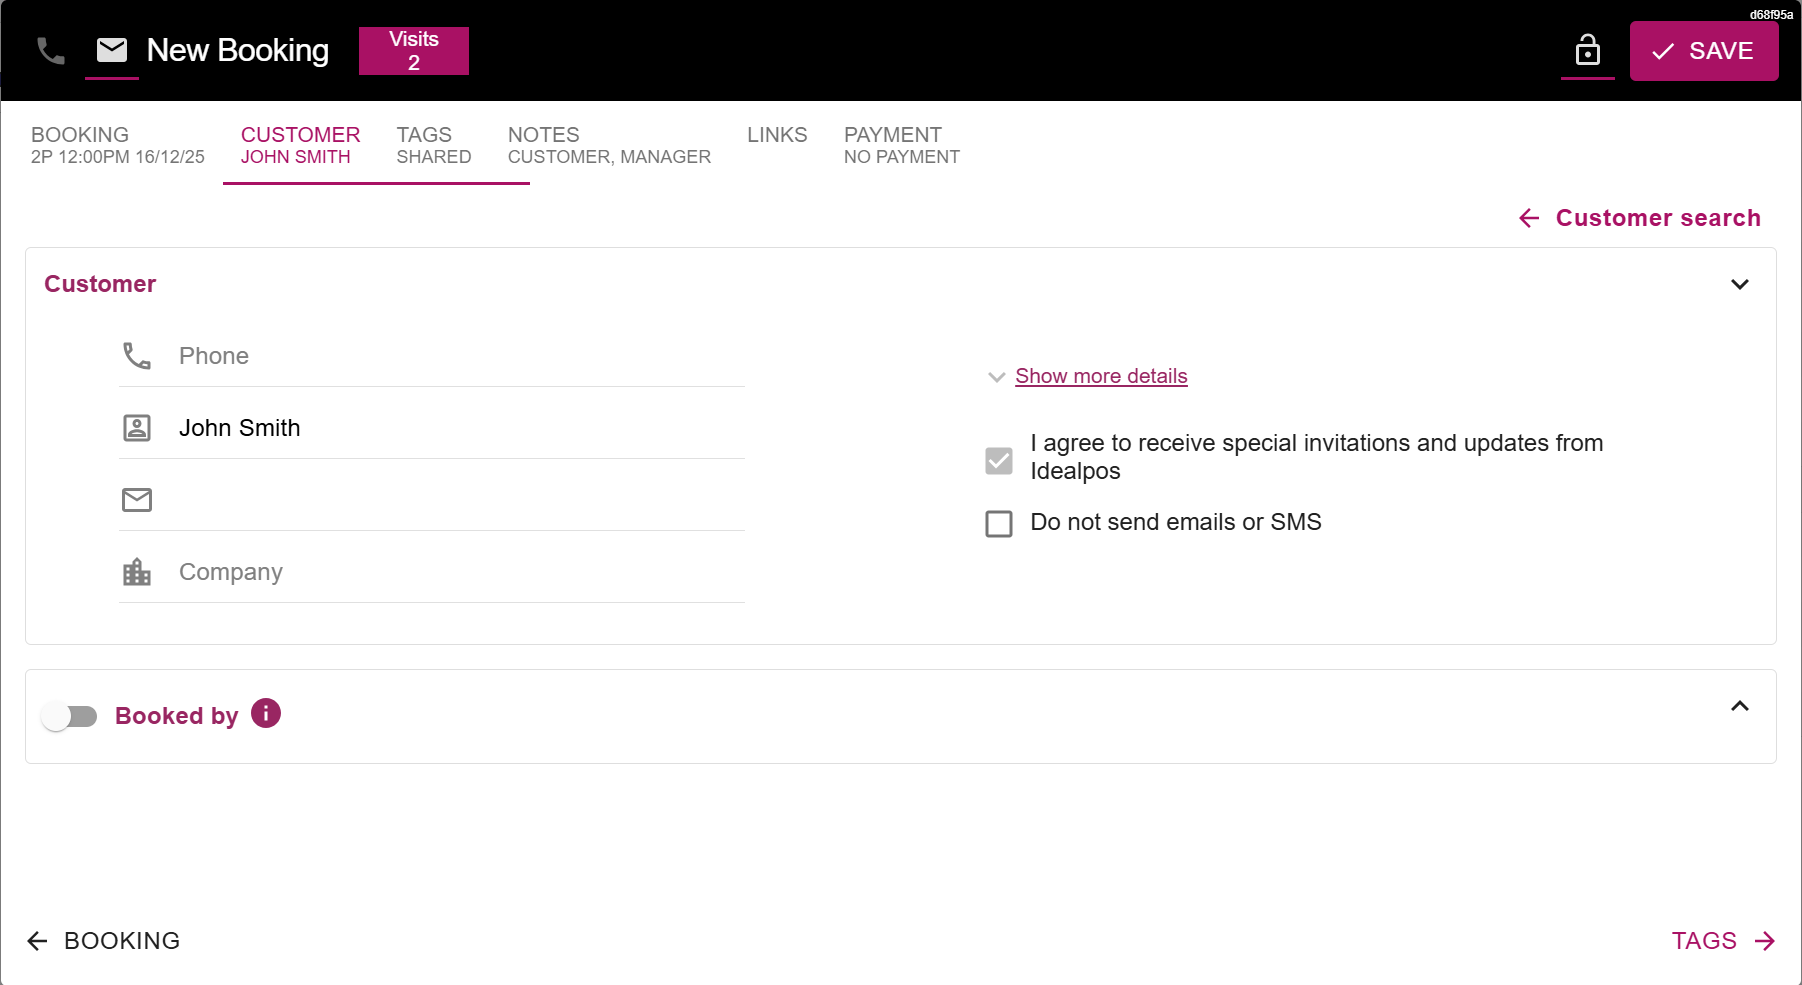
The customer's details will be displayed. Press the "Save" button on the top-right corner to save the customer's reservation.
If a matching customer isn't found, press the "Create a new customer" button.
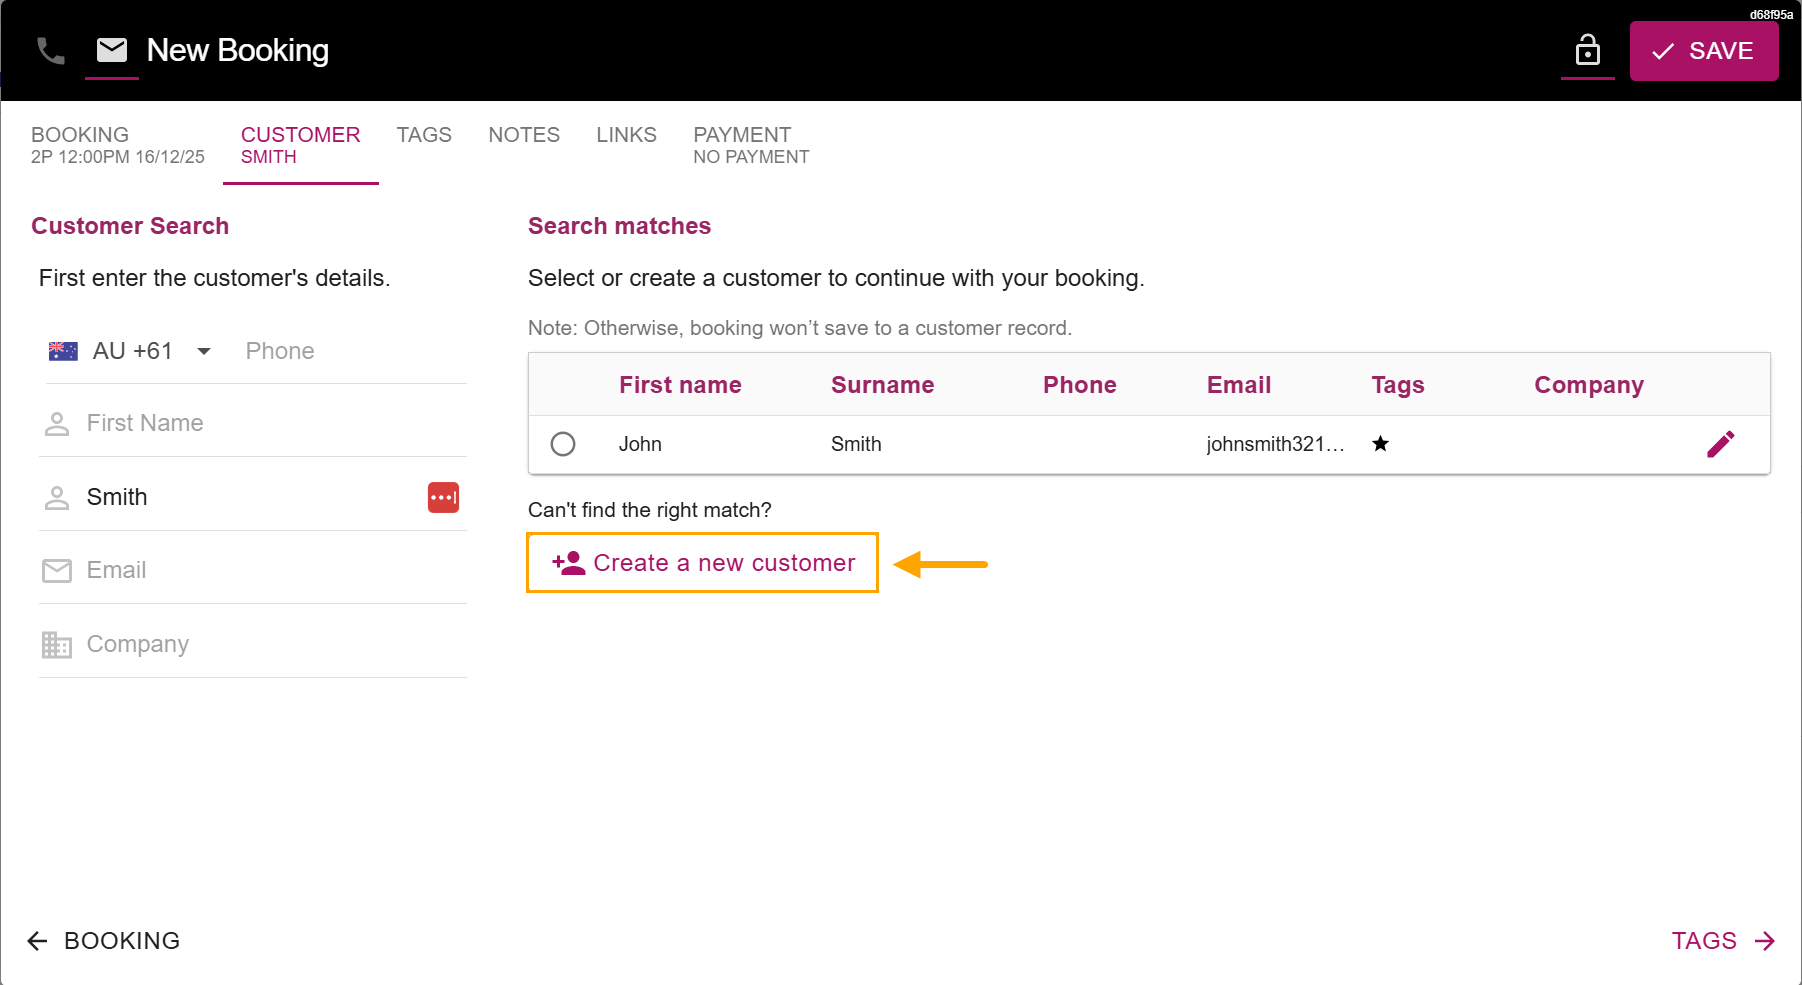
This will open a window which will enable the new customer's details to be entered.
Enter the customer's details, tags and notes as required.
Any fields that were populated during the customer search will be pre-populated.
Press the "Save" button on the top-right corner to save the customer and the reservation.
If the venue requires the customer to make a payment prior to their reservation, this can be set in the Payment tab; see New Booking Payment below.
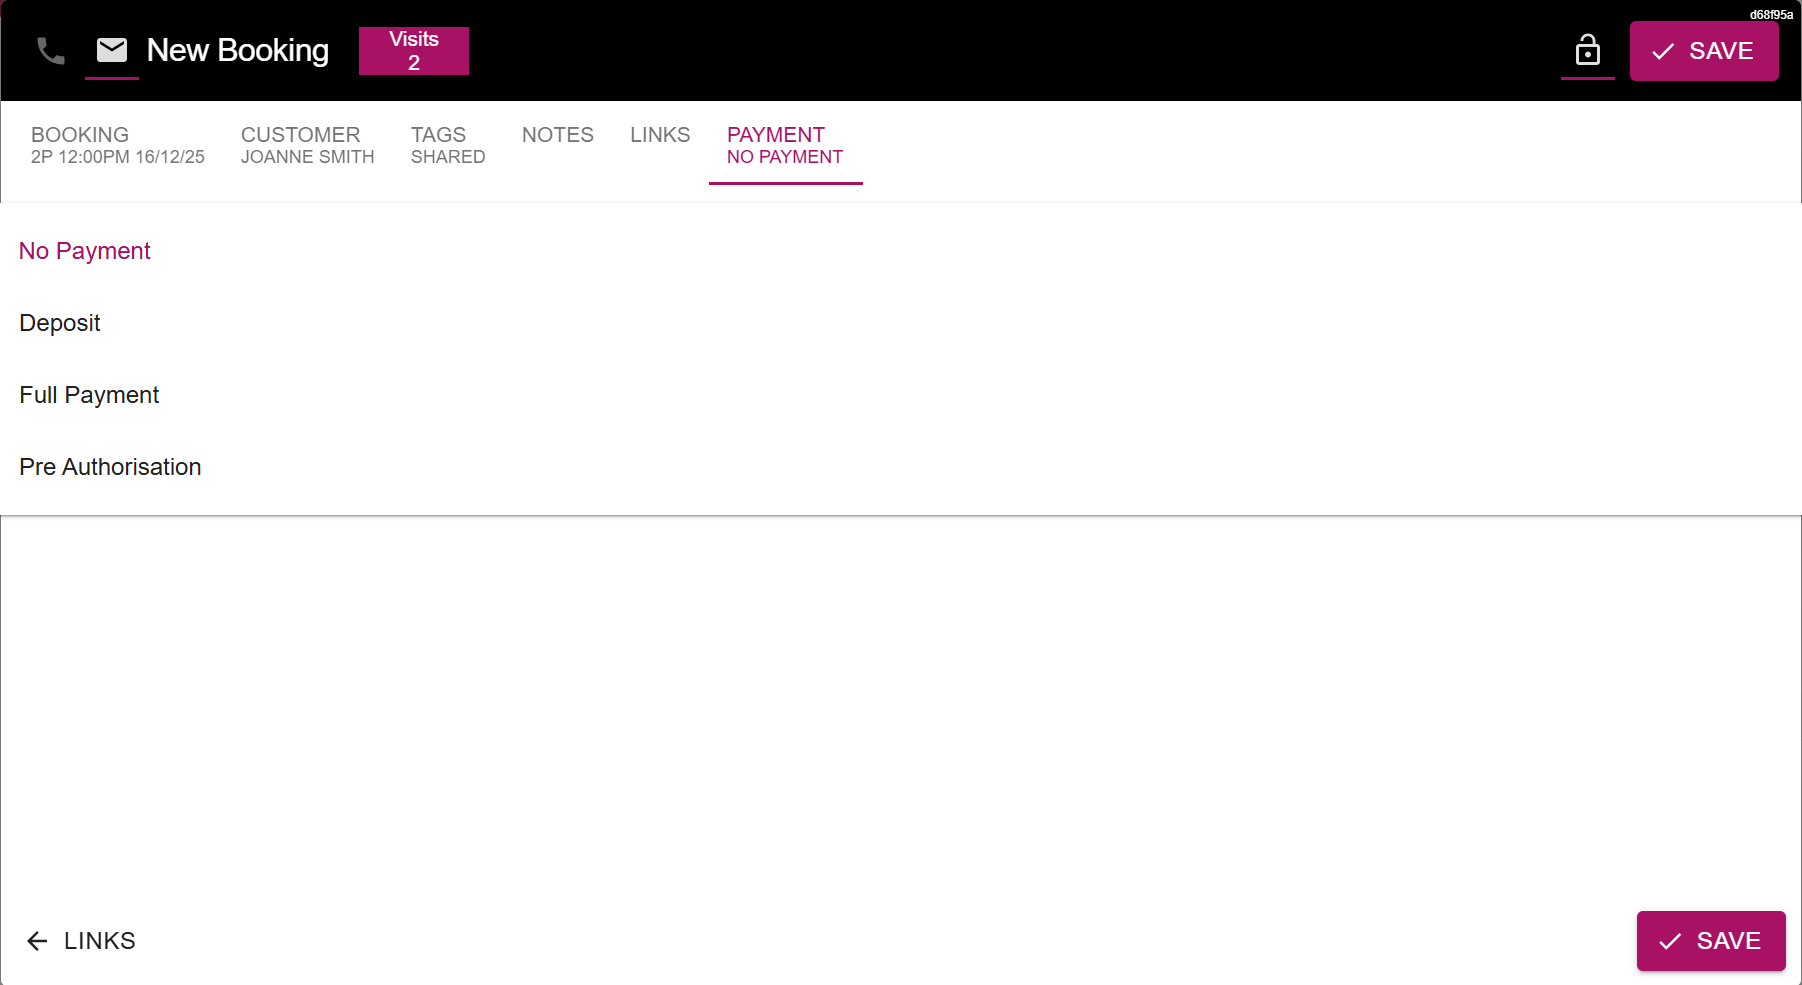
Select the Payment option at the top of the New Booking window.
This section controls whether a payment from the customer will be required for their reservation.
Idealpos supports the following options:
Once the required Payment option has been selected and the Price entered, press the "Save" button.
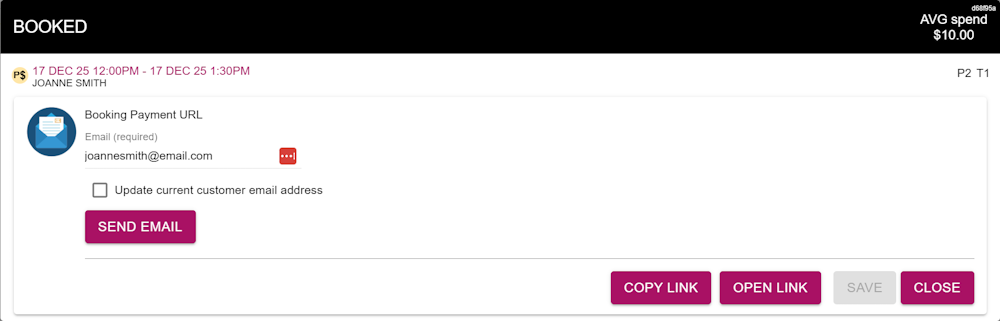
If a Payment Type that requires payment from the customer, a prompt will be displayed with an option to send the Booking Payment URL to the customer's email address via a "Send Email" button.
Other options available include:
Note!
While a Reservation is waiting for a payment from the customer, it will not appear in the Idealpos Table Map or Idealpos Reservations window (Restaurant > Reservations button).
The Reservation will be created in Now Book It and will appear in the Now Book It site with a status of "Pending Payment".
Once the customer processes their payment as per the process outlined below, the Reservation's status will be updated and will then appear in the Idealpos Restaurant Table Map and Idealpos Reservations window.
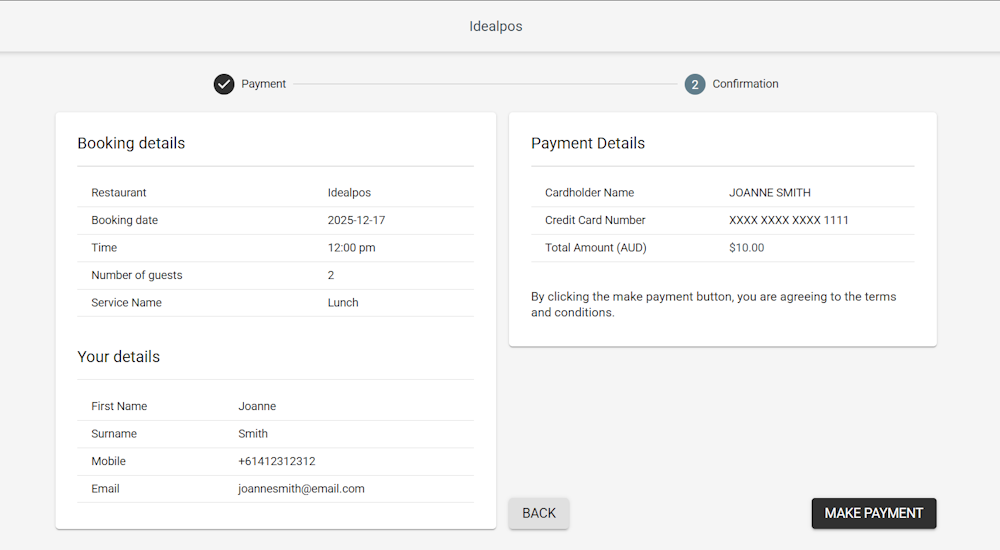
When the customer visits the Booking Payment URL, they will be shown a form similar to the below:
The customer will enter their card details and press "Next" to proceed with their reservation.
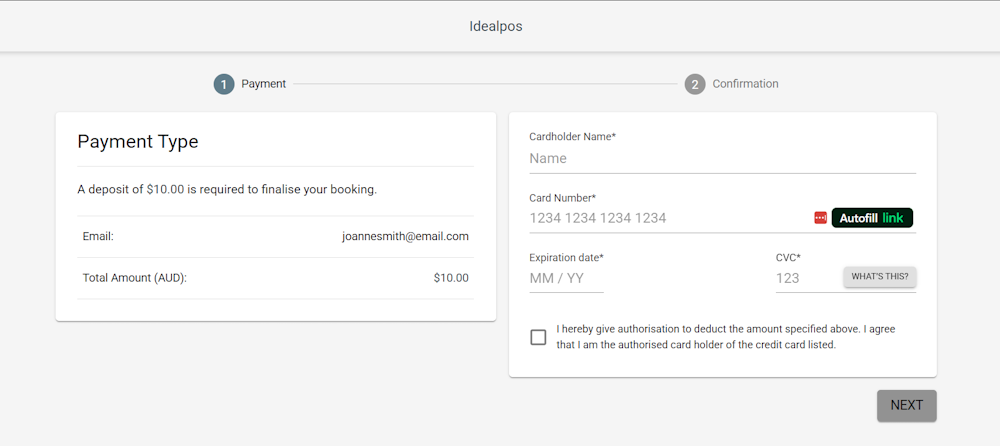
The confirmation step will display a confirmation of their reservation and the amount being paid.
To proceed, the customer will press the "Make Payment" button to proceed.
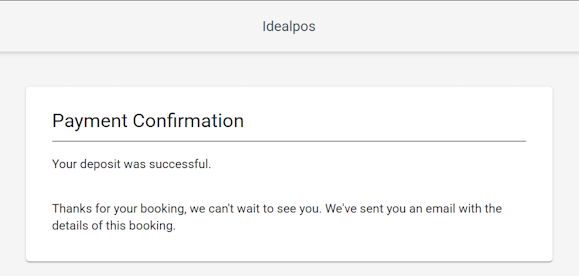
After the customer makes their payment and the payment is successful, they are shown a Payment Confirmation prompt.
The Reservation will appear in Now Book It with a Status of Confirmed.
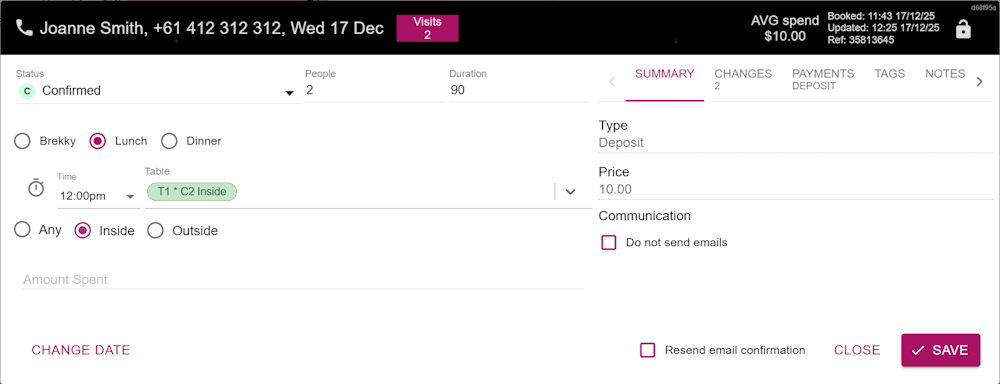
The Reservation will appear in the Idealpos Table Map and the Idealpos Reservations window (accessed via the Table Map > Reservations button).

After a Reservation has been created, a Booked prompt will appear to confirm the creation of the booking.
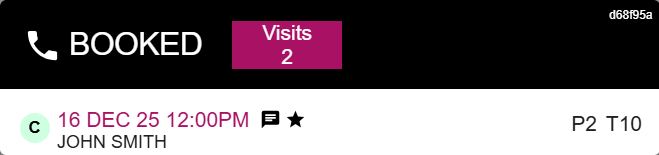
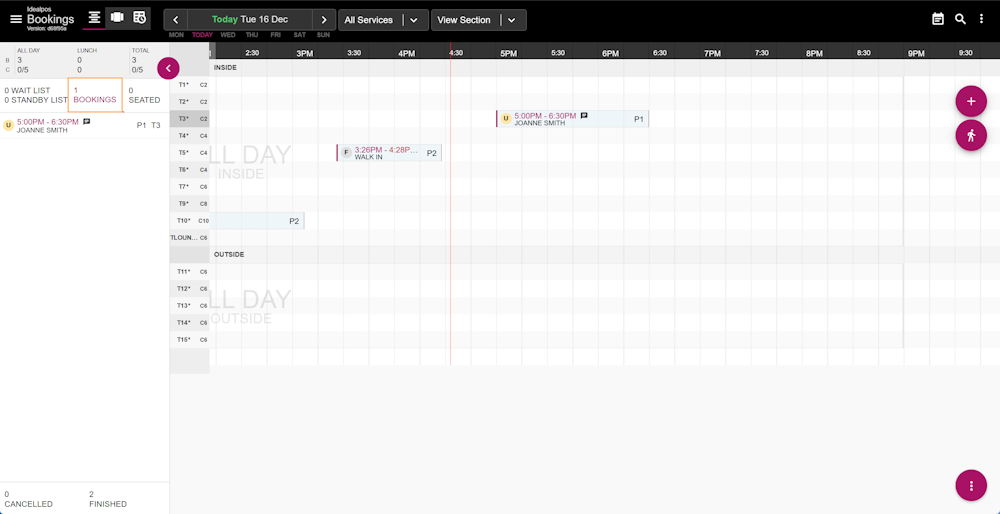
The booking will appear on the Bookings page of Now Book It.
The Reservation will also appear in the Idealpos Reservations window (accessed via the Idealpos Table Map > Reservations button).

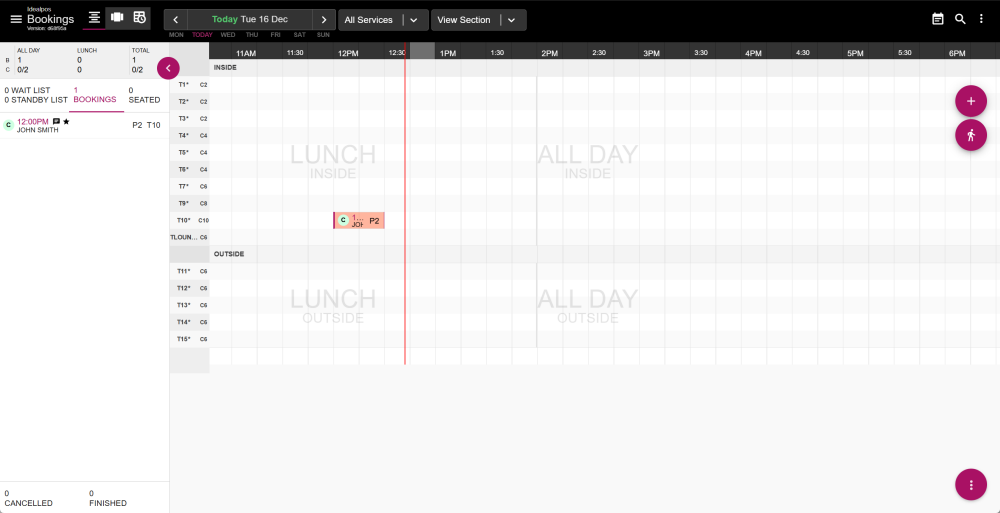
Press the person button on the top-right corner.

The "New Walk in" window will appear.
The current time will appear in the time field, which can be adjusted if required.
Select the Number of people, Duration, Session, Area, Status, Table, Time and any other details as required.
Then select "Seat for XX:XXAM/PM".
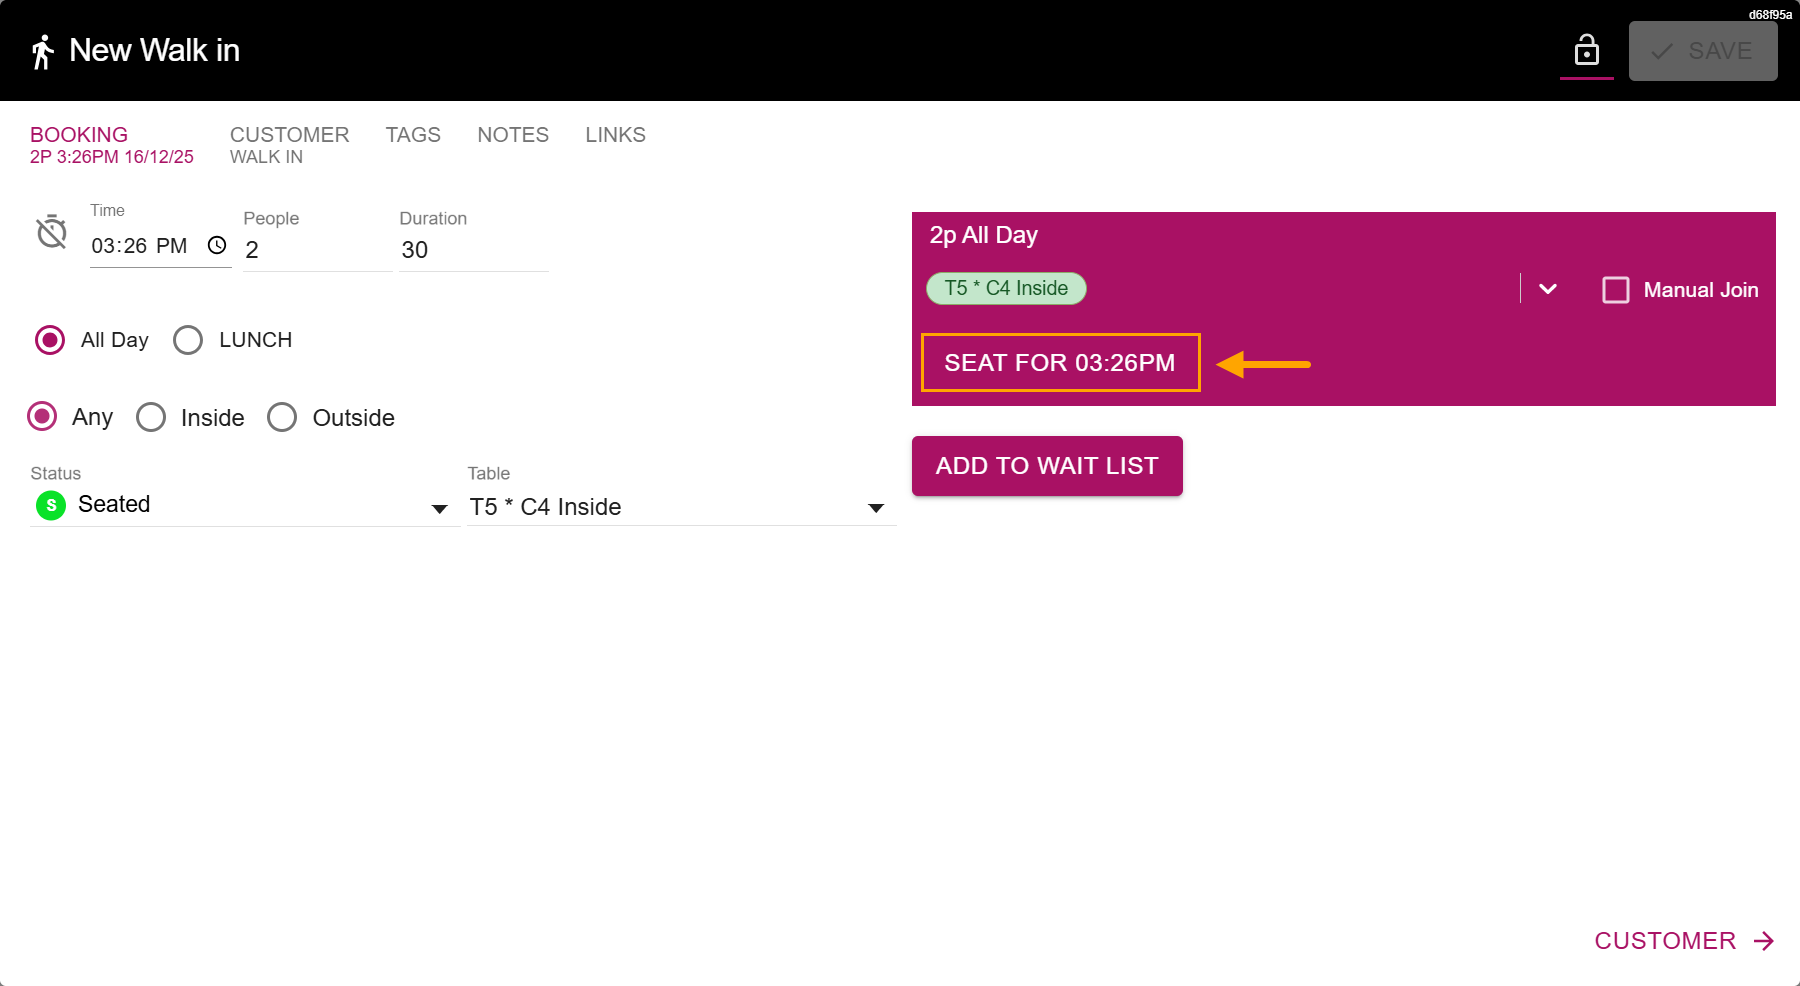
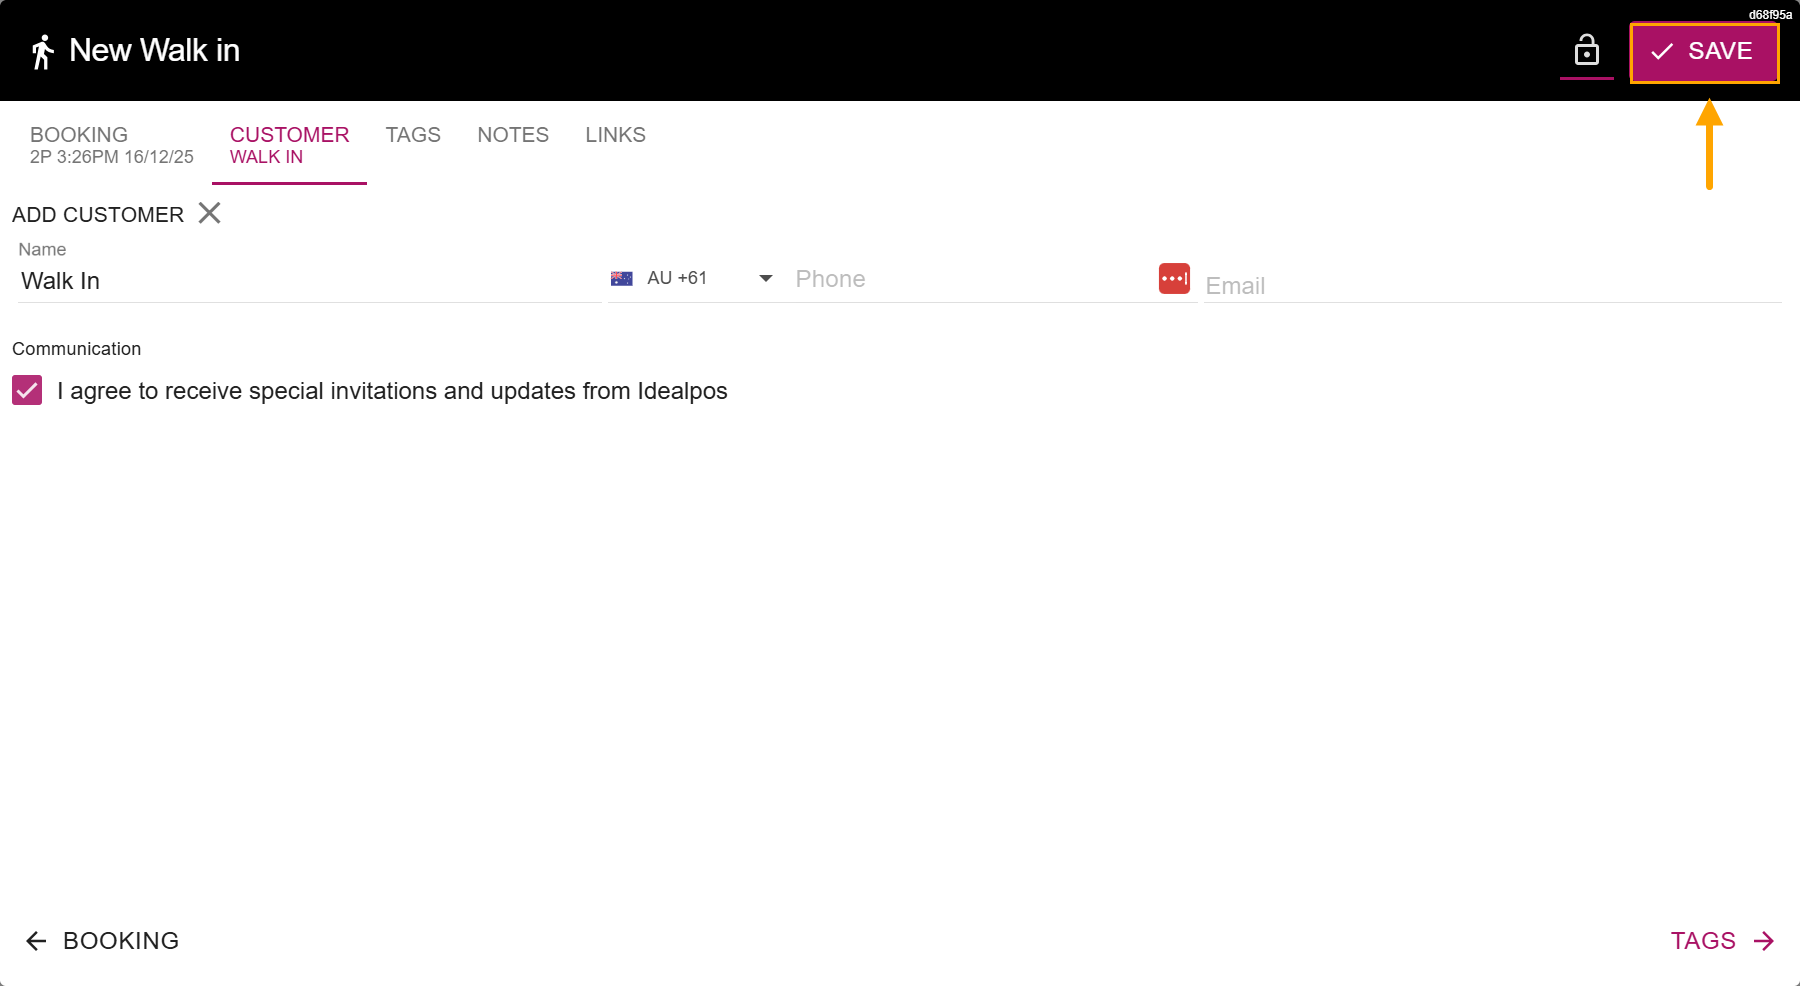
The "New Walk In" window will progress to the Customer section.
Press the "Save" button on the top-right corner to seat the Walk In.
A Booked prompt will be displayed to confirm the creation of the Walk In Reservation.
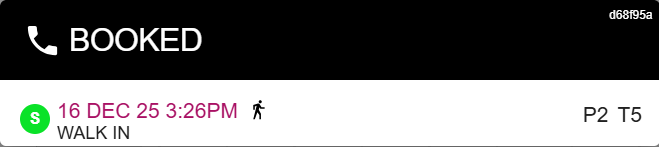
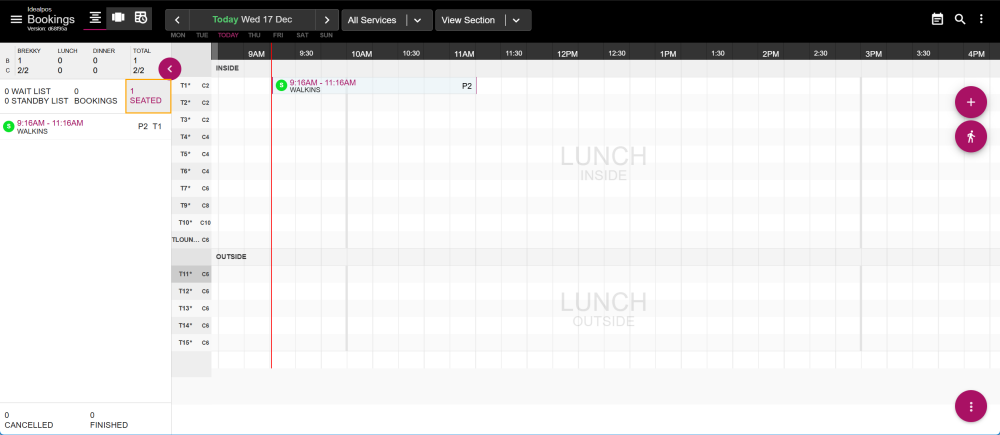
The Walk in reservation will be created for the selected table and will appear on the Seated page of Now Book It.
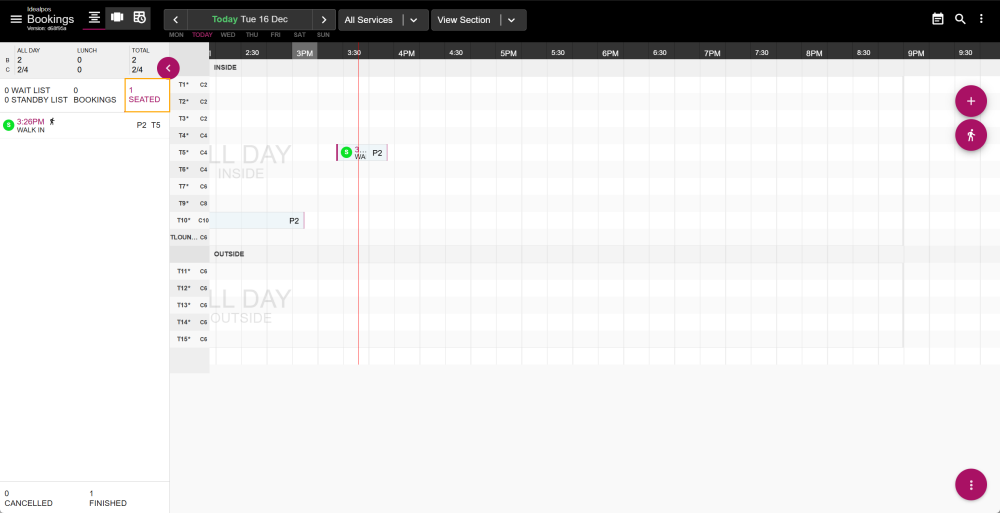
The reservation will also appear on the Idealpos Restaurant Table Map
It will also appear within the Idealpos Reservations window (accessed via the Idealpos Table Map > Reservations button).
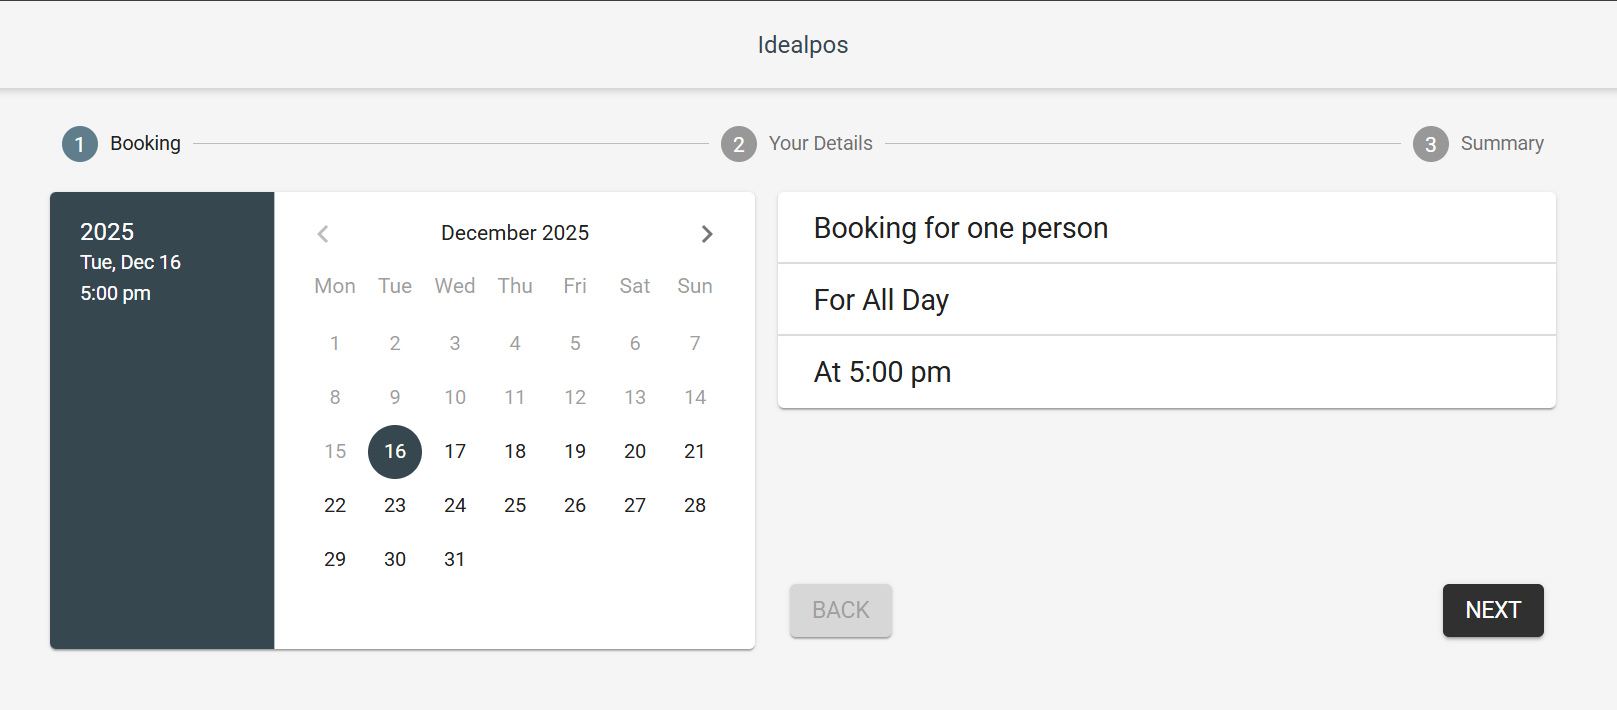
Depending on how the widget has been configured, the steps to create a booking may vary.
The customer will visit the venue's website and will place a booking via the Now Book It widget.
The venue may elect to have the widget on the main page of their website, or they can create a dedicated page for the widget with appropriate links to the page so that customers can find it.
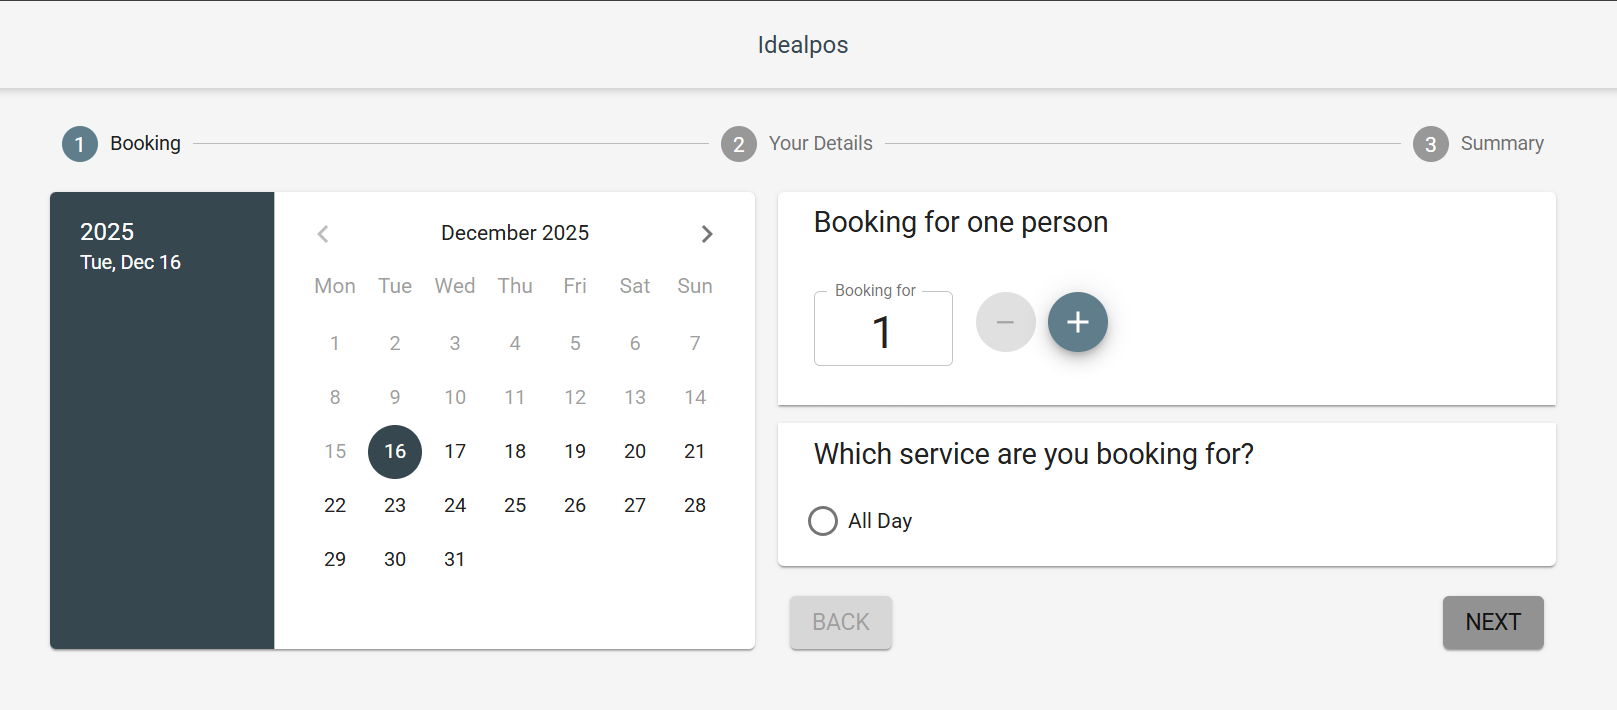
The widget will typically have 3 steps to create a booking; Booking, Your Details and Summary.

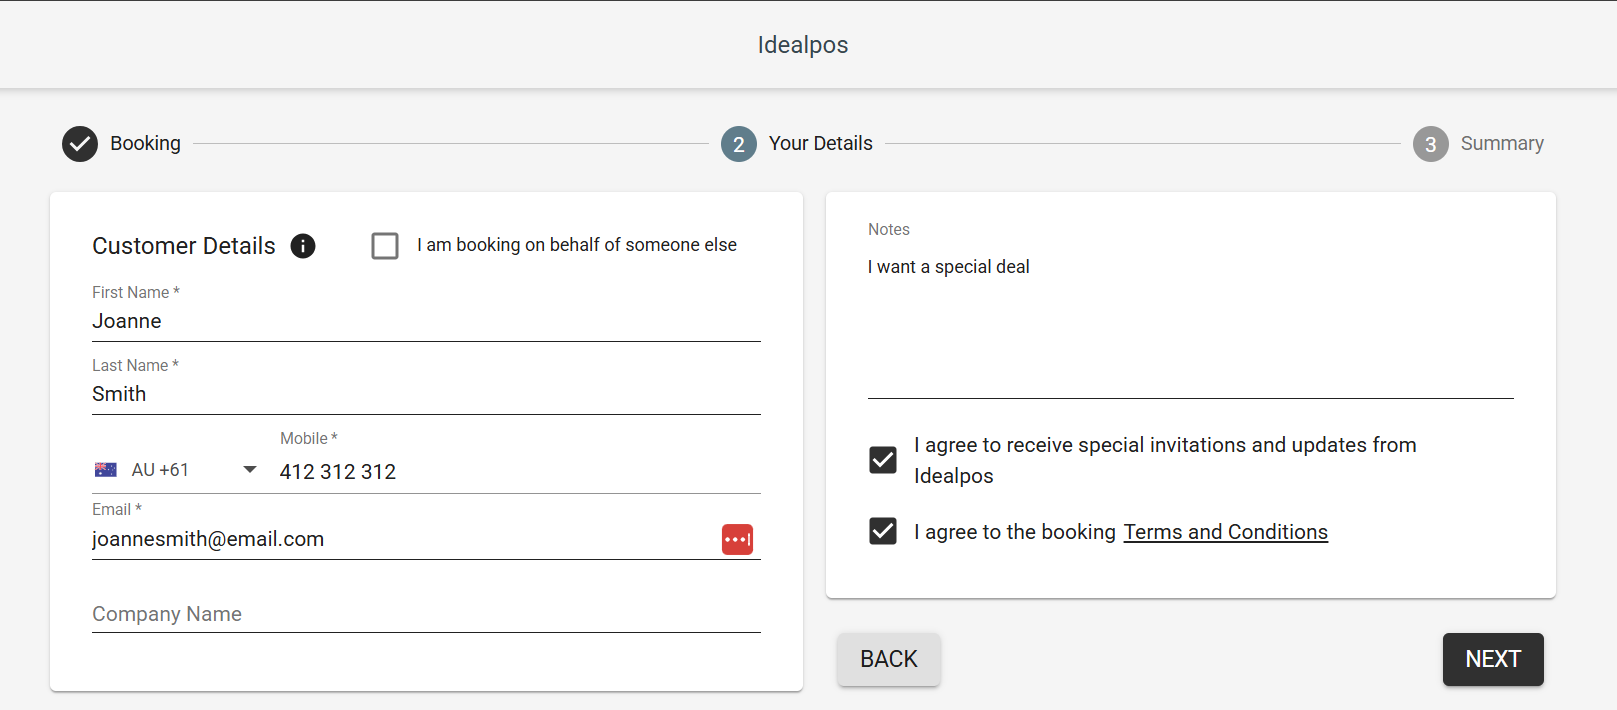
Enter Customer Details (Names, Contact Number, Email) and any notes
Press Next
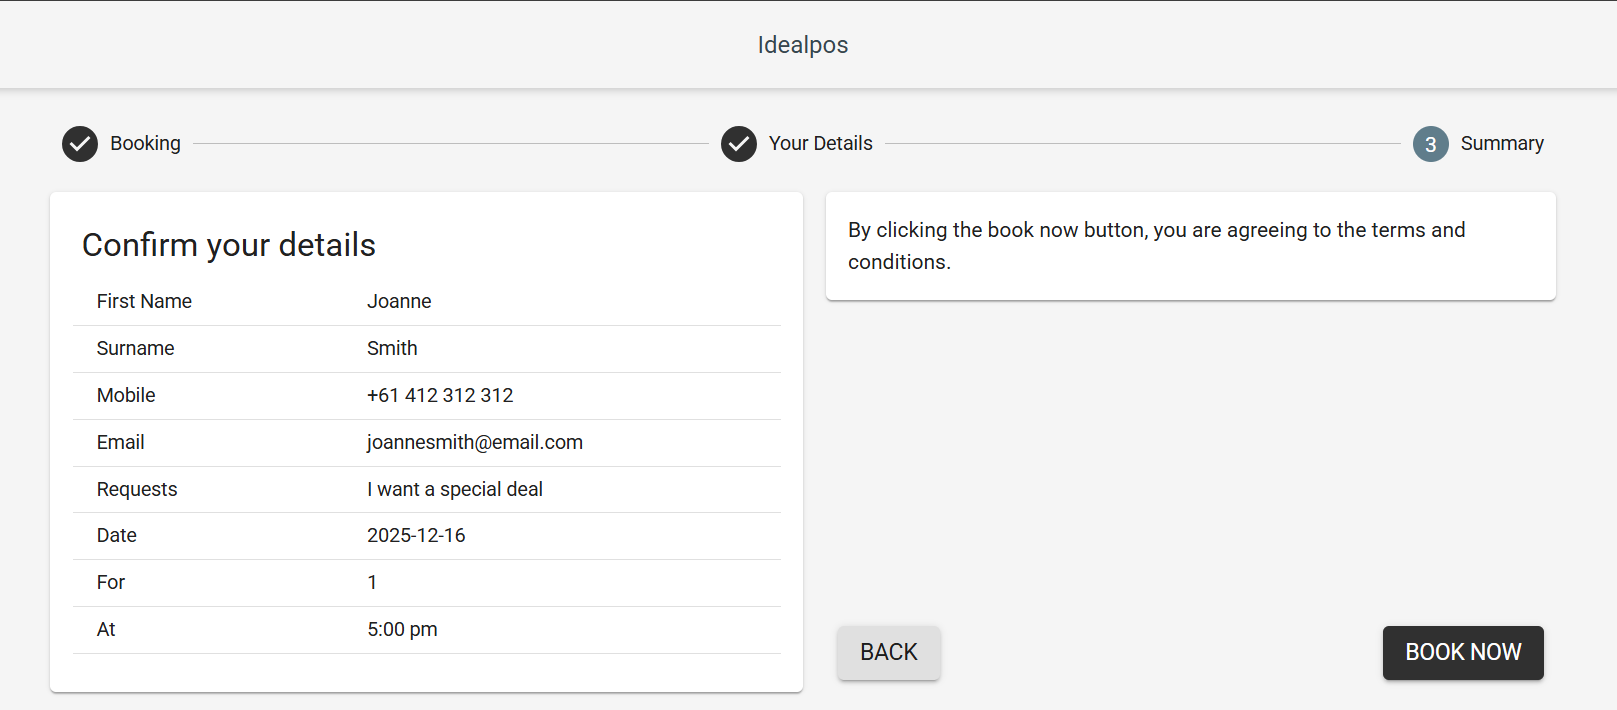
The Summary displays a summary of the booking.
Press the "Book Now" button to create the booking.
A Thank You prompt is displayed to the customer.
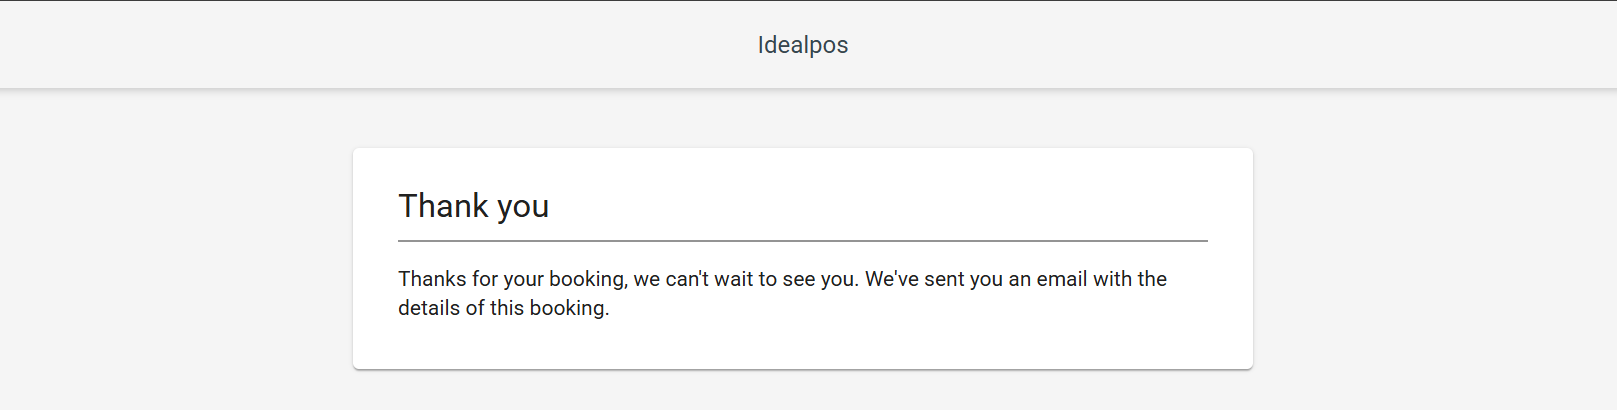
The Reservation appears on the Bookings page of Now Book It
The Reservation appears in the Idealpos Table Map and the Idealpos Reservations window (accessed via the Table Map > Reservations button)


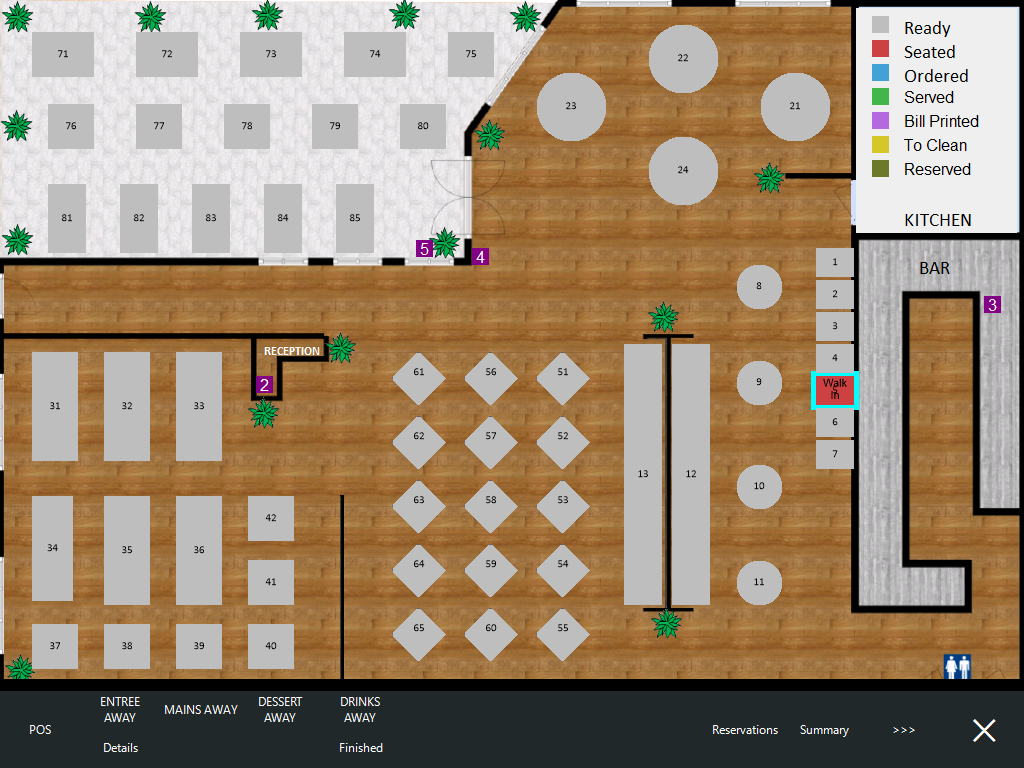
A Walk In reservation can be created via the Idealpos Table Map.
Go to the Idealpos Table Map > Select a Table > Press "POS" or "Occupy" on the bottom-left corner of the Table Map.
The "Occupy" option will appear if the Yes/No Option "Inhibit Occupy Table Function" is disabled.


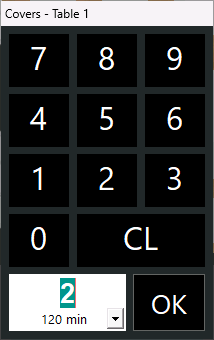
When selecting a table and pressing the "Occupy" button on the bottom-left corner of the Table Map, the number of Covers prompt will be displayed.
Select the number of Covers/Guests and press OK.
The Table Status will change to Seated and the Table Map will remain onscreen.

After pressing "Occupy", the Walk in reservation will be created in Now Book It and will appear in Now Book It under the Seated page with a Seated status.
When selecting a table and pressing the "POS" button on the bottom-left corner of the Table Map, the number of Covers prompt will be displayed, then POS Screen will open, enabling items to be saved to the table.
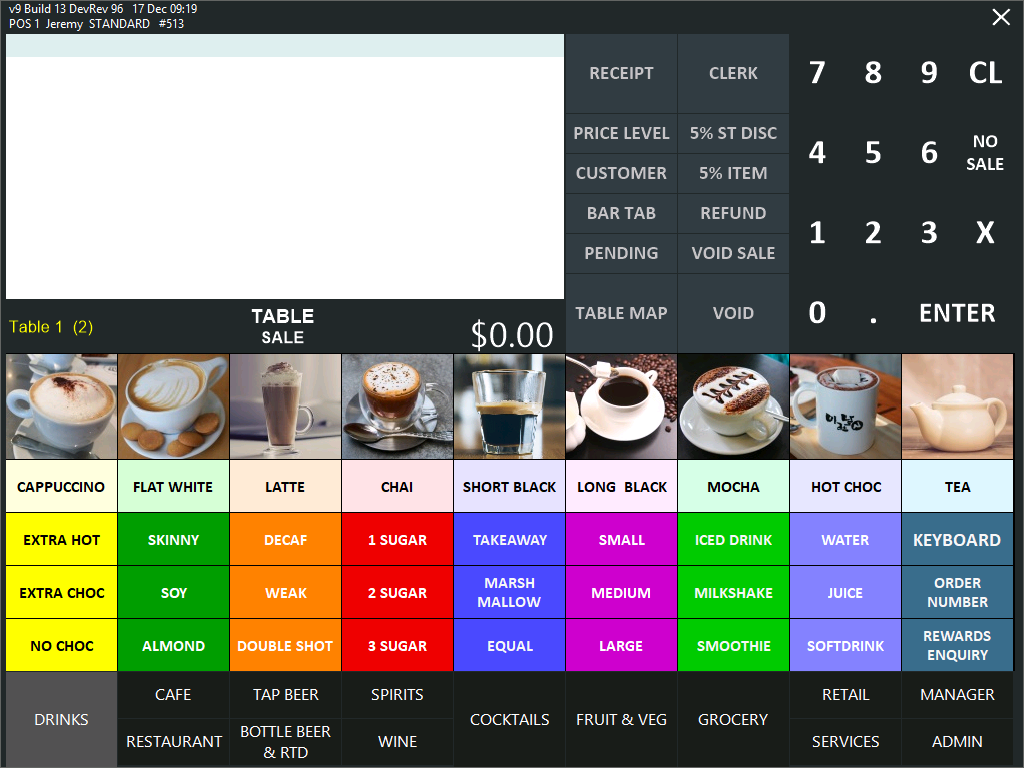
Add the required items, then press the "Table Map" button to save the items to the table.
The Walk in reservation is created in Now Book It and will appear in Now Book It under the Seated page with an Ordered status.
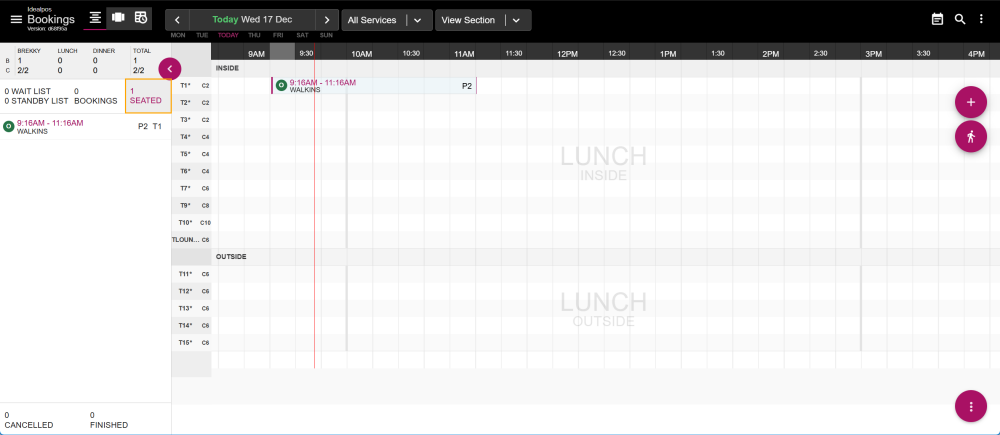
To seat a reservation, go to: https://restaurant.nowbookit.com
Select the Reservation from the left-hand side.
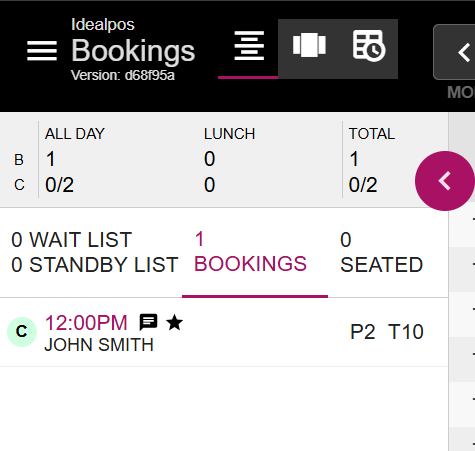
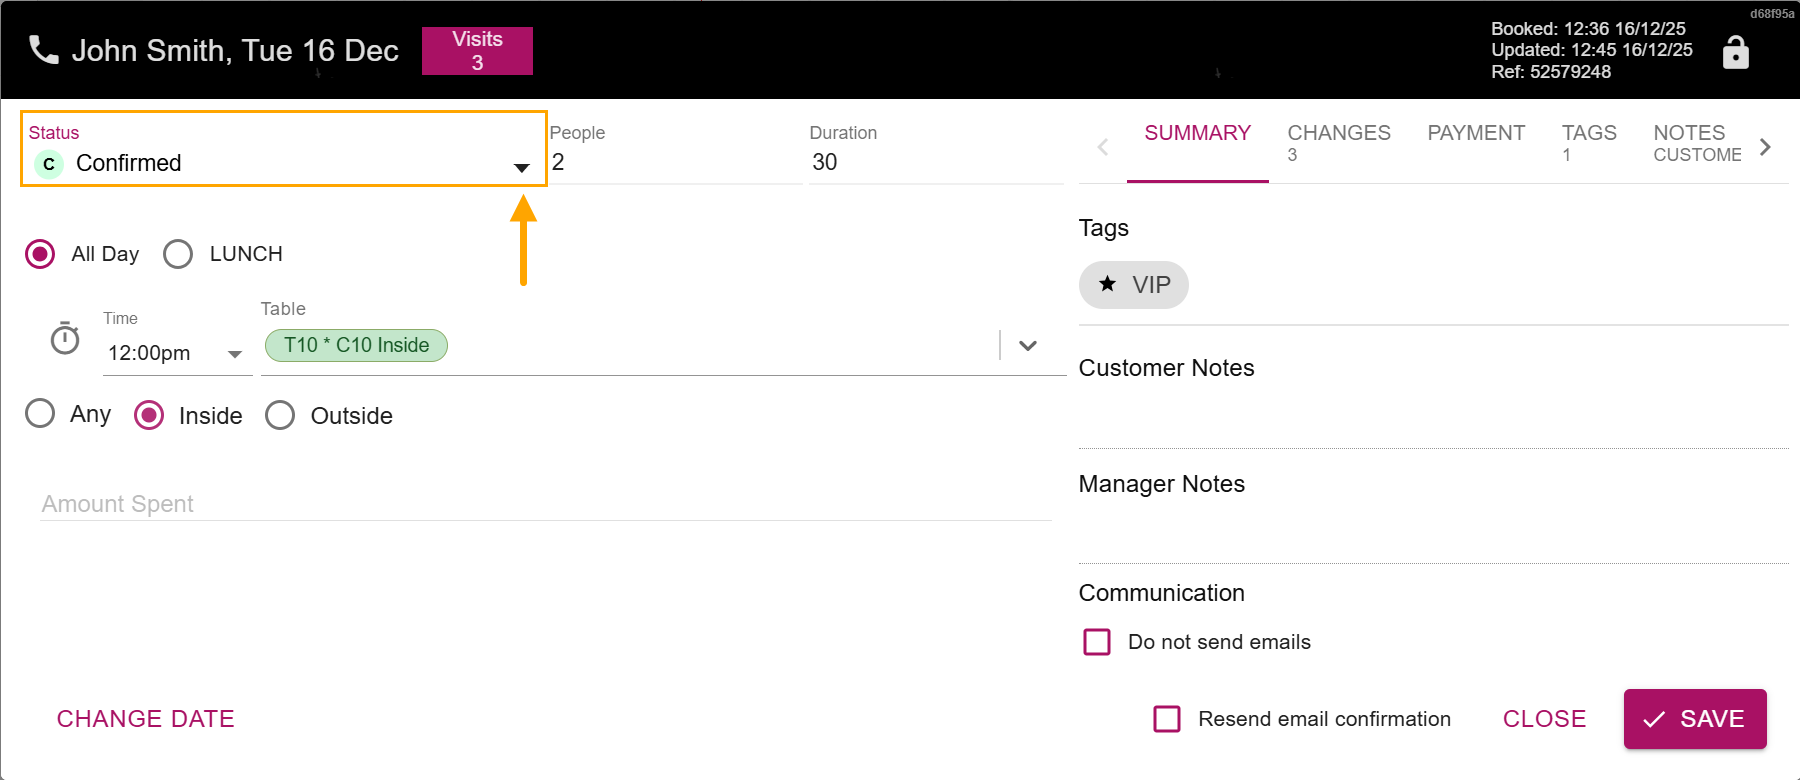
The Reservation details will appear.
Select the Status dropdown box and change the status to Seated.
Once Seated has been selected, press the "Save" button on the bottom-right corner.
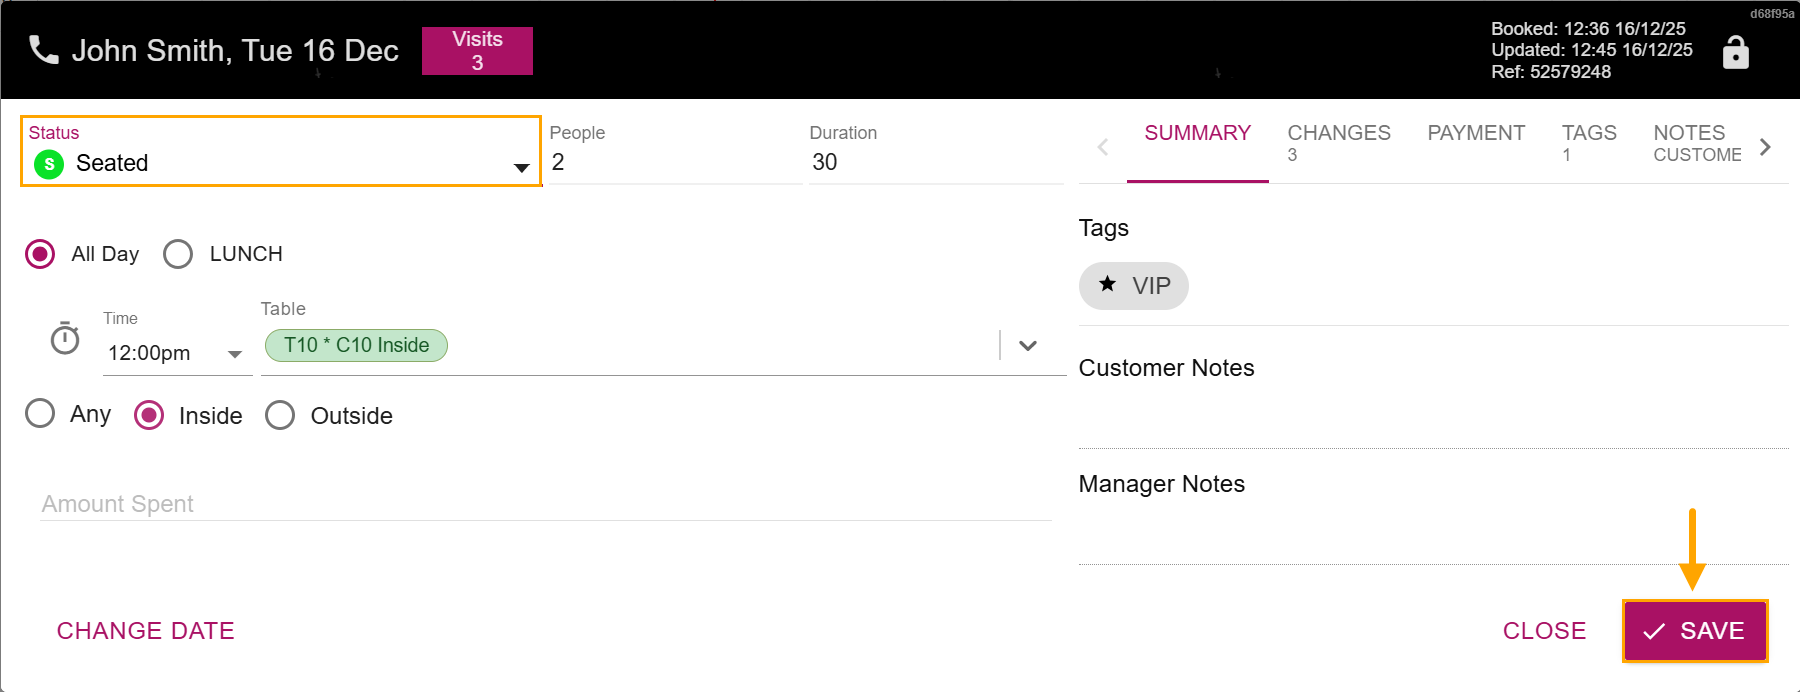
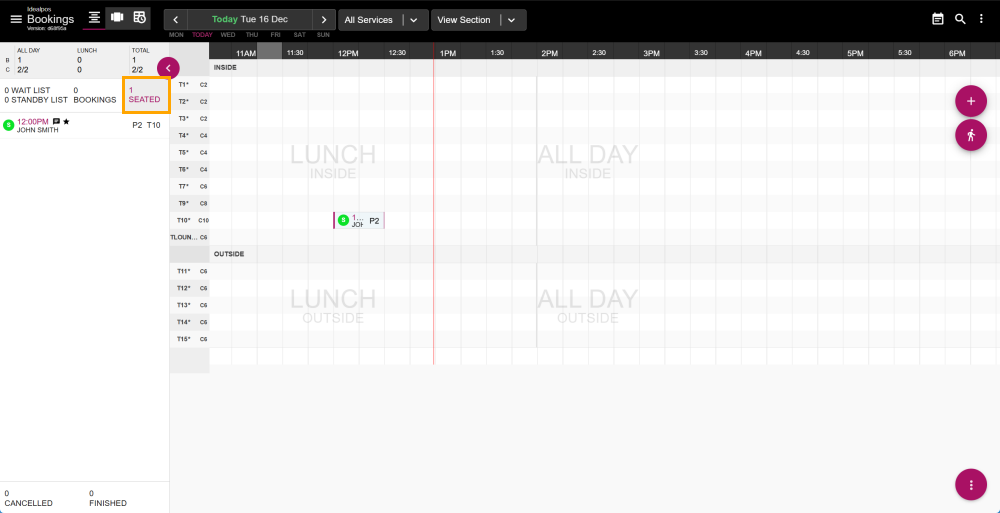
The Status of the Reservation is changed to Seated.
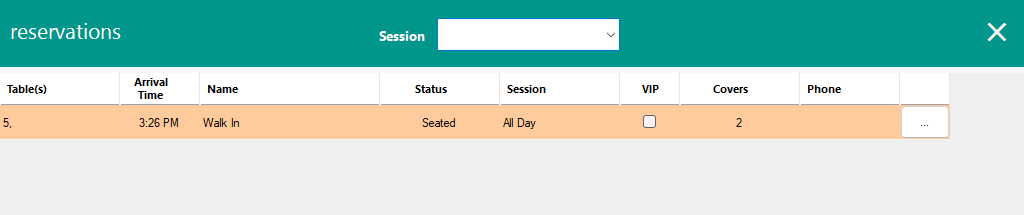
The Reservation will appear under the Seated list on the left-hand side, and will also have its status updated in the Reservations grid.
Each Reservation is allocated to a Table.
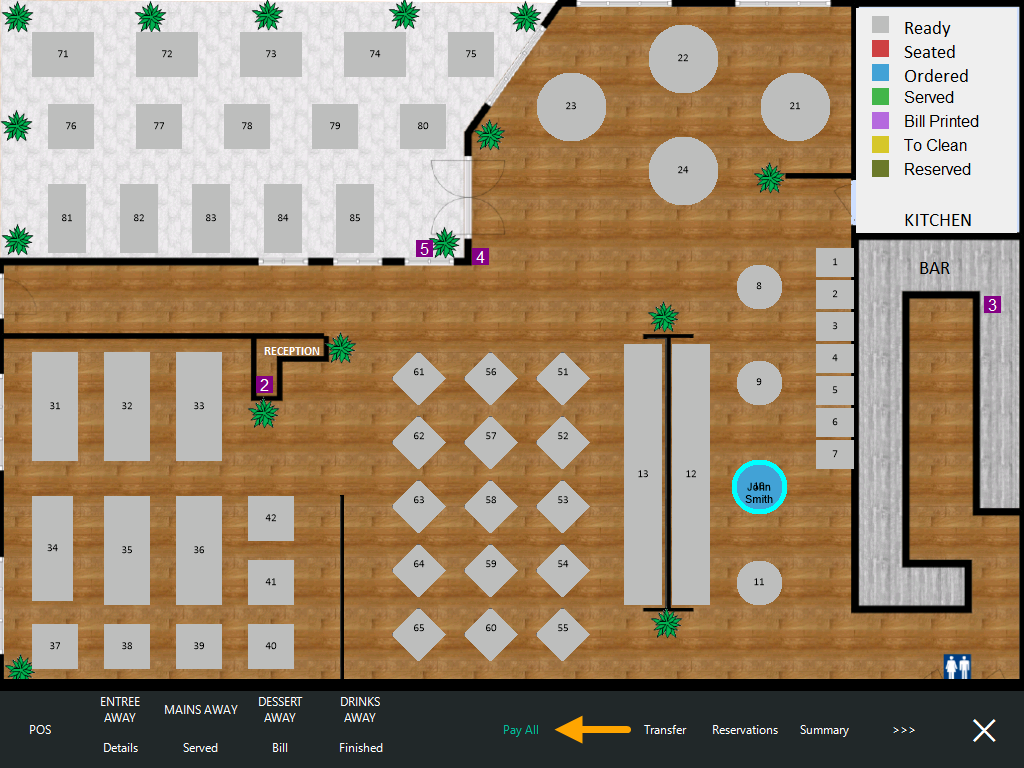
To pay a Table, press the "Table Map" button on the POS Screen to go to the Table Map > Select the Table > Pay All.
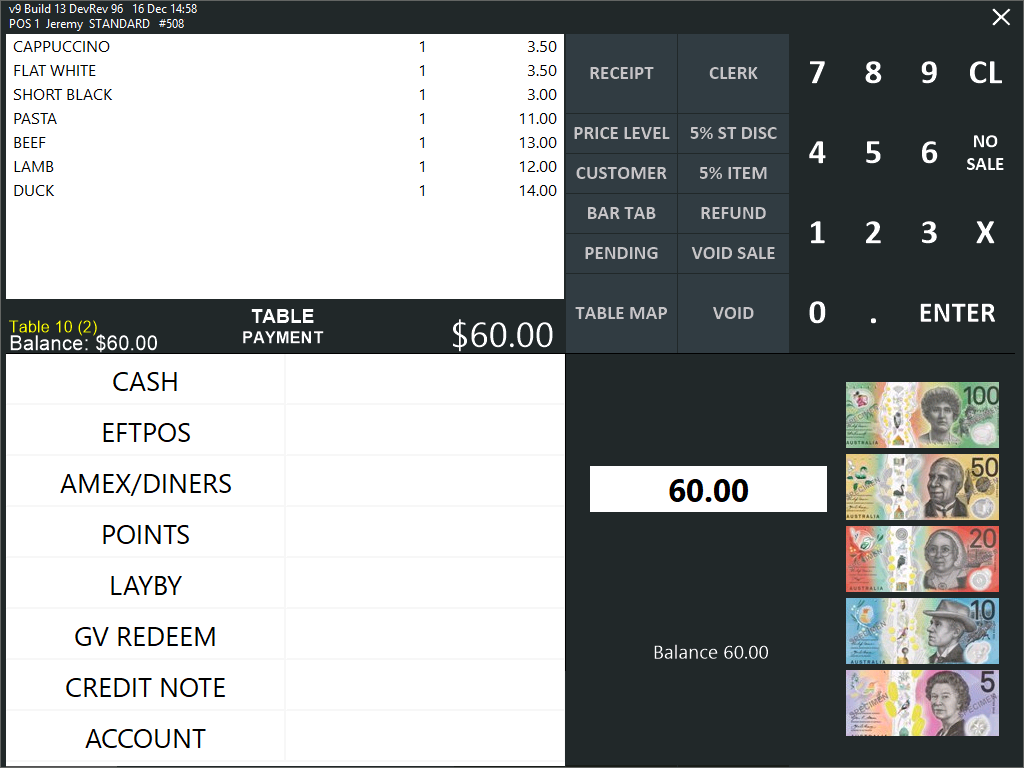
The items from the Table will be shown on the POS Screen > Tender the sale as required.
If the customer paid a deposit for the reservation, the deposit amount will appear in the sale and will be deducted from the sale total.
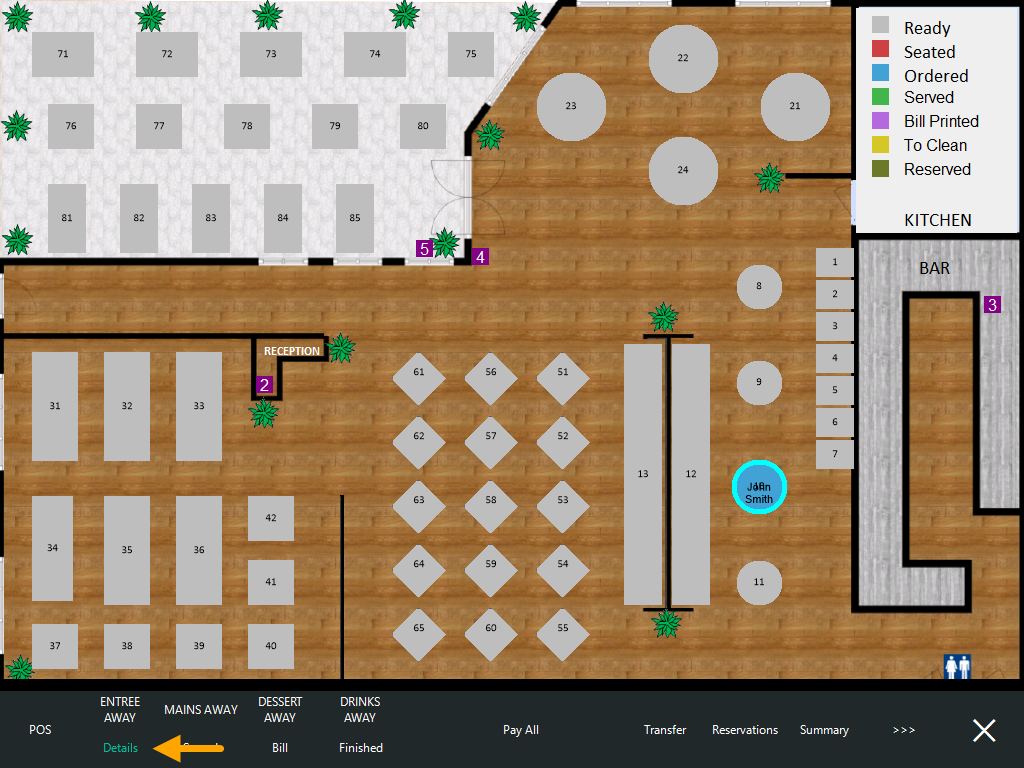
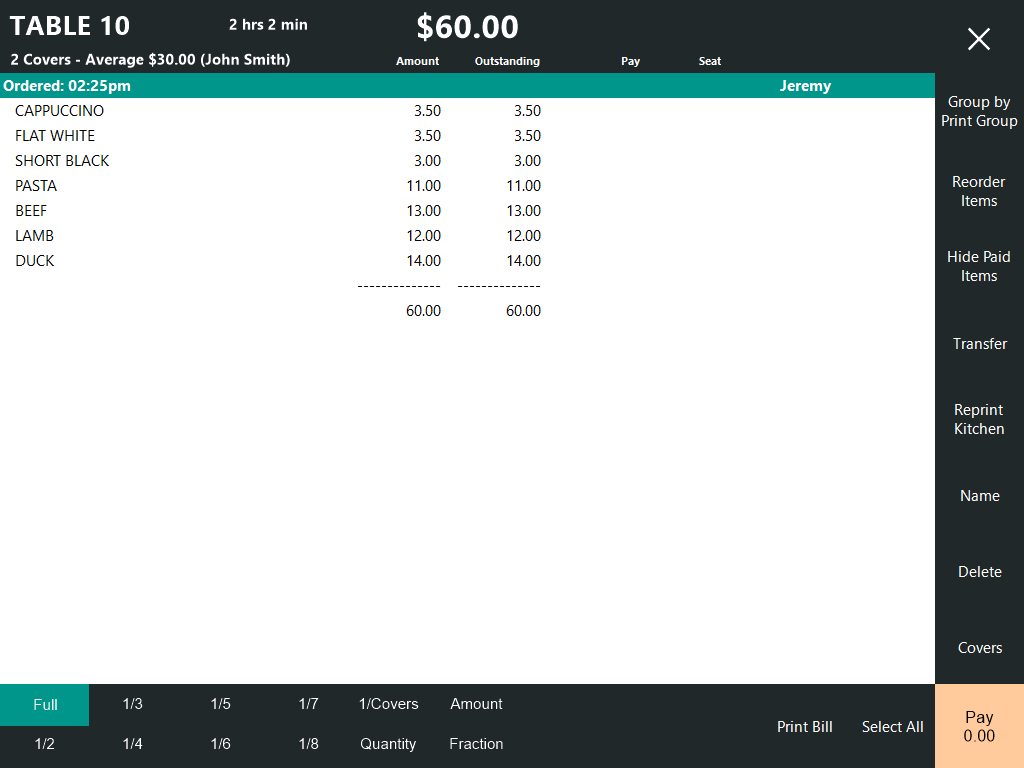
Alternatively, the Table Details can be opened to view all the items on the Table and select individual items to pay.
Go to the Table Map > Select the Table > Press "Details"
Select the individual items to pay > Press the "Pay" button > Tender the sale > Table Details are shown with remaining items to pay > Repeat the process until all items have been paid.
If the customer paid a deposit when the reservation was booked, the deposit will appear in the Table Details screen.
If Now Book It Gift Cards have been configured/enabled, the sale can be tendered using the Gift Card.
On the tender screen, select the "Now Book It Gift Card" tender that was configured during the setup of Now Book It.
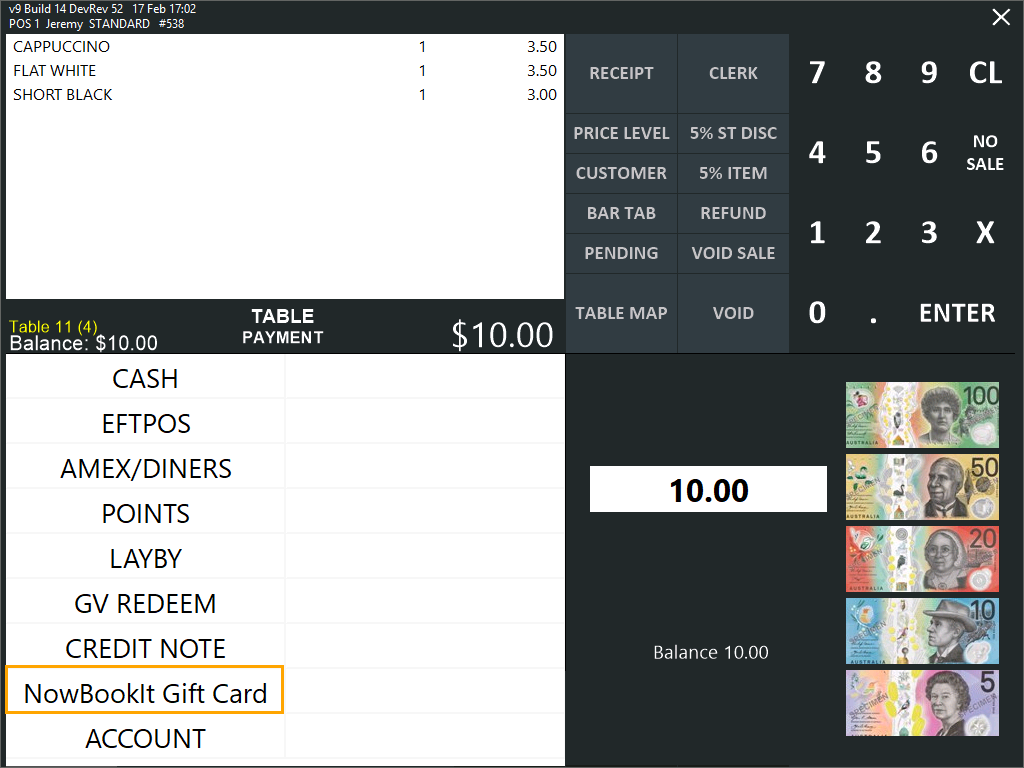
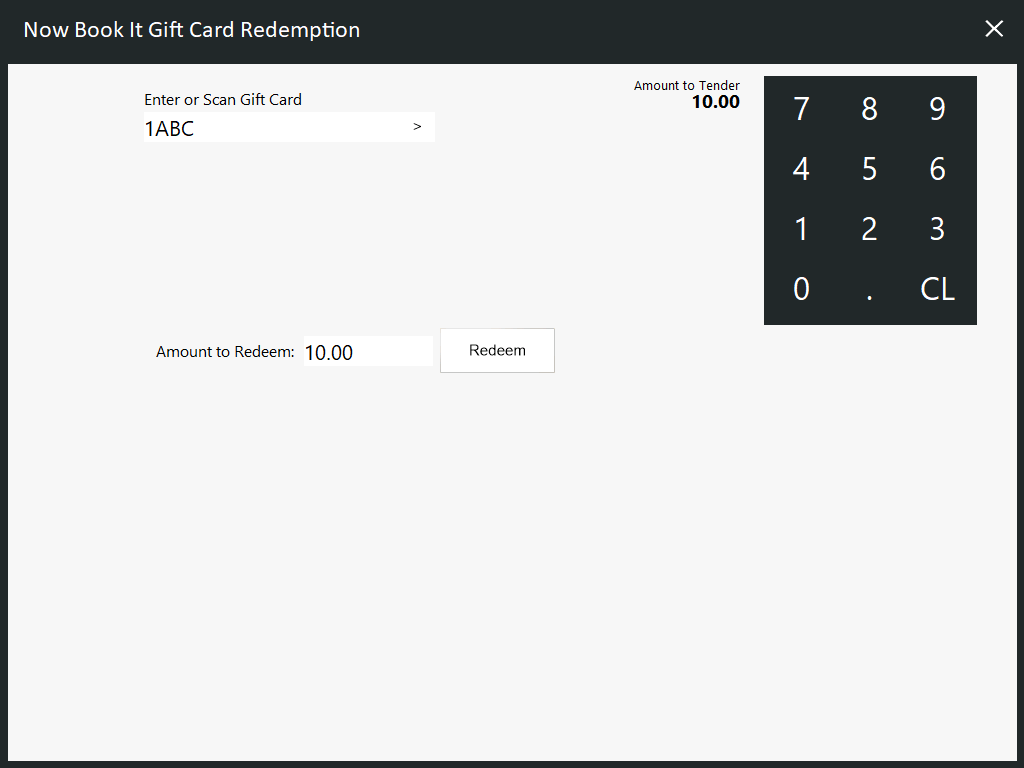
The Now Book It Gift Card Redemption window will appear.
Enter or Scan the Gift Card Number.
To enter a Gift Card Number, press the ">" button within the Gift Card Number field to display an on-screen keyboard.
When entering a Now Book It Gift Card, either the entire Gift Card Number can be entered, or the last four characters of the Gift Card can be entered.
The Amount to Redeem can be left as the default amount or adjusted by selecting the Amount to Redeem field > enter a new amount using the on-screen numeric keypad.
Press the "Redeem" button to proceed with the redemption.
A "Redemption Successful!" prompt will appear with the amount redeemed.

Press "OK".
The sale is finalised.
If the Gift Card has already been redeemed, a prompt of "Card already redeemed" will be displayed.
If attempting to redeem a value that is greater than what is available on the Gift Card, an "Invalid request" prompt will appear.
After the Table has been completely paid, the Reservation's status will be set to "Finished" in Now Book It.
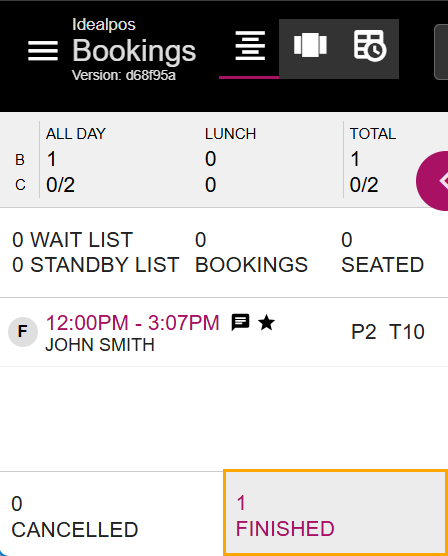
Within the Idealpos Table Map, the Table Status will appear as "To Clean" if the Yes/No Option "Auto "Finish" Table after Finalisation" is disabled.
Select the Table and press "Finished" so that it is ready for the next guest.

After the table has been marked as "Finished" in Idealpos, it will also remove the Reservation from the Idealpos Reservations window (accessed via the Table Map > Reservations).

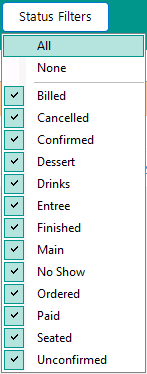
This function can be used to filter the list of reservations shown in the Reservations window.
The top-right corner of the Reservations contains a "Status Filters" button; when pressed, a list of Status Types will be displayed.
Status Types available are: Billed, Cancelled, Confirmed, Dessert, Drinks, Entree, Finished, Main, No Show, Ordered, Paid, Seated, Unconfirmed.
The Status Types may vary based on configuration in Now Book It.
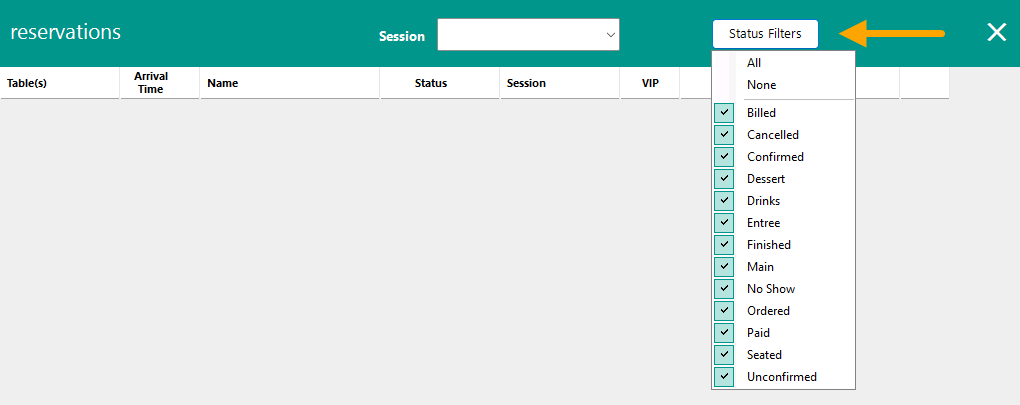
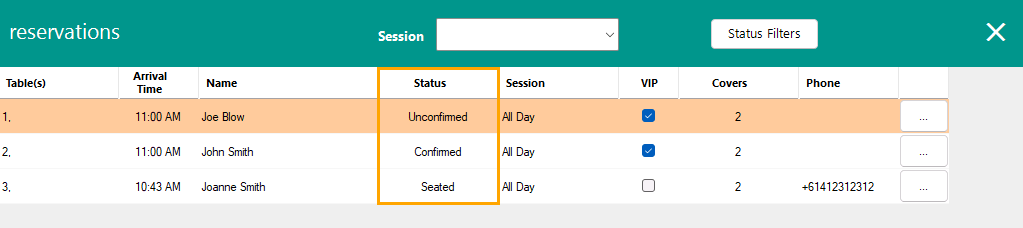
When all the status filters are enabled, Reservations with all Status Types will be shown in the Reservations window.
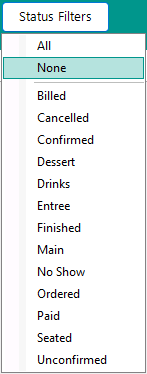
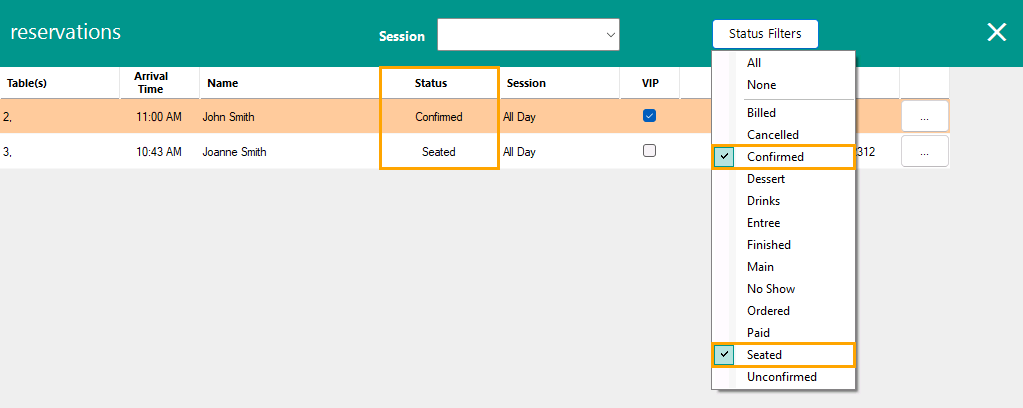
When filtering by specific Status(es), only reservations that match the selected Status Type(s) will be shown.
Pressing the "All" option will enable all statuses or pressing "None" will clear all the statuses: