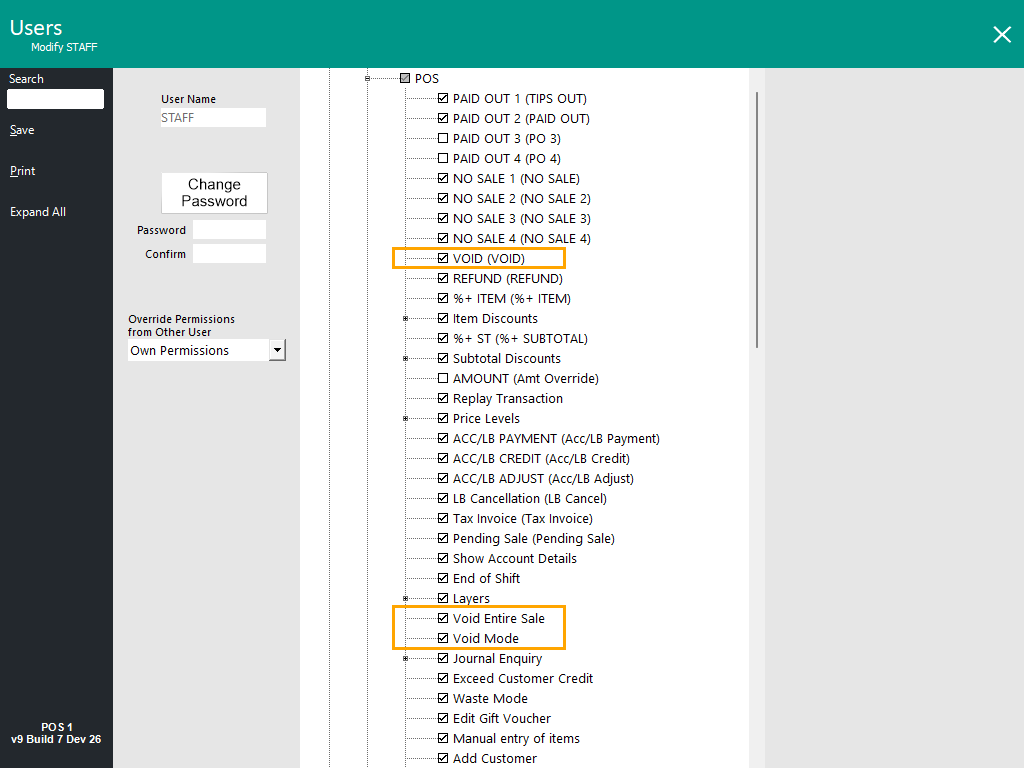
Voids can be controlled at both the User and Clerk level to ensure that not everyone has access to the most advanced functions.
Users can group Clerks together to control them with the same permissions.
Go to Setup > Users.
Admin Users will by default have access to all functions.
Create a new User or Modify an existing.
You cannot modify the Admin permissions, as they have Master Access.
Select or deselect the following options for voids:
Voids can be controlled at both the User and Clerk level to ensure that not everyone has access to the most advanced functions.
Clerks can be controlled using the User Link function, which will link them to the limited User/s you have created in the User menu.
Admin Clerks will need to be selected on the specific options that you want to allow.
Go to Setup > Clerks > Modify > User Link or Permissions tab.
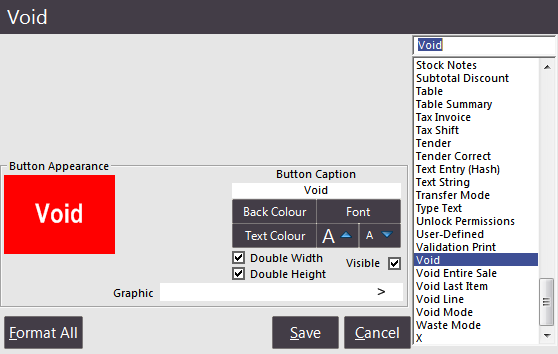
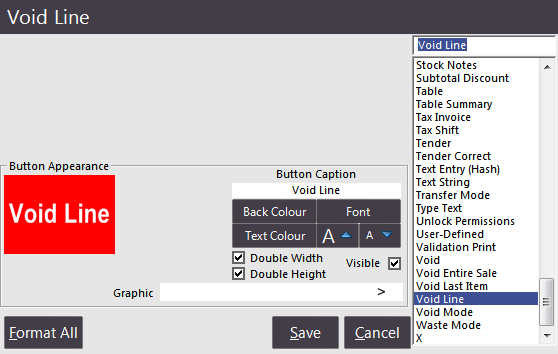
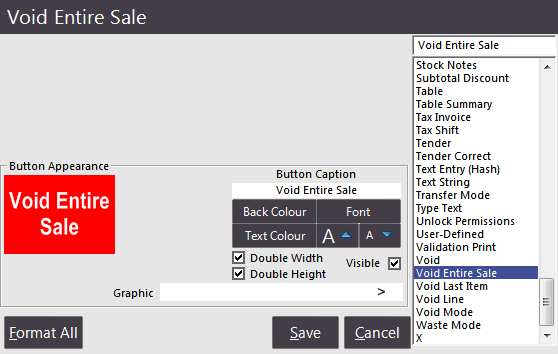
For all button configurations go to Setup > POS Screen > POS Screen Setup > Layouts > Buttons.
Void Item
Void Line
Void Entire Sale
Void Last Item

Go to Setup > Yes/No Options.
Prompt for Reason when doing a Void
This option will prompt for a Reason when doing Voids and Void Entire Sale.
For this functionality to trigger, the Yes/No Option Prompt for Reason when doing a Void must be enabled, and at least two Void Reasons must be configured in Global Options > Sales > Void Reasons (click here to go to the section below that shows further detail).
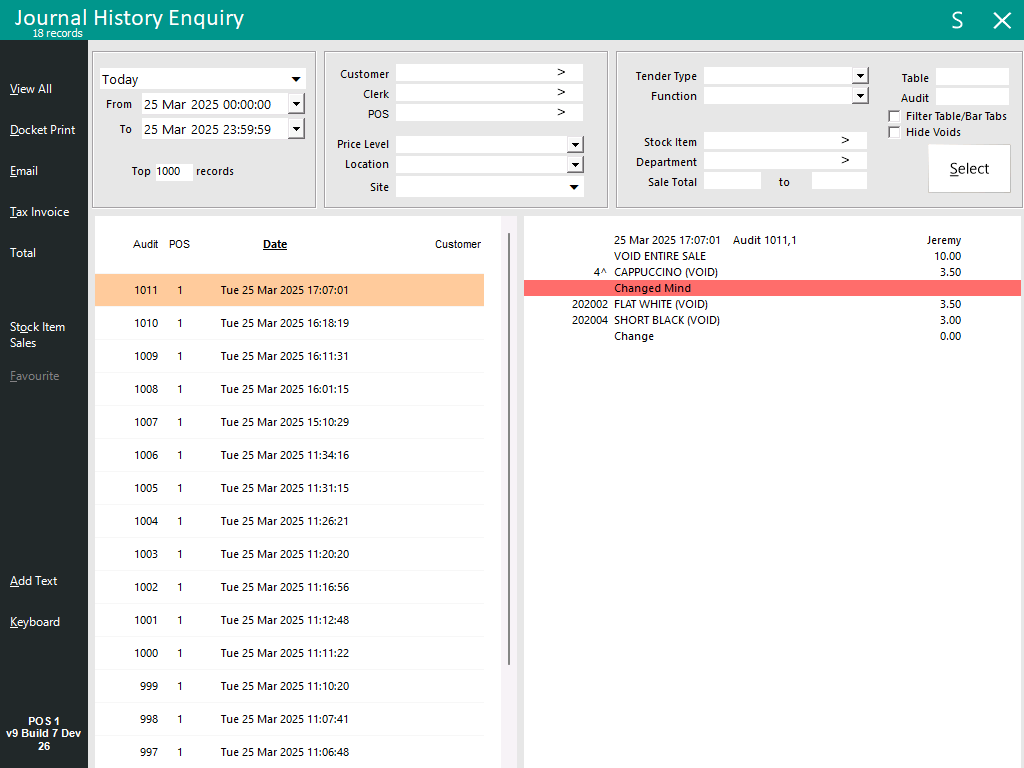
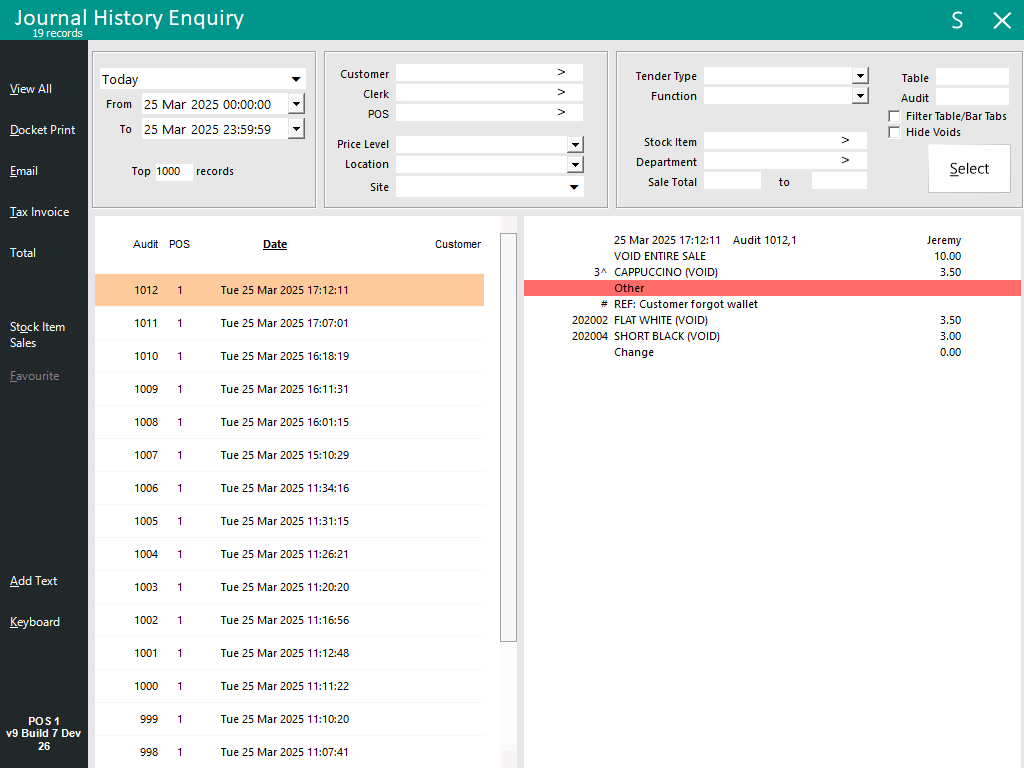
The selected Void Reason will be recorded in the Journal and can be viewed via the Journal History Enquiry (Back Office > Enquiry > Journal History).
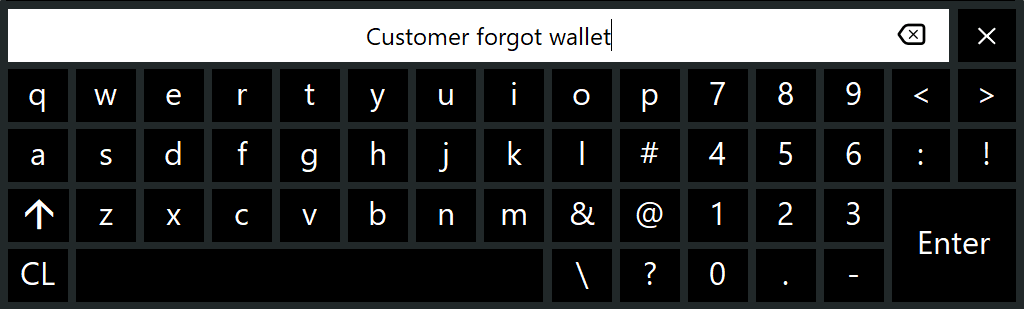
Selecting a Void Reason that has the Type Text option enabled will display an on-screen keyboard that can be used to enter additional information.
The additional information that is entered will be recorded in the Journal History Enquiry.
Show Voids on Customer Display
This option will display any voids that the clerk enters in RED on the Customer Display.
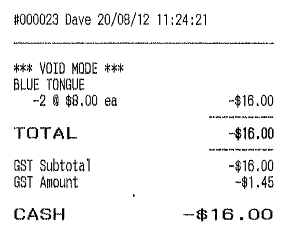
Void Mode allows for One Transaction only
This option will allow the Void mode function to be used for only one transaction, before returning to normal function.
This will ensure that standard sales are not accidentally rung up as Void Mode sales.
Force Receipt after a Void Entire Sale
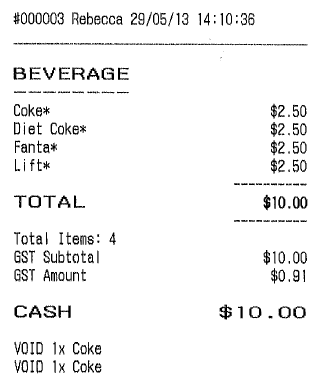
This option will print a receipt when the operator has performed a Void Entire Sale function.

Print Receipt for Void Mode Transactions
This option will force a receipt to print detailing the transactions that were voided.
Show Voided Items on Receipt
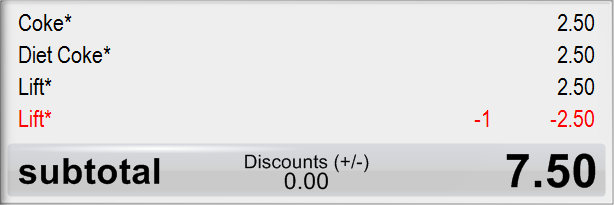
This option will show all the items that have been voided from the sale and not charged, as VOID on the receipt so the customer knows they are being charged the correct amount.
Inhibit Voids when Paying Tables
This option will not allow items to be voided from the Table when you have selected to pay for them.
This is security against Clerks who are unable to delete items from Table Map.

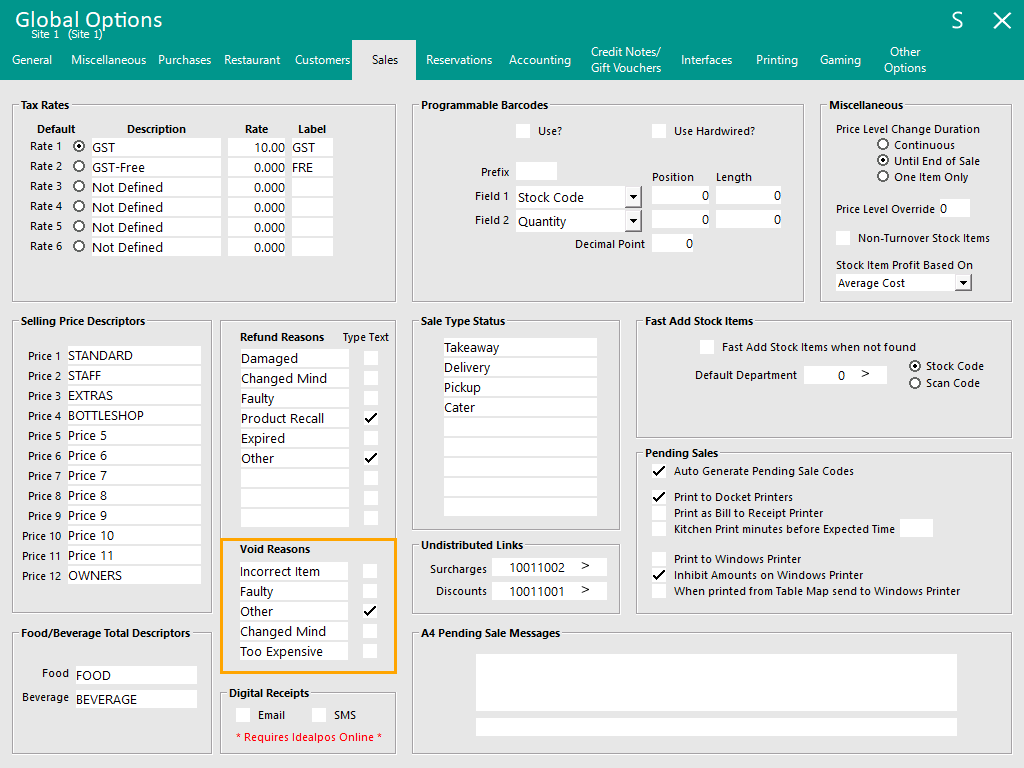
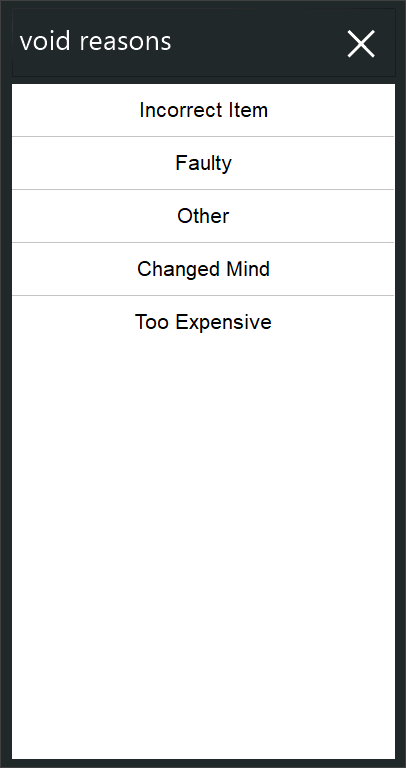
Void Reasons
Five Void Reasons can be configured that will be displayed as options when Voiding an item or Voiding an entire sale.
Any Void Reason that has the Type Text checkbox enabled, when selected as a Void Reason, will trigger an on-screen keyboard to be displayed which can be used to enter additional details.
These Void Reasons will be displayed when Voiding either a single Stock Item from a sale, or when Voiding the entire sale.
Go to: Back Office > Setup > Global Options > Sales > Void Reasons > Configure the required Void Reasons.
The Type Text checkbox can be enabled for any Void Reason, and when Type Text is enabled, this will trigger an on-screen keyboard to be displayed when selecting the corresponding Void Reason.
Any text entered will be recorded against the Journal.
Note!
The following conditions must be met for the Void Reasons prompt to appear when Voiding an item or Voiding the entire sale: