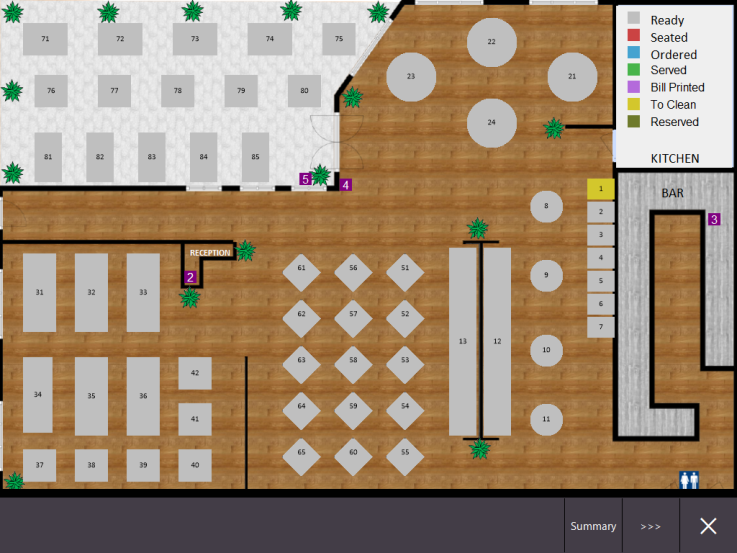
Note - The Restaurant Module will need to be licensed and configured in order to access the Table Map
There are three methods that can be used to pay for a sale using Tenerum as outlined below:
If using the Table Map, you will need to use the "EFTPOS Capture Tips" function any time after the order is placed and before the Clerk ends their Shift.
Refer to the below for more details about the Capture Tips process, or click here to go directly to the Capture Tips section on this page.
Note that Capture Tips process must still be used even in the case where a customer has chosen not to leave a tip; in this case, simply leave the tip amount as $0.00 on the Capture Tips screen. Refer to the Capture Tips process below for more details.
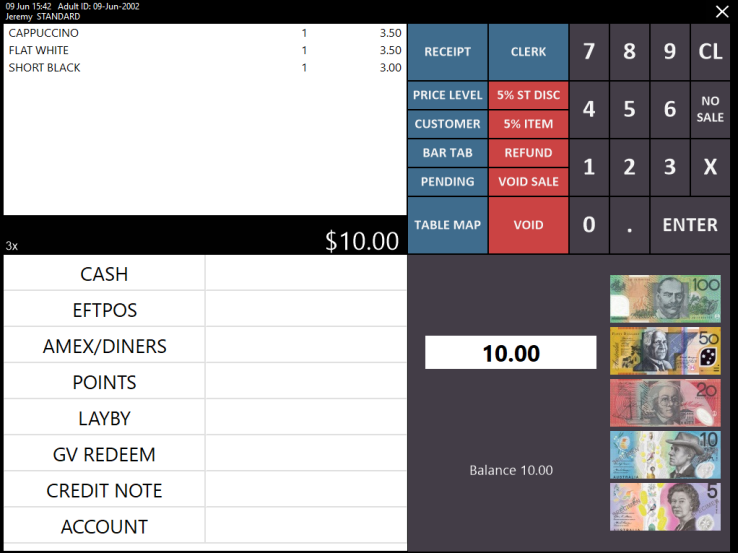
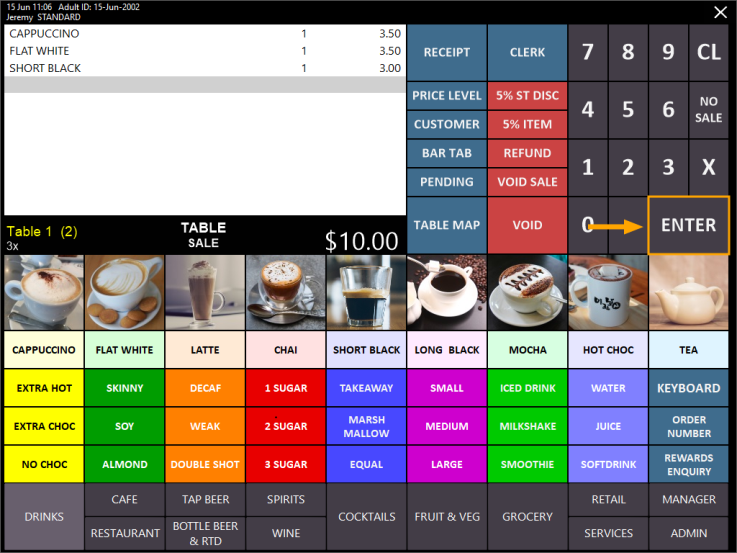
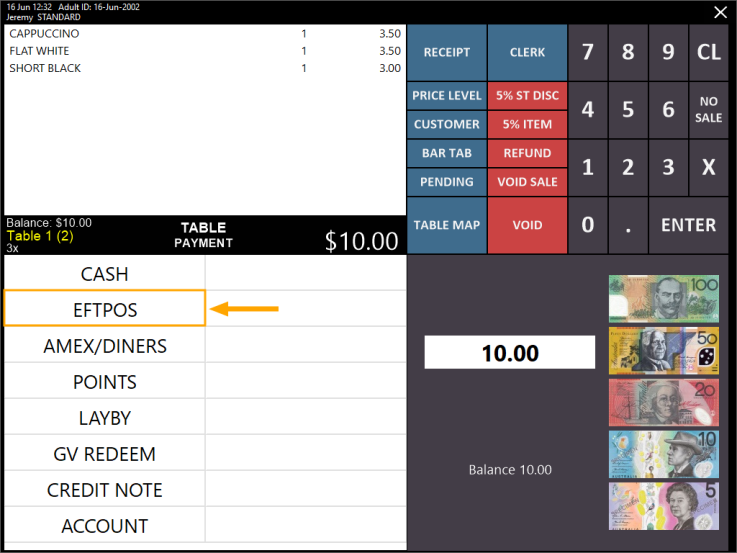
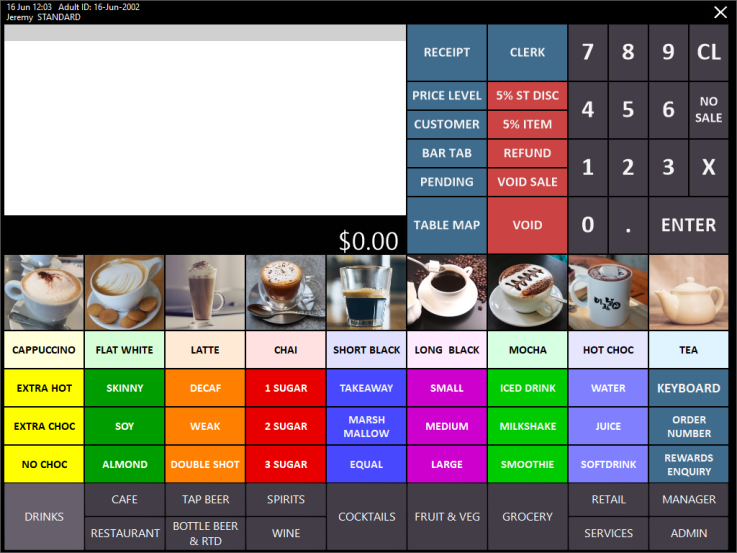
Simply add the items to the sale, then press the "ENTER" button to go to the Tender Screen.
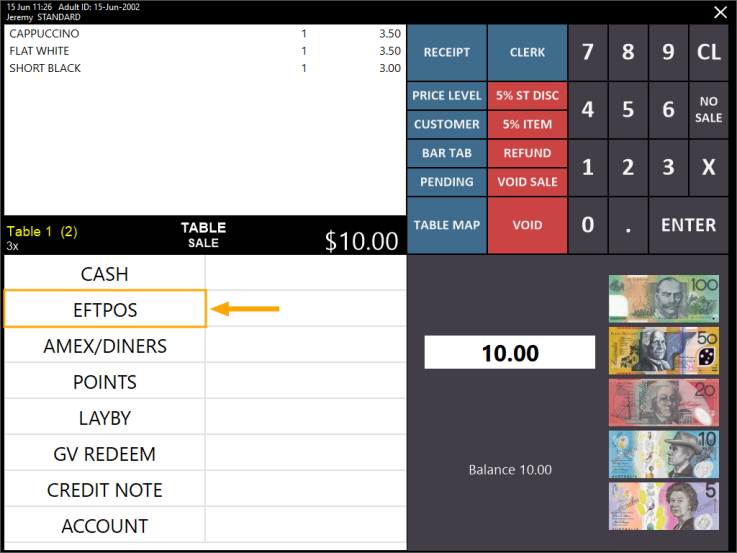
The Tender Screen will appear as follows:
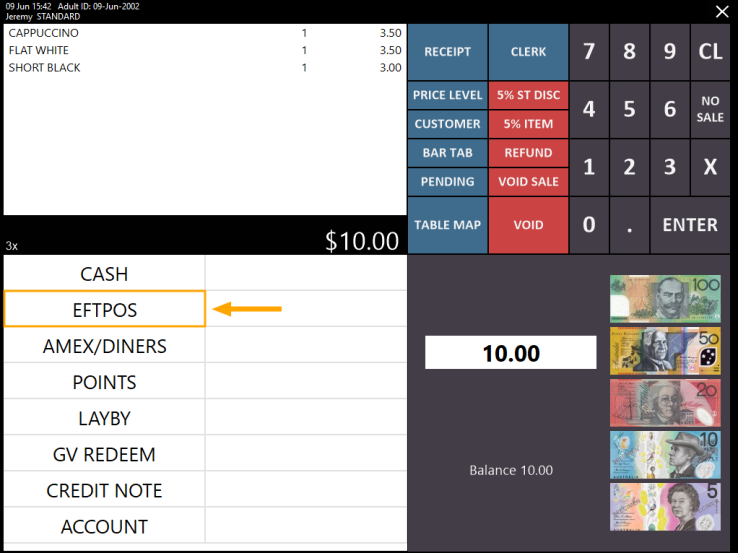
Press the Tender button configured for Tenerum Payments.
Pressing EFTPOS in the below example will send the Payment to the Tenerum Payment Terminal.
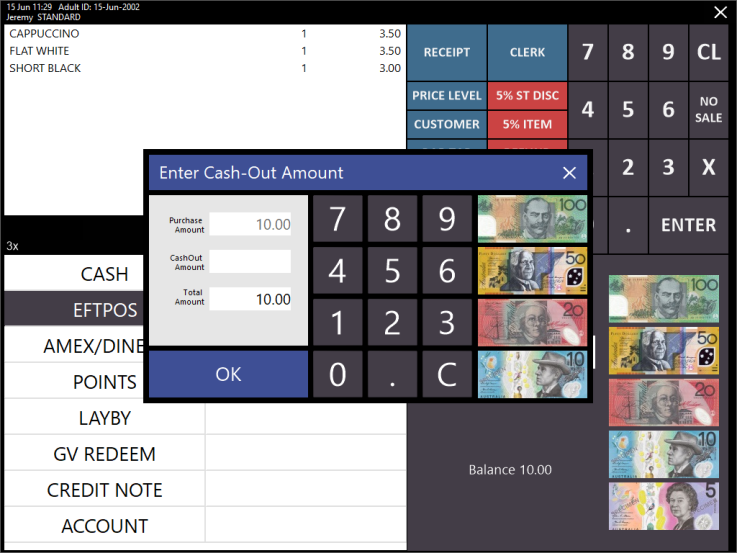
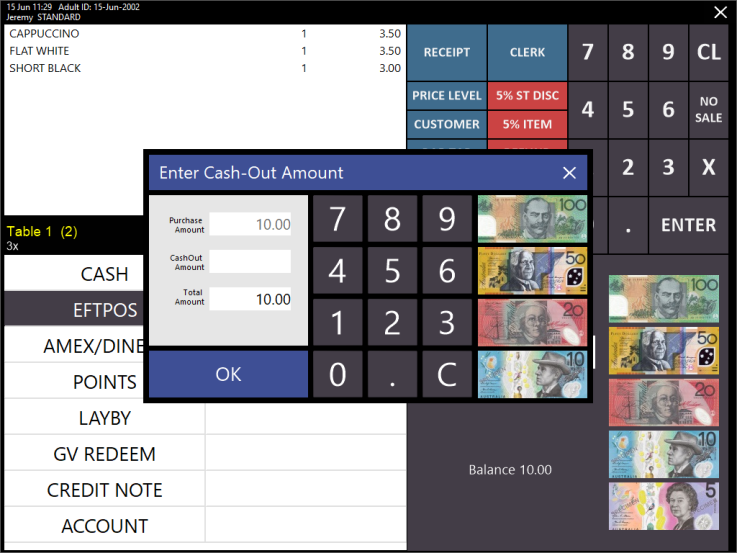
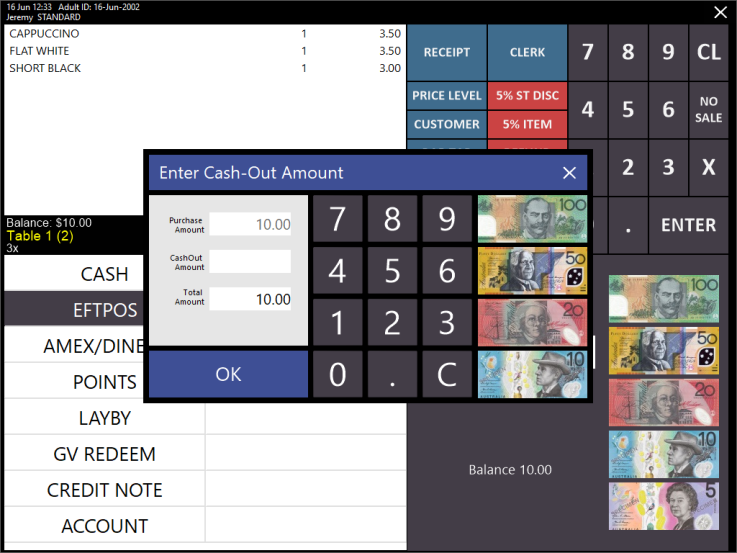
If the Cash Out prompt is enabled, you will be prompted to enter the Cash Out amount.
If Customer requires Cash Out, enter the amount they require and press OK.
Otherwise, if no Cash Out required by the Customer, press "OK" without entering an amount.
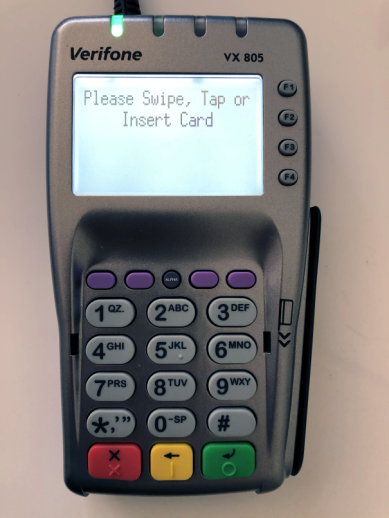
The Tenerum Payment Terminal will display a prompt "Please Swipe, Tap or Insert Card".
Refer to the Card Process section further below for more details about the process involved depending on the card method used (Swipe, Insert, Tap, etc.).
The process for paying for a sale at the time it is being saved to a Table is as follows:
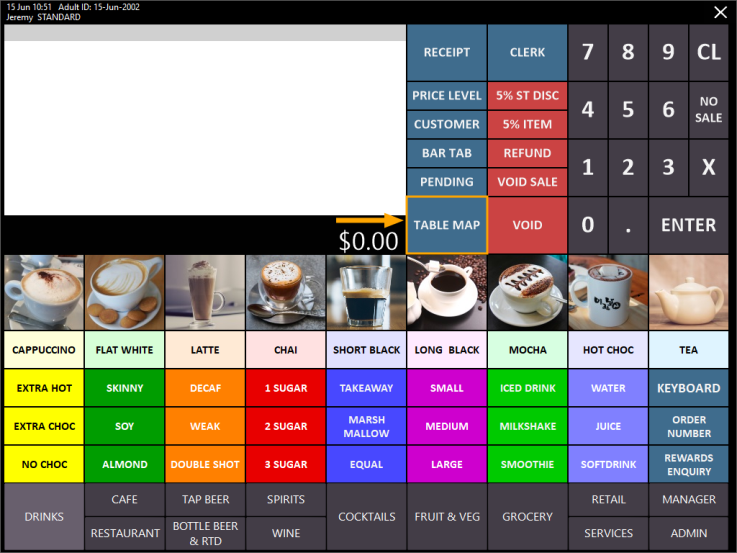
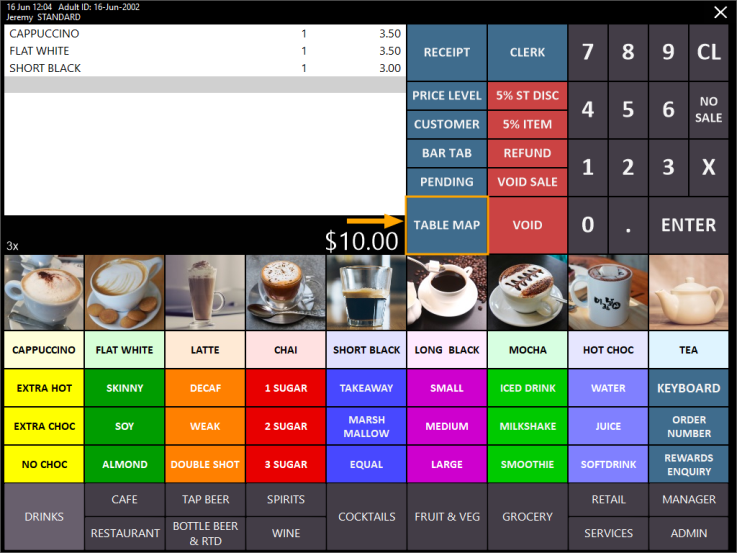
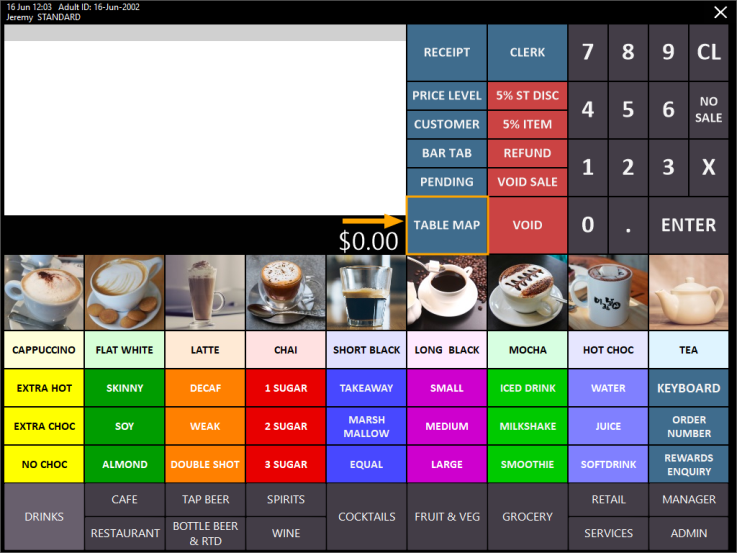
Begin with a blank sale screen, then press the Table Map button.
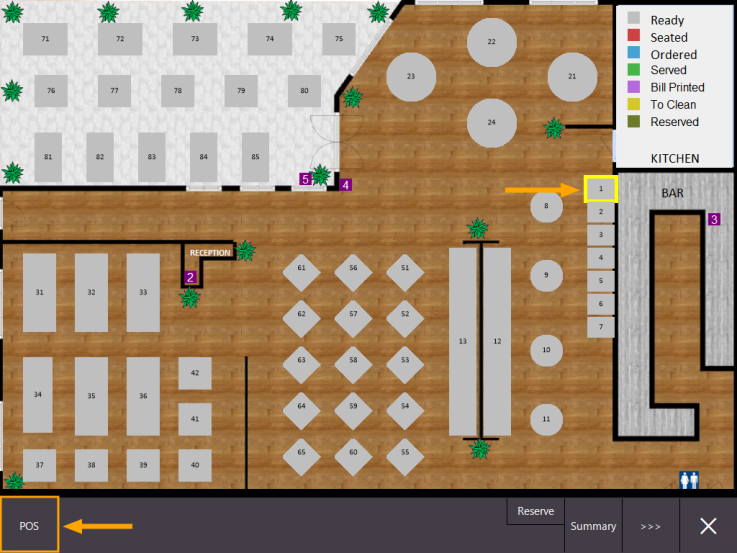
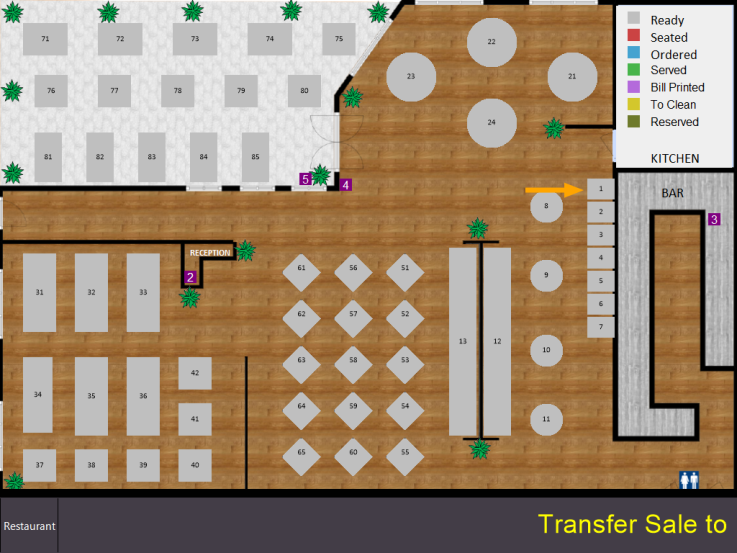
On the Table Map, select the desired table where the Guests will be seated, then press the "POS" button on the bottom-left corner of the screen.
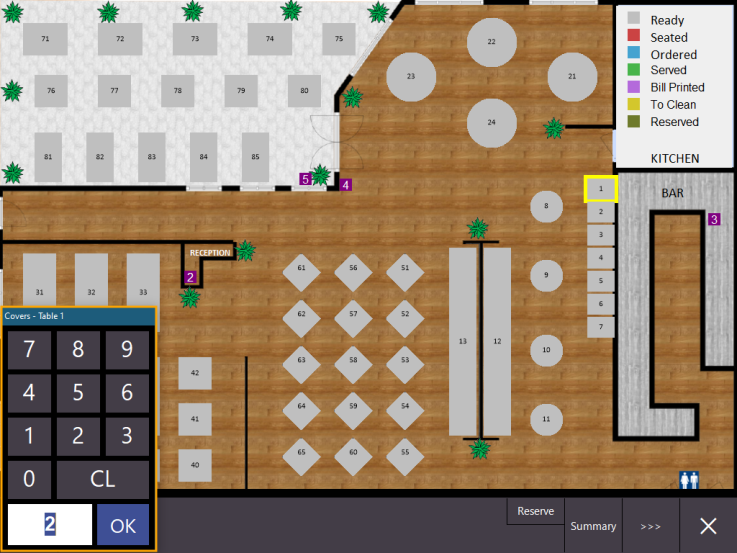
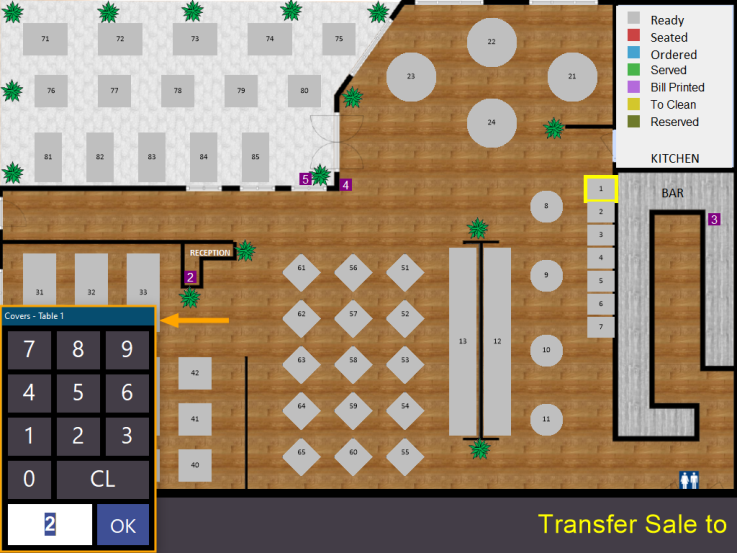
If "Prompt for Covers" is enabled, the following prompt will be displayed. This is used to enter the number of Guests that will be seated at the table.
Enter the number of Guests, then press "OK"
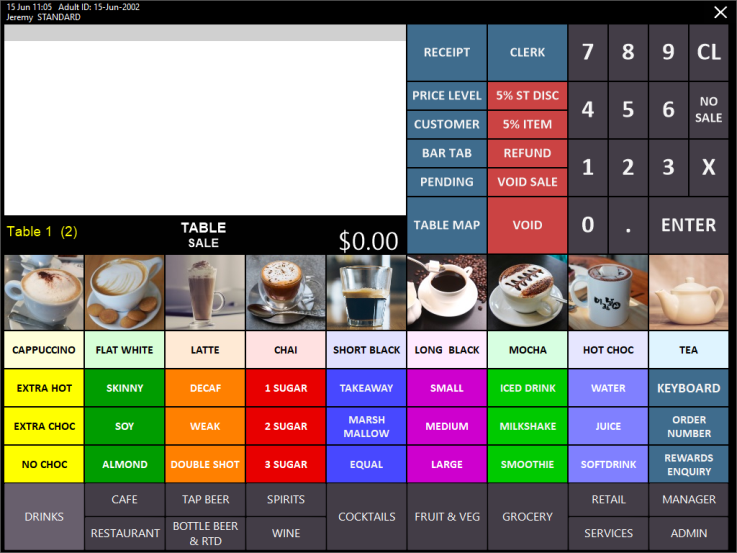
The sale screen will now been displayed showing the selected Table Number and the number of Guests.
Add the items to the sale that the guests are wanting to order, then press the "ENTER" button to go to the Tender Screen.
Select the Tender function that has been enabled for "EFTPOS". In the below example, this is "EFTPOS".
If the Cash Out prompt is enabled, you will be prompted to enter the Cash Out amount.
If Customer requires Cash Out, enter the amount they require and press OK.
Otherwise, if no Cash Out required by the Customer, press "OK" without entering an amount.
The Tenerum Payment Terminal will display a prompt "Please Swipe, Tap or Insert Card".
Refer to the Card Process section further below for more details about the card payment process (depending on the card method used: Swipe, Insert, Tap, etc.).
Note that when paying for a sale via the Table Map function as outlined above, you will need to Capture Tips (which will also capture the payment authorisation).
This can be done any time after the transaction has been completed, or it can be postponed until a later time (e.g. Before End of Shift, at the closing time of the venue, etc.).
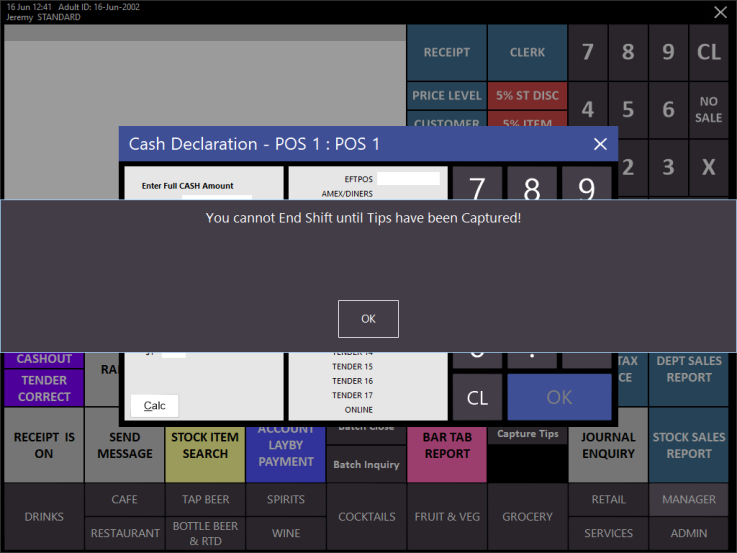
If Payments that took place during the Clerk's shift have not had tips captured and the Clerk attempts to end their shift, the following prompt will be displayed.
Note that the Capture Tips process must be performed for all transactions that were processed via the Table Map, regardless of whether or not the Customer has given a tip. In any instance where a Customer did not offer a tip, the Tip amount can simply be left as $0.00.
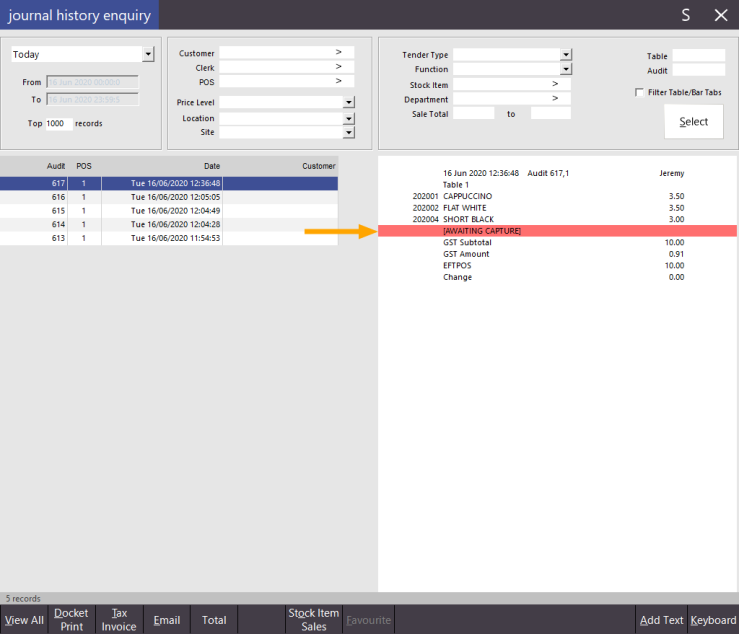
In addition, any Journals that do not currently have a tip captured will appear as follows in the Journal Enquiry screen.
To view the Journal Enquiry screen, from the Back-Office Dashboard, go to: Enquiry > Journal History.
For the process required to Capture Tips, click here.
The process for saving a sale to a table and paying for it later (e.g. after Guests have consumed their meals and make payment before they leave the venue) is as follows:
Begin with a blank sale screen.
Add Stock Items requested by the Customer to the Sale Screen, then press the "Table Map" button:
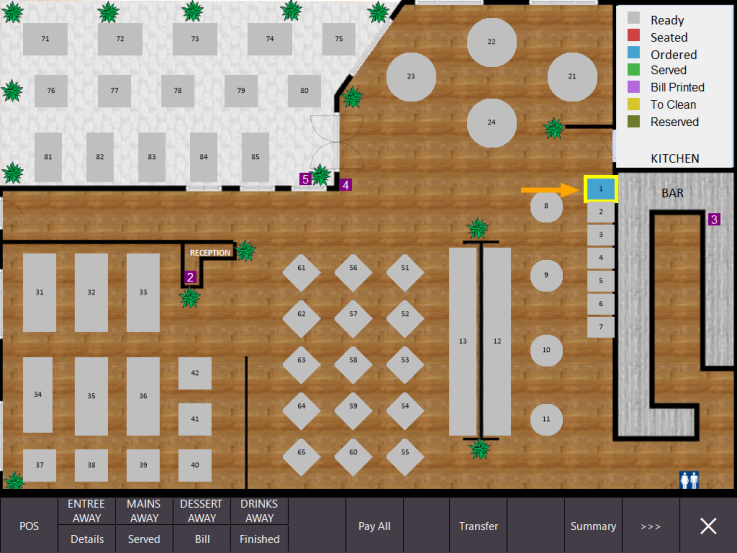
The Table Map will be displayed.
Select a Table from the Table Map to save the sale to.
If Prompt for Covers has been enabled, a Covers Prompt will be displayed.
This is used to enter the number of Guests that are going to be seated at the table.
If Prompt for Covers is not enabled, the Covers prompt will not be displayed.
The Table will change colour to indicate that the status has been changed to "Ordered".
The Table Map Screen can be closed using the "X" on the bottom-right corner of the Table Map and the Customer can be seated at the table.
When the Customer is ready to pay for the order on their table, start with a blank sale screen, then press the "Table Map" button.
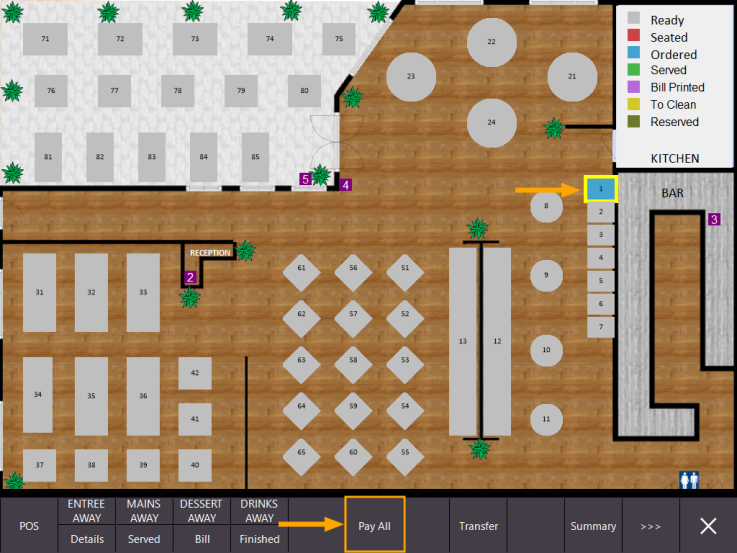
Select the Customer's table from the Table Map, then press the "Pay All" button.
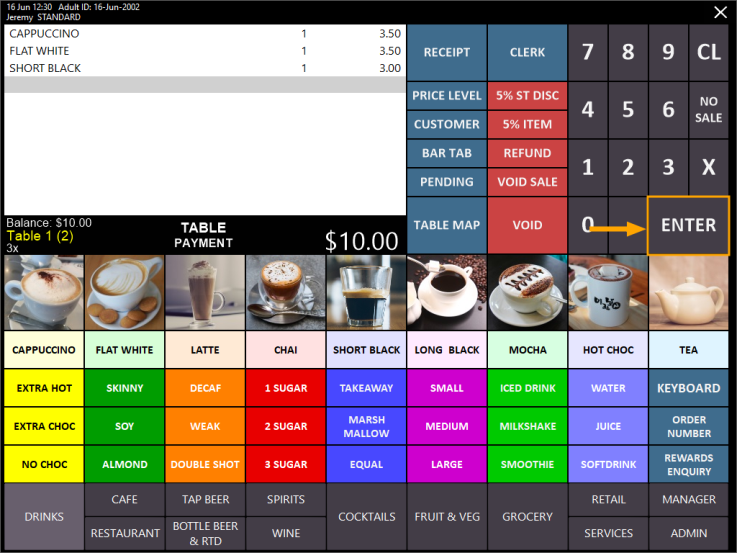
The Items ordered will appear on the POS Screen.
If the Yes/No Option "Fast Service Table Map" is enabled, the below step will be skipped and you will be taken straight to the Tender Screen.
Press the "ENTER" button to go the Tender Screen.
Select the Tender function that has been enabled for "EFTPOS". In the below example, this is "EFTPOS".
If the Cash Out prompt is enabled, you will be prompted to enter the Cash Out amount.
If Customer requires Cash Out, enter the amount they require and press OK.
Otherwise, if no Cash Out required by the Customer, press "OK" without entering an amount.
The Tenerum Payment Terminal will display a prompt "Please Swipe, Tap or Insert Card".
Refer to the Card Process section further below for more details about the card payment process (depending on the card method used: Swipe, Insert, Tap, etc.).
After the payment has been Approved by the Tenerum Payment Terminal, the Table Map screen will be displayed and the colour of the Table which was just paid will now change to reflect a status of "To Clean".
If the Yes/No Options "Auto "Finish" Table after Finalisation" or "Fast Service Table Map" are enabled, the Table Status will simply change to "Ready" so that the next customer can be seated.
Note that when paying for a sale via the Table Map function as outlined above, you will need to Capture Tips (which will also capture the payment authorisation).
This can be done any time after the transaction has been completed, or it can be postponed until a later time (e.g. Before End of Shift, at the closing time of the venue, etc.).
If Payments that took place during the Clerk's shift have not had tips captured and the Clerk attempts to end their shift, the following prompt will be displayed.
In addition, any Journals that do not currently have a tip captured will appear as follows in the Journal Enquiry screen.
Note that the Capture Tips process must be performed for all transactions that were processed via the Table Map, regardless of whether or not the Customer has given a tip. In the instance that the Customer did not offer a tip, the Tip amount can simply be left as $0.00.
From the Back-Office Dashboard, go to: Enquiry > Journal History.
Select the Journal/Transaction from the left-hand side and the Transaction Details are displayed on the right-hand side of the screen.
For the process required to Capture Tips, click here.
Select the desired method of card payment below for more details about the steps involved.
The prompts displayed by the Payment Terminal can vary depending on the card method used to pay for the transaction (Swipe, Tap or Insert).
Due to the wide range of Payment cards on the market, prompts may differ slightly from the below examples.
If the Customer has tapped their card, the Payment Terminal will typically proceed to transaction processing and a PIN may not be required when using the tap method (depending on the transaction amount).
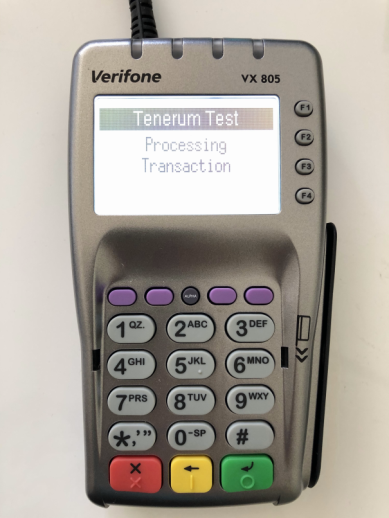
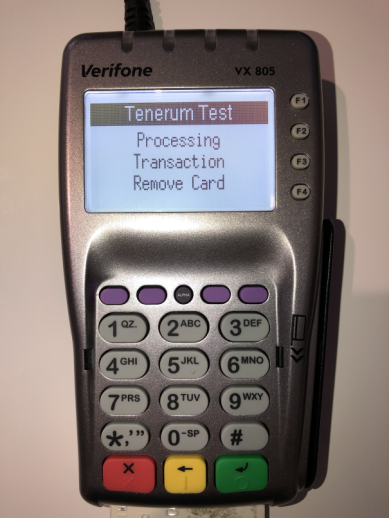
While the transaction is processing, the Payment Terminal will display "Processing Transaction".
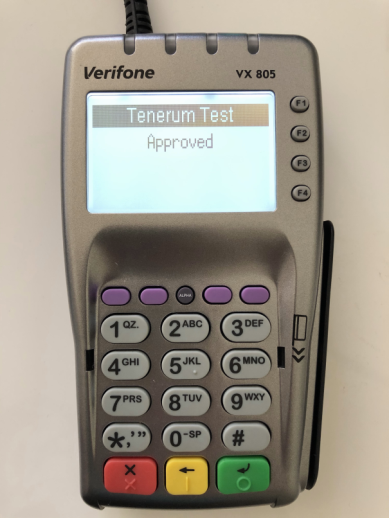
Once processing has been completed, the Payment Terminal screen will show "Approved" and the sale will be finalised by Idealpos.
If the Customer elects to insert their card with the EMV chip, additional prompts may appear on the Payment Terminal as below.
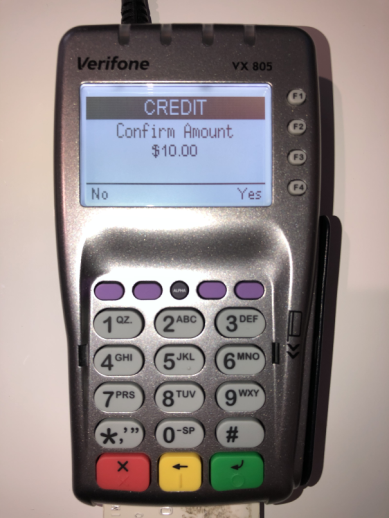
After inserting an EMV Chip Card into the Payment Terminal, a prompt will be displayed to confirm the amount.
To confirm the amount, press the green enter button on the bottom-right corner of the Payment Terminal.
To cancel the payment, press the red cancel button on the bottom-left corner of the Payment Terminal.
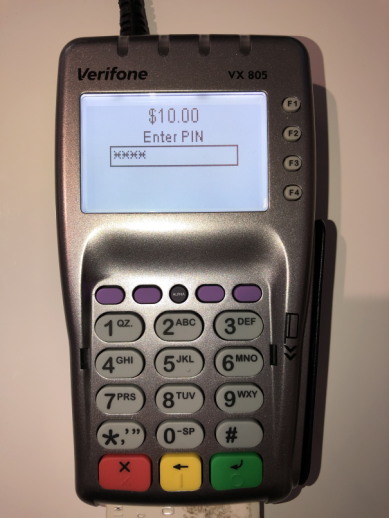
After confirming the amount, the Payment Terminal will prompt to Enter PIN.
The Customer will enter their PIN to continue:
After PIN Entry, the Payment Terminal will process the transaction.
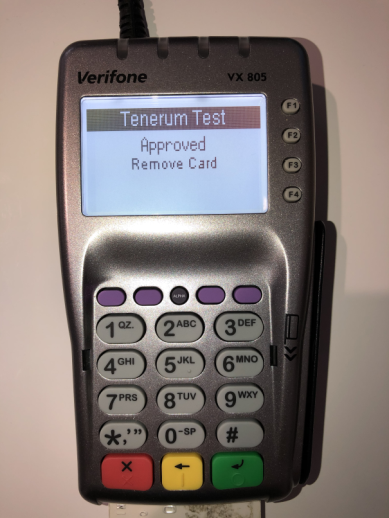
Once the transaction has been approved, the Payment Terminal will display an Approved - Remove Card prompt:
When paying for a sale using Tenerum via the Table Map function, "Capture Tips" will need to performed, regardless of whether or not the Customer has elected to include a tip with their payment.
This process can be performed any time after the sale has been completed, whether it be before the Clerk ends their shift or at the end of trade for the current period. This is entirely up to you and can coincide with your internal processes used in your venue.
As a pre-requisite to Capturing Tips, you will need to have a Capture Tips button on your POS Screen. If this has not been configured or created, please refer to the "Create POS Screen Buttons" on the Configure Idealpos for Tenerum topic by clicking here.
To assist with the Capturing Tips process, we recommend that you configure Idealpos to print multiple receipts when paying with Tenerum (i.e. a Customer Copy and a Store Copy).
We also recommend configuring the Receipt Footer so that a Tip section is included along with suggested Tip Amounts which will allow the customer to record their tip at the time of the sale.
For more information about configuring the Receipt Footer, click here
When a Journal/Transaction has not had a tip captured, it will appear as follows in the Journal Enquiry screen.
From the Back Office Dashboard, go to: Enquiry > Journal History > Select Journal from the list.
Journals/Transactions are displayed on the left-hand side of the screen.
Details of the Journal/Transaction are displayed on the right-hand side.
In addition, if a Clerk attempts to end their shift whilst there are Journals/Transactions that have not had tips captured, the following prompt will be displayed on the POS Screen.
To capture tips, go to:
POS Screen > Enter Clerk ID if required/prompted > Select tab that contains EFTPOS Capture Tips Button > Capture Tips button
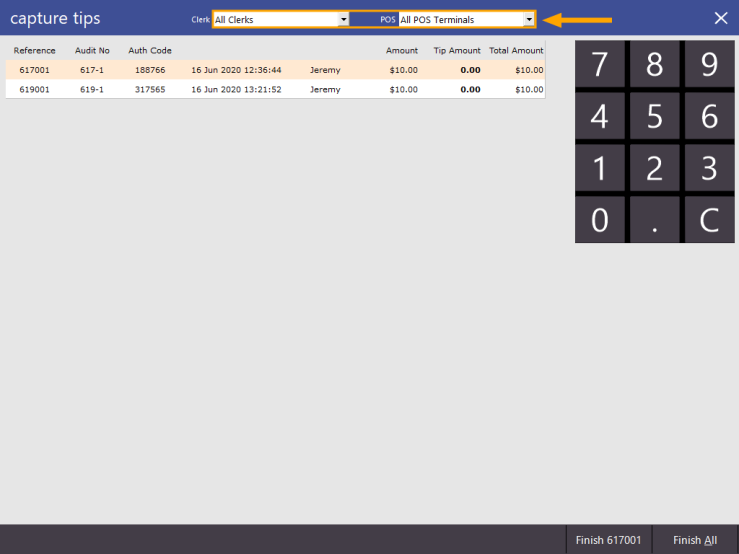
The Capture Tips screen will be displayed.
From this screen, you can filter the transactions by Clerk and/or POS Terminal number.
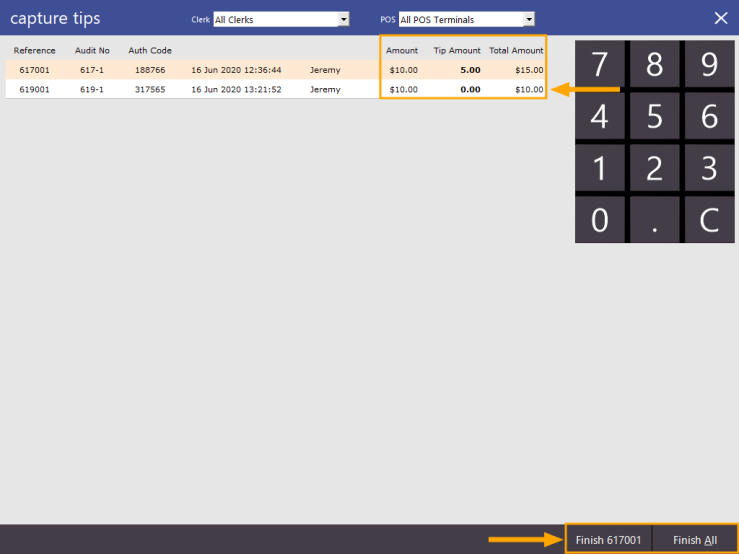
Enter a tip amount for each transaction where the Customer has left a tip.
Any transactions where the customer did not leave a tip can simply have the tip amount left as $0.00.
It is possible to either capture tips for all transactions in this list, or you can capture a tip for an individual transaction.
If you only want to capture a tip for a single transaction in the list, ensure that it is selected and ensure that the Tip Amount is correct.
Then press the "Finish [ReferenceNumber]" button on the bottom-right corner of the screen (where [ReferenceNumber] refers to the selected Transaction in the list).
If you want to capture tips from all transactions in the list, ensure that all tip amounts are correct.
Then press the "Finish All" button on the bottom-right corner of the screen.
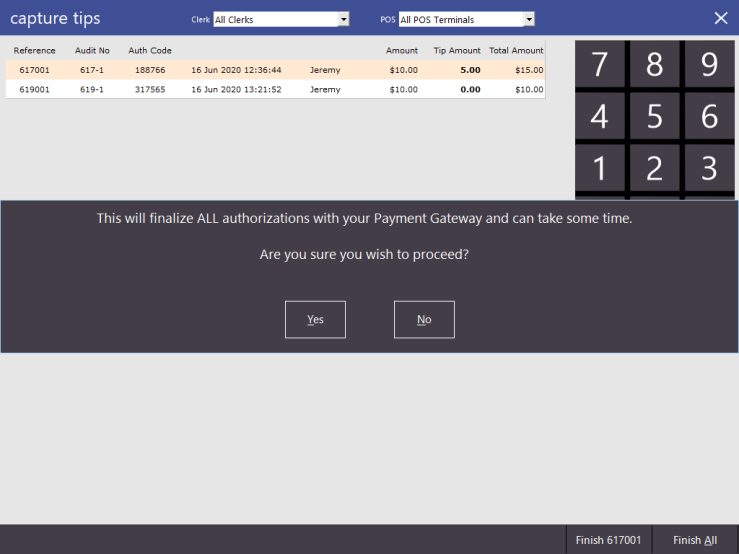
A warning prompt will be displayed. Confirm the prompt to proceed.
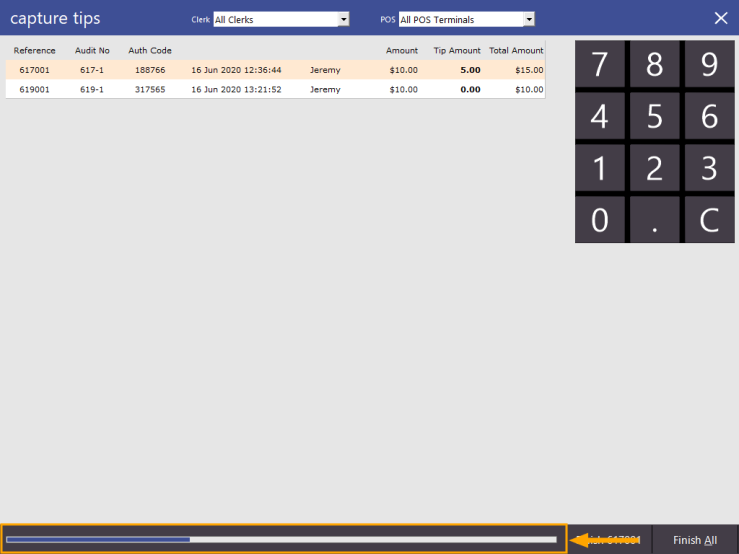
When tips are being captured, a progress bar will appear at the bottom of the screen. This process may take some time depending on the number of transactions that are being captured.
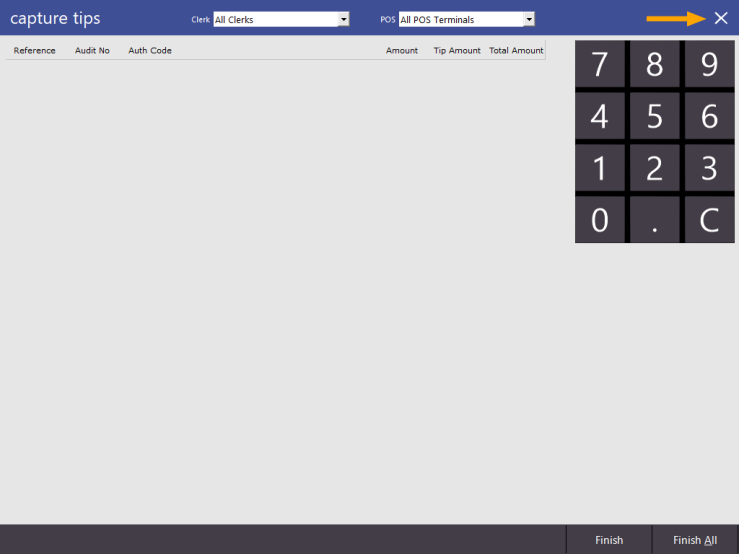
Once the capture process has been completed, the captured transactions will be cleared from the list.
The Capture Tips window can now be closed.
Transactions which previously displayed "[AWAITING CAPTURE]" have now been updated.
This can be confirmed by going to the Journal Enquiry screen (from the Back-Office Dashboard, go to: Enquiry > Journal History).
Select the transaction from the left-hand side, transaction details will appear on the right-hand side.
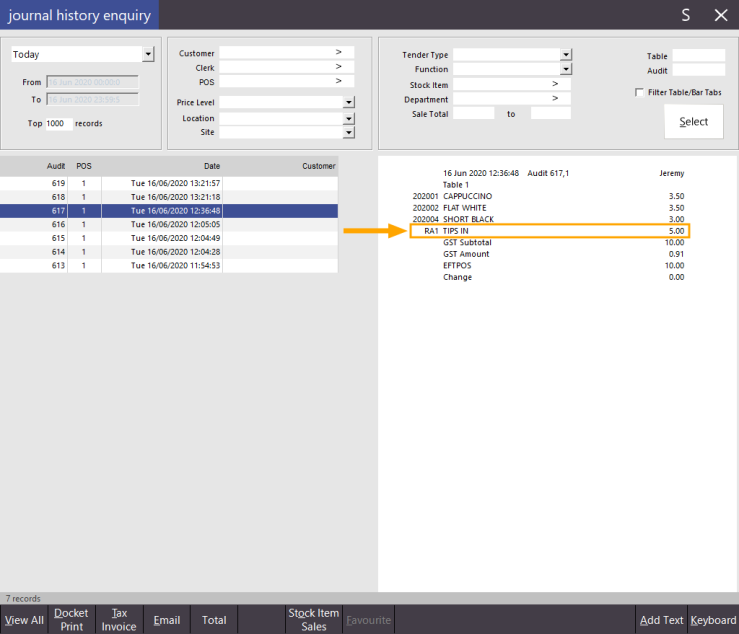
Journals/Transactions which had a Tip captured will display the Tip Amount as per the below example:
The Tip will be recorded against the Receive Account that the EFTPOS Tips have been linked to
Tips function for EFTPOS is configured via Setup > POS Terminals > Modify > EFTPOS Settings > Tips Function.
The Receive Account Descriptor is configured via Setup > Function Descriptors > RECEIVED ACCOUNT #
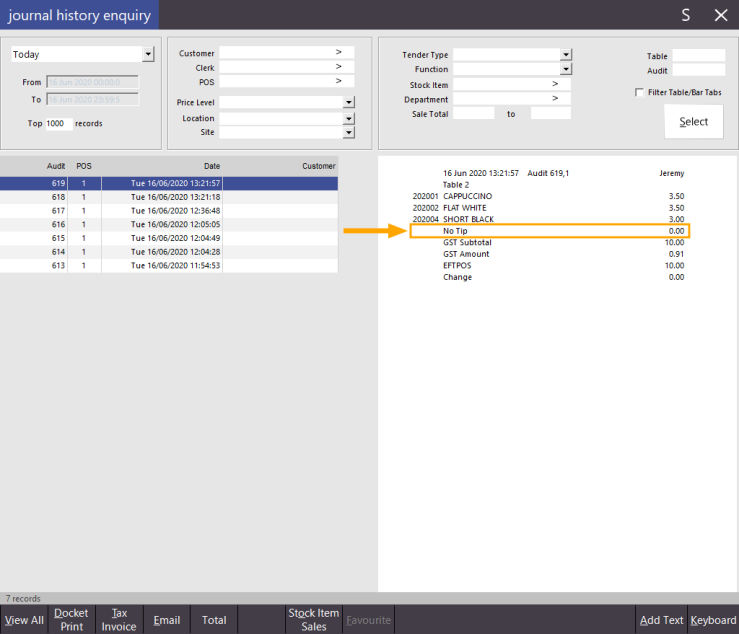
Journals/Transactions which did not have a Tip captured will display "No Tip" as per the below example: