To enable the Kiosk V1 Demo Database, complete the below steps:
Start IPSUtils by going to Windows Start Menu > Search for IPSUtils > Open IPSUtils
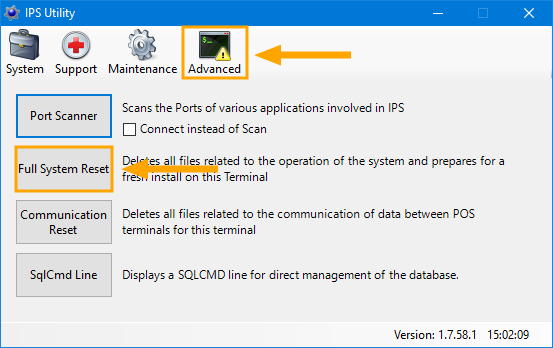
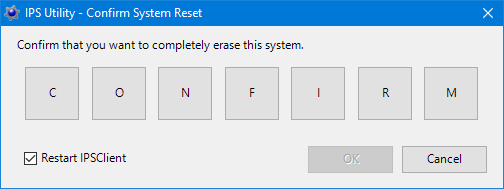
Within IPSUtils, click on the Advanced tab, then click on "Full System Reset"

If prompted, enter the Admin password, then confirm the reset by either pressing each character on the screen, or type in "confirm" using your keyboard.
After confirming, the OK button will become available.
Press "OK" to perform a Full System Reset and completely erase Idealpos data from the system.
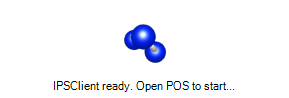
After the System Reset has been completed, the following "IPSClient ready" prompt will appear on the bottom-right corner of the screen.
Double click on the spinning IPSClient logo.
One the following prompt, select "Create Demonstration Database" then press "OK".

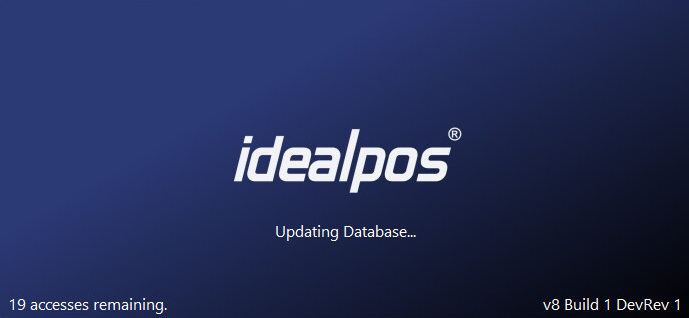
Idealpos will Create the Demo Database.

When complete, the Idealpos POS screen will be displayed.
Close the POS screen using the "X" button on the top-right corner of the screen.
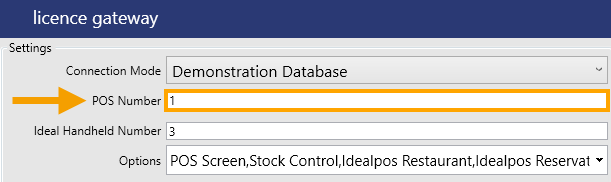
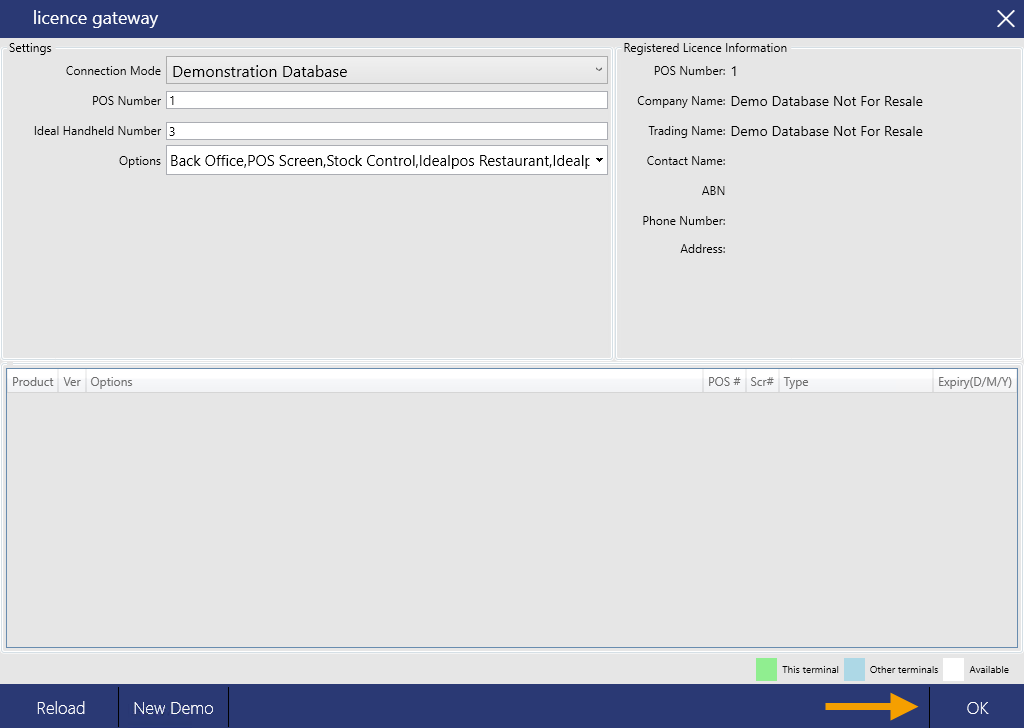
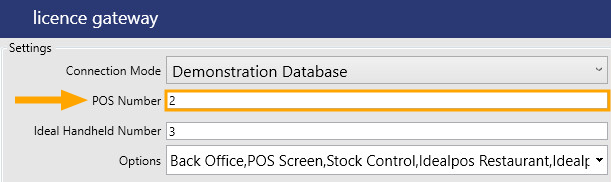
Then go to: Setup > Licence Gateway.
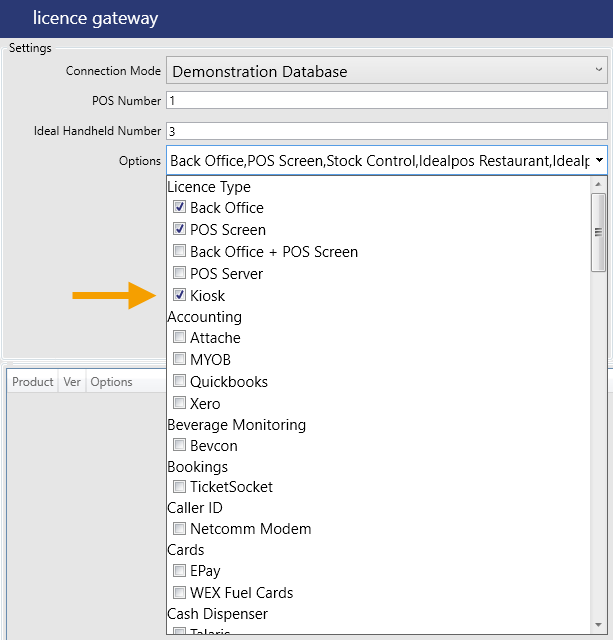
Change the POS Number to 2.
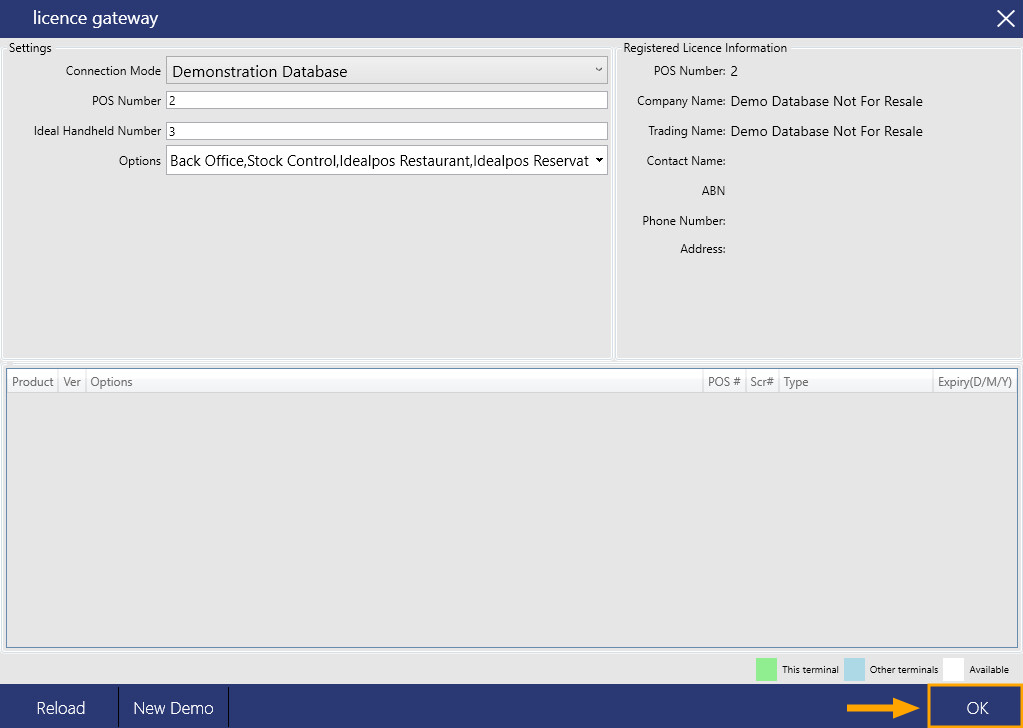
Click in the dropdown box next to Options, then disable "POS Screen" and enable "Kiosk".
Note that the below combination of Back Office and Kiosk is only possible on a Demo Licence.
When an Idealpos Licence is purchased, the Back Office and Kiosk modules cannot be included together on the one terminal.

Press the "OK" button on the bottom-right corner of the screen to save the changes.
You will need to restart Idealpos for the change to take effect.
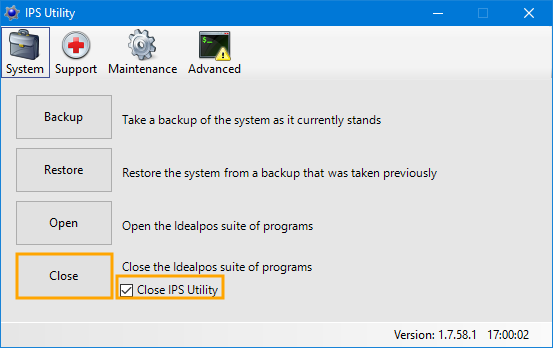
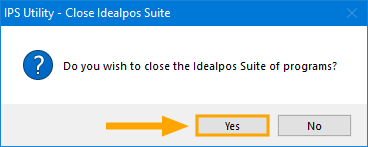
IPSUtils can be used to close Idealpos.
Go to: Start > Search for "IPSUtils" then once it is displayed, open it > Enable Checkbox: Close IPS Utility > Close

Select "Yes" when prompted to close the Idealpos Suite of programs.
As the kiosk module is designed to run on a portrait orientation screen, you will need to adjust the Windows display settings so that the screen is rotated and displayed in portrait mode.
On a Windows 10 system, this can usually be achieved by right-clicking anywhere on the Windows desktop and choosing "Display Settings", then changing the orientation from Landscape to Portrait.
Note however that this may differ depending on the version of Windows installed as well as the Windows Display Drivers.
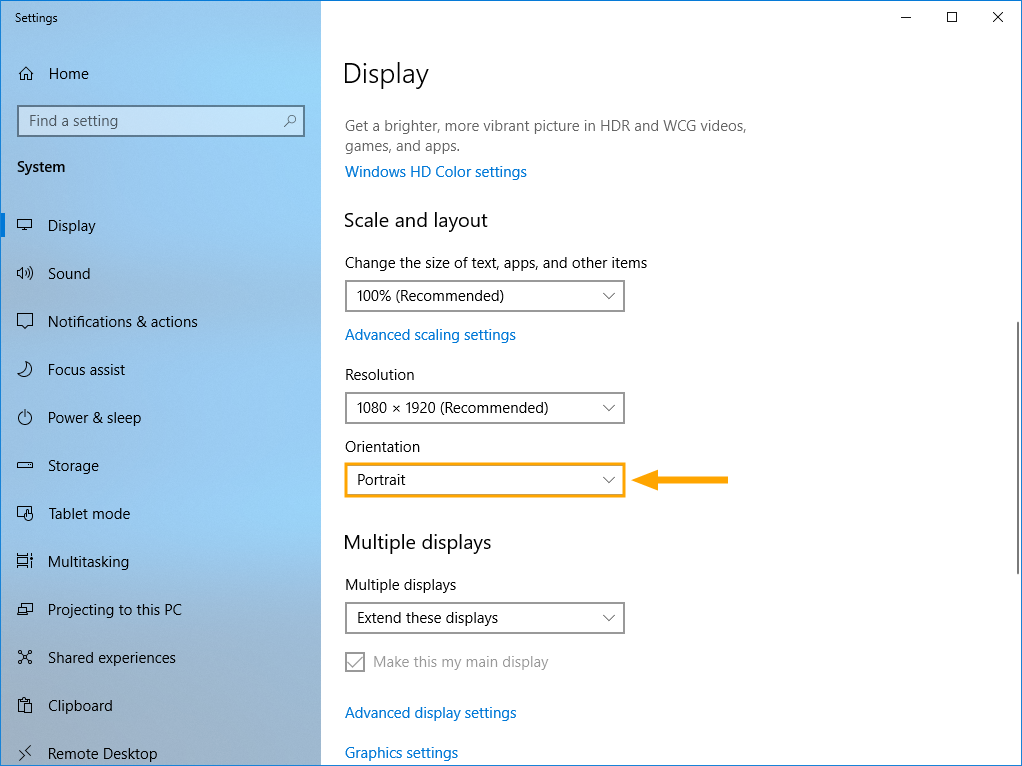
Once the Windows Display Orientation has been changed to Portrait, you may start Idealpos.
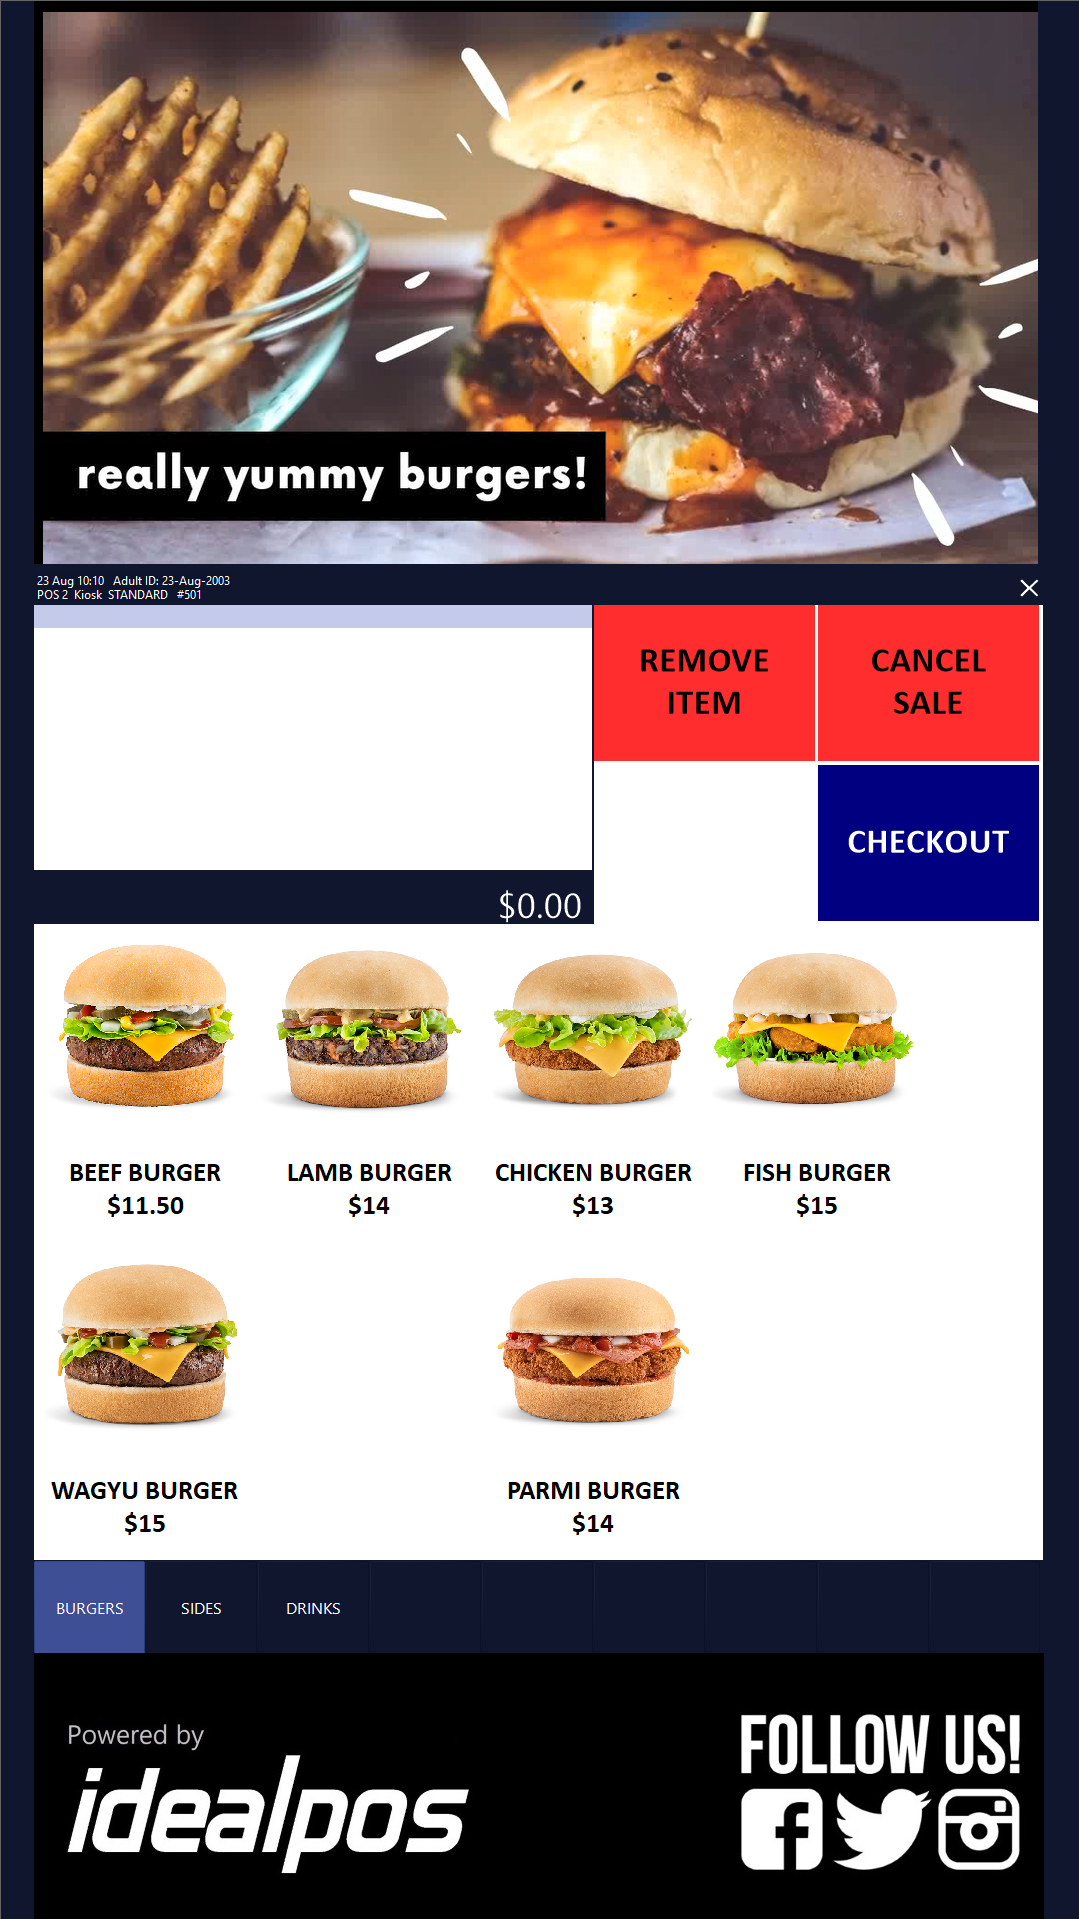
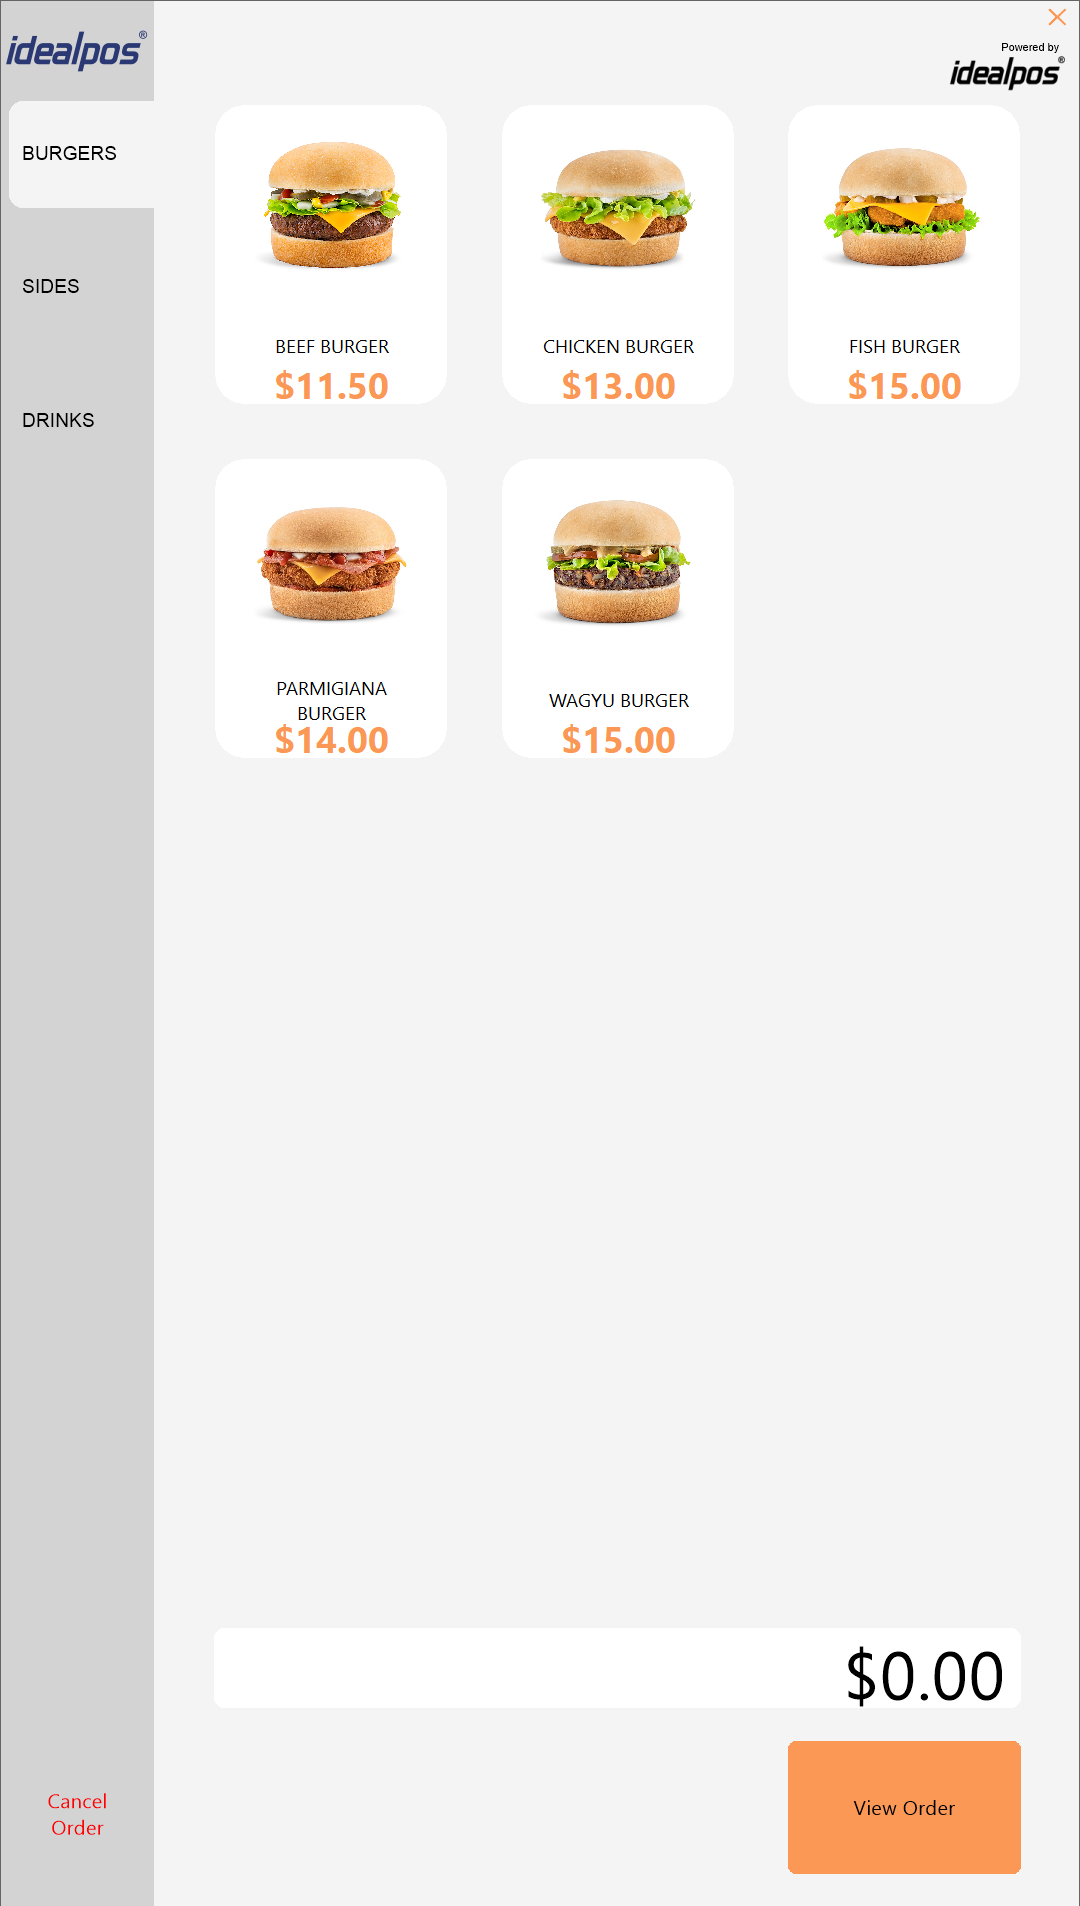
After Idealpos starts, it will display a "Kiosk" POS Screen layout that can be used to demonstrate the Kiosk module.
The first screen that appears will be an ORDER HERE screen to draw the customer's attention towards the Kiosk.
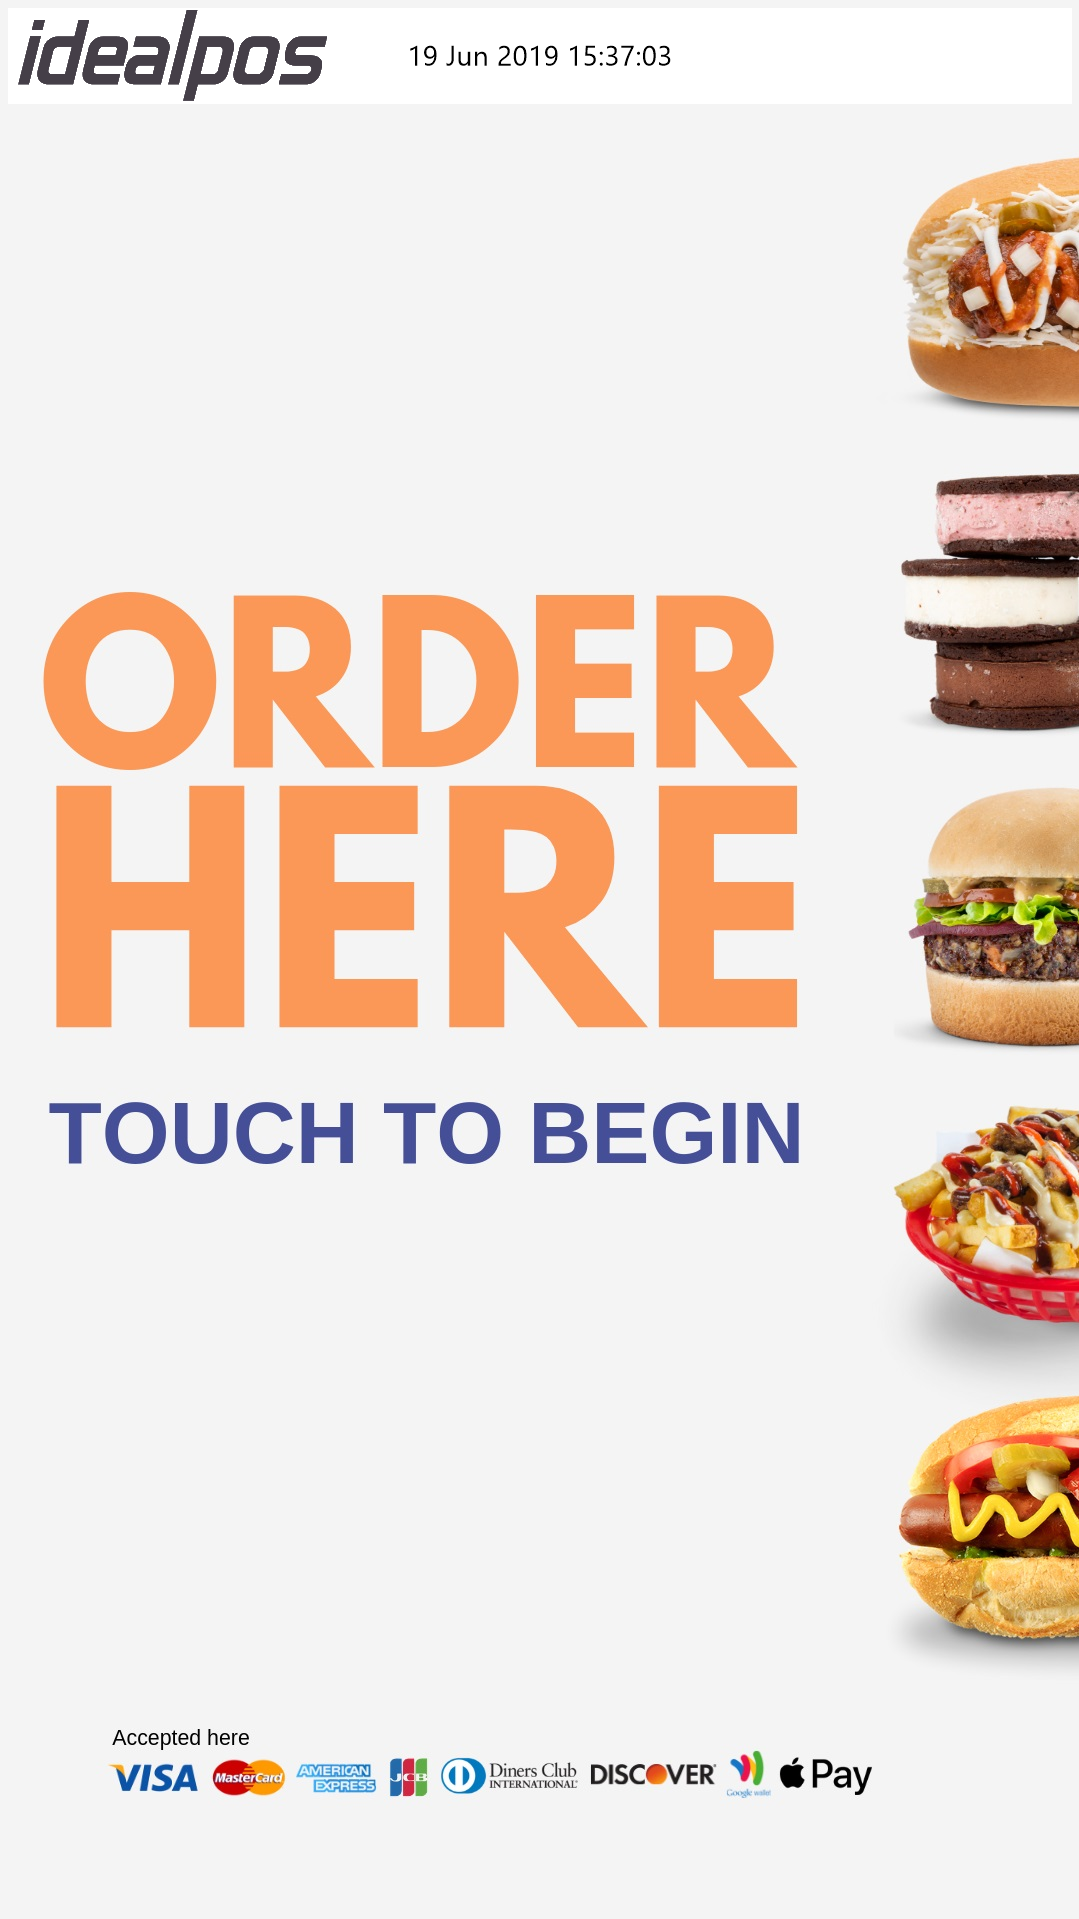
Pressing anywhere on the screen will reveal the Kiosk POS Screen Layout included in the Idealpos Demo Database.
This can be used to demonstrate the various possibilities when using a Kiosk layout.
POS screen tabs included in the Kiosk Demo are BURGERS, SIDES and DRINKS.
The main buttons available on the top-right corner of the POS screen are:
REMOVE ITEM - Select any item that has been added to the sale then press REMOVE ITEM to remove the item
CANCEL SALE - Removes all items from the sale then returns to the ORDER HERE - TOUCH TO BEGIN screen
CHECKOUT - Once the required items have been added, pressing the CHECKOUT button displays the CHECKOUT screen where customer makes their payment.
We recommend that the included Kiosk POS Screen Layout is used for demonstration purposes only.
Should the Kiosk function be required, a new POS Screen Layout should be created to suit the requirements of the venue.